Learn how to use VuePress for a Documentation Site
On this VuePress Tutorial - Learn how to use VuePress for a Documentation Site (Beginner) Design Course course we can see an introduction to VuePress where the some of the main features are quite well explained.
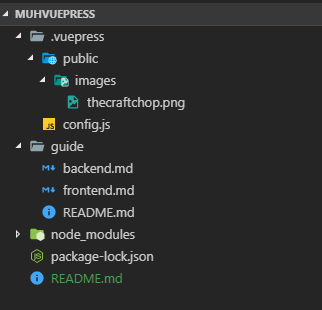
Steps to create a documentation web static site
- Create the
muhvuepressdirectory

- Install
VuePressglobally executingyarn global add vuepressornpm install -g vuepress
Juan.Pablo.Perez@RIMDUB-0232 MINGW64 ~/OneDrive/Training/Vuepress/muhvuepress$ yarn global add vuepress
yarn global v1.9.2
[1/4] Resolving packages...
warning vuepress > css-loader > cssnano > autoprefixer > browserslist@1.7.7: Browserslist 2 could fail on reading Browserslist >3.0 config used in other tools.
warning vuepress > css-loader > cssnano > postcss-merge-rules > browserslist@1.7.7: Browserslist 2 could fail on reading Browserslist >3.0 config used in other tools.
warning vuepress > css-loader > cssnano > postcss-merge-rules > caniuse-api > browserslist@1.7.7: Browserslist 2 could fail on reading Browserslist >3.0 config used in other tools.
[2/4] Fetching packages...
[-------------------------------------------------------------------------------------------------------------------------------------------------------------------------------] 0/1275(
node:89472) [DEP0005] DeprecationWarning: Buffer() is deprecated due to security and usability issues. Please use the Buffer.alloc(), Buffer.allocUnsafe(), or Buffer.from() methods inst
ead.
info fsevents@1.2.4: The platform "win32" is incompatible with this module.
info "fsevents@1.2.4" is an optional dependency and failed compatibility check. Excluding it from installation.
[3/4] Linking dependencies...
[4/4] Building fresh packages...

warning Your current version of Yarn is out of date. The latest version is "1.12.3", while you're on "1.9.2".
info To upgrade, download the latest installer at "https://yarnpkg.com/latest.msi".
success Installed "vuepress@0.14.5" with binaries:
      - vuepress
Done in 169.81s.
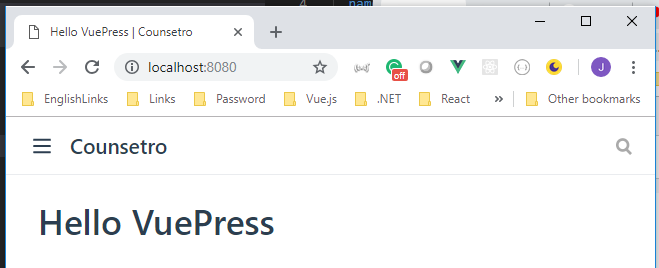
- Create the
README.mdfile
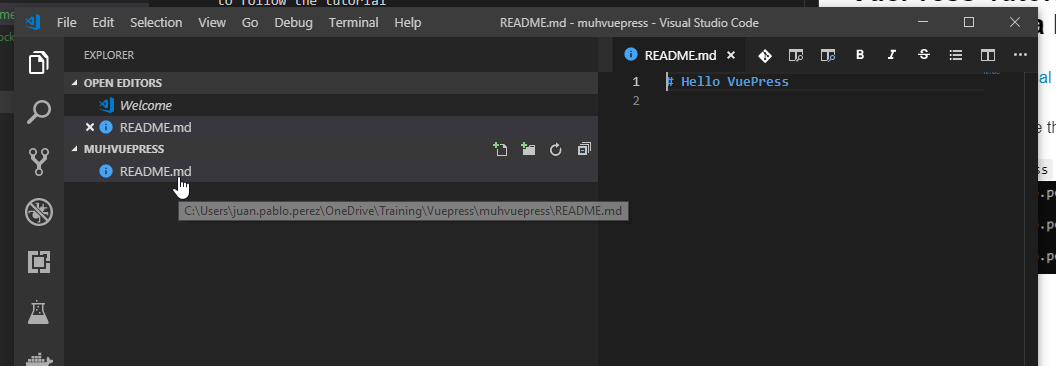
# Hello VuePress
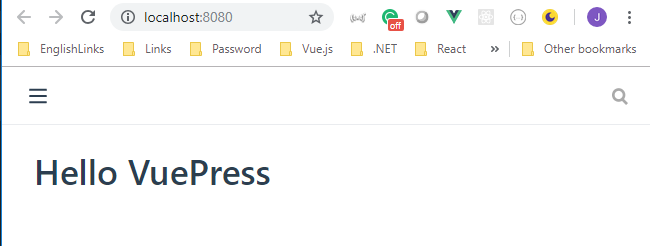
- Compile it using
vuepress dev

Juan.Pablo.Perez@RIMDUB-0232 MINGW64 ~/OneDrive/Training/Vuepress/muhvuepress
$ vuepress dev
 DONE  [12:33:52] Build 220f0a finished in 14623 ms!

> VuePress dev server listening at http://localhost:8080/
- Create the
config.jsfile on the.vuepressfolder
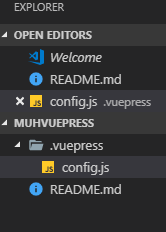
module.exports = {
  title: `Counsetro`,
  description: `Just playing around`
};
- Restart the
vuepress devcommand. It doesn't update automatically.
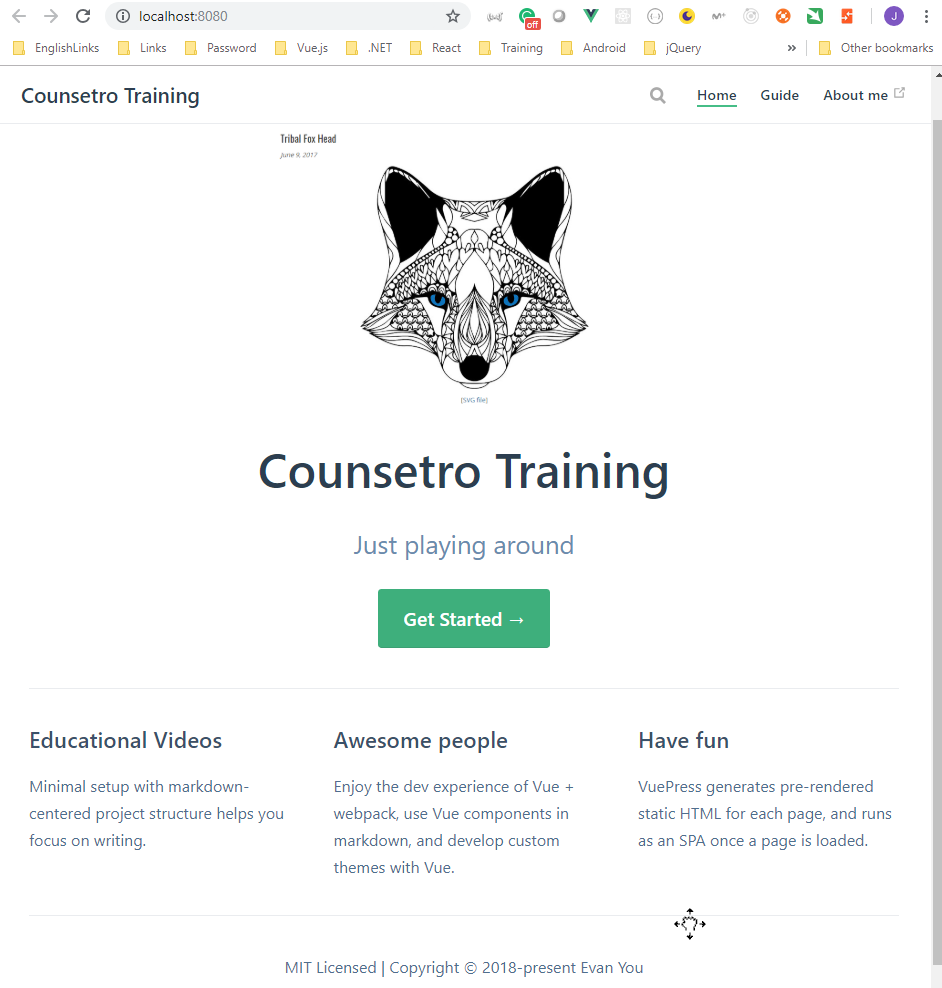
- Change the
config.jsto add thenavmenu.
module.exports = {
  title: `Counsetro Training`,
  description: `Just playing around`,
  themeConfig: {
    nav: [
      { text: "Home", link: "/" },
      { text: "Guide", link: "/guide/" },
      { text: "About me", link: "https://github.com/peelmicro" }
    ]
  }
};
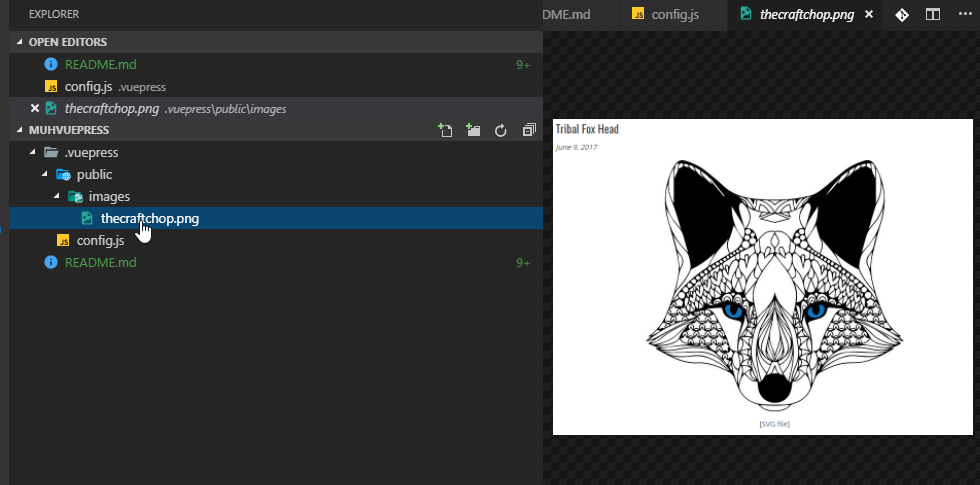
- Modify the main
README.mdto include someyamlcode at the begining to update the layout of the main page.
---
home: true
heroImage: /images/thecraftchop.png
actionText: Get Started →
actionLink: /guide/
features:
  - title: Educational Videos
    details: Minimal setup with markdown-centered project structure helps you focus on writing.
  - title: Awesome people
    details: Enjoy the dev experience of Vue + webpack, use Vue components in markdown, and develop custom themes with Vue.
  - title: Have fun
    details: VuePress generates pre-rendered static HTML for each page, and runs as an SPA once a page is loaded.
footer: MIT Licensed | Copyright © 2018-present Evan You
---
- The
heroImagemust be copied on the.vuepress\publicfolder.
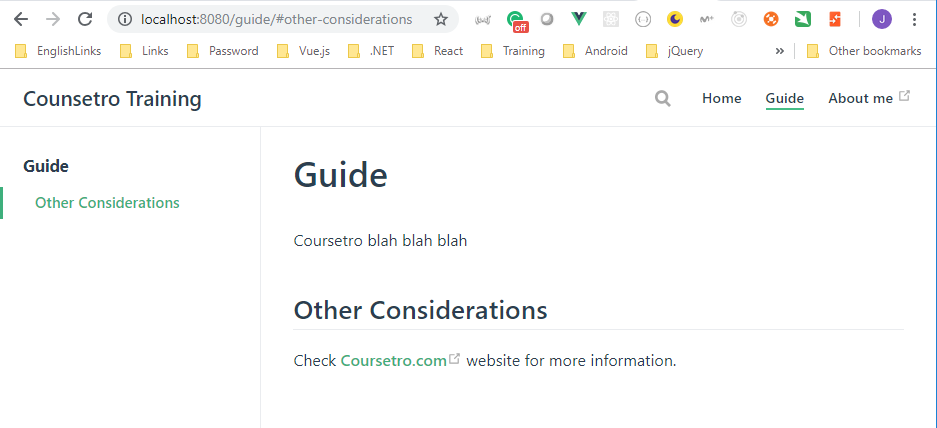
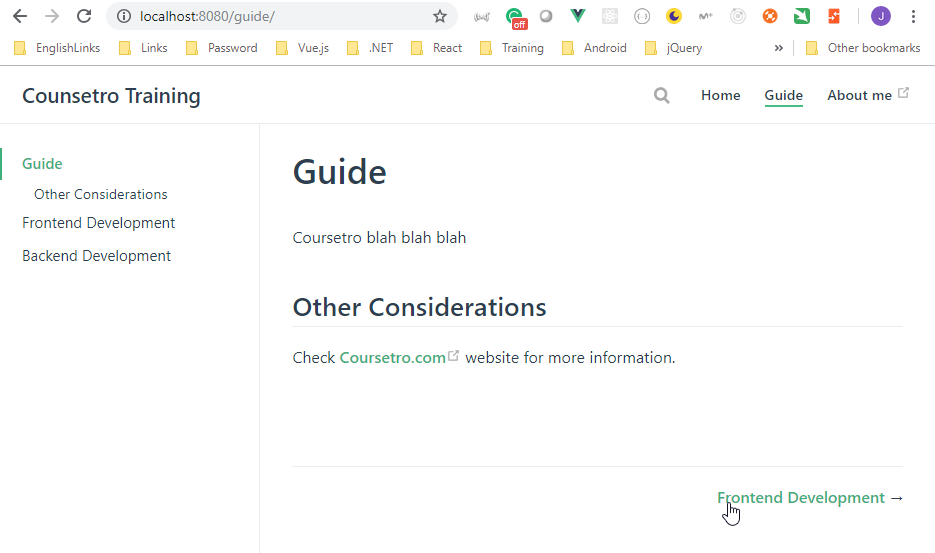
- To include another page we have to do the following:
- Add a folder with the name of the url where we want to include the page,
guidein this case (it has to be with lowercase characters) - Create a
README.mddocument that will contain the information for the main page.
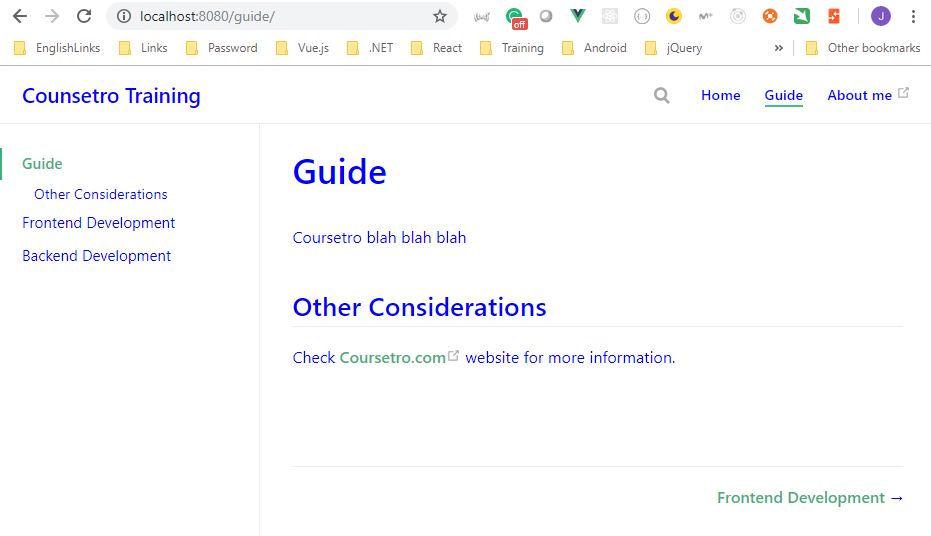
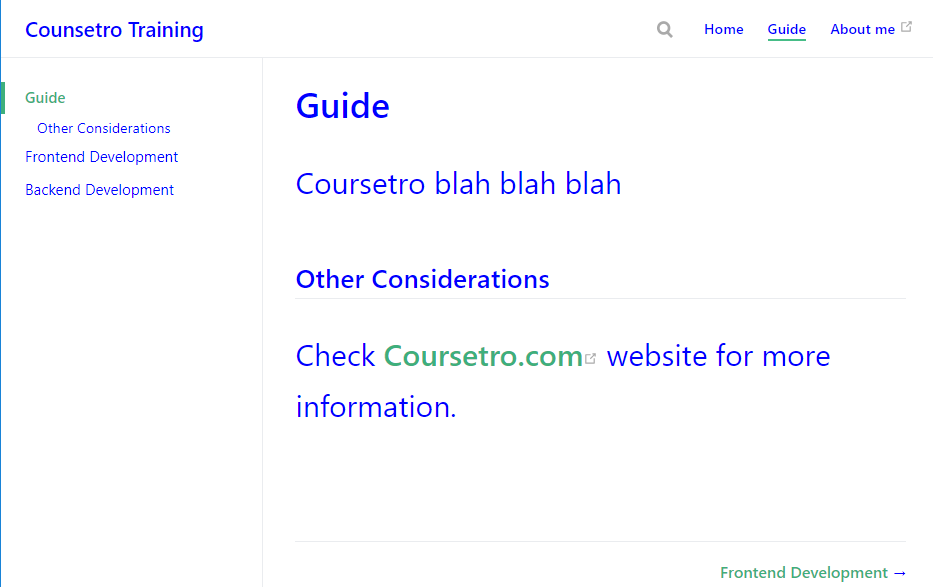
# Guide

Coursetro blah blah blah

## Other Considerations

Check [Coursetro.com](https://coursetro.com) website for more information.
- If we put different sections using level of headers with #, ##, and so on, we can add a sidebar with the content automatically. In order to do this, we need to modify the
config.jsfile.
module.exports = {
  title: `Counsetro Training`,
  description: `Just playing around`,
  themeConfig: {
    nav: [
      { text: "Home", link: "/" },
      { text: "Guide", link: "/guide/" },
      { text: "About me", link: "https://github.com/peelmicro" }
    ],
    sidebar: "auto"
  }
};
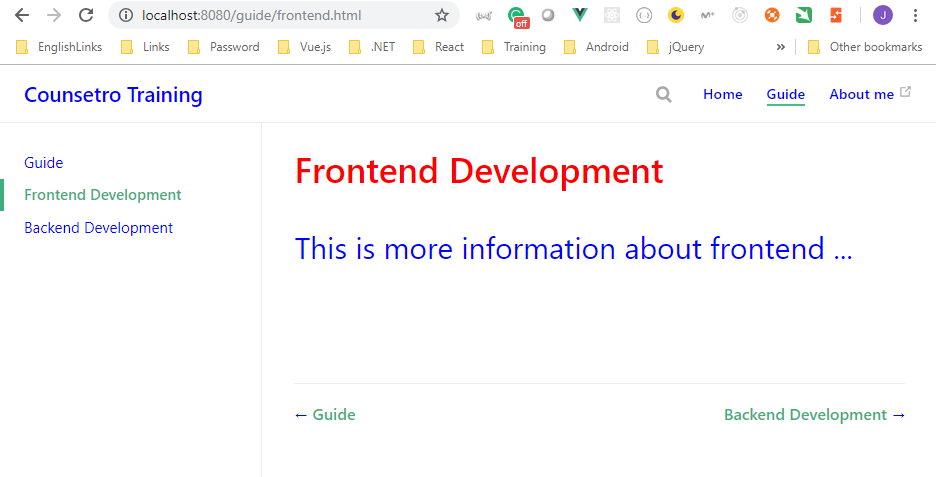
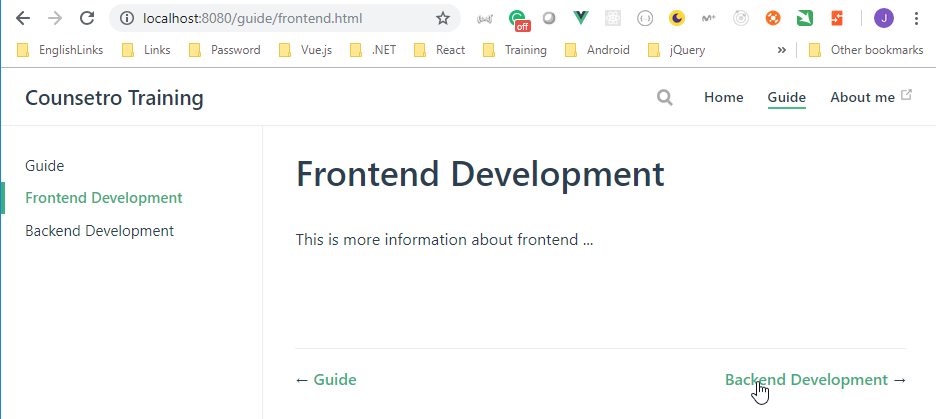
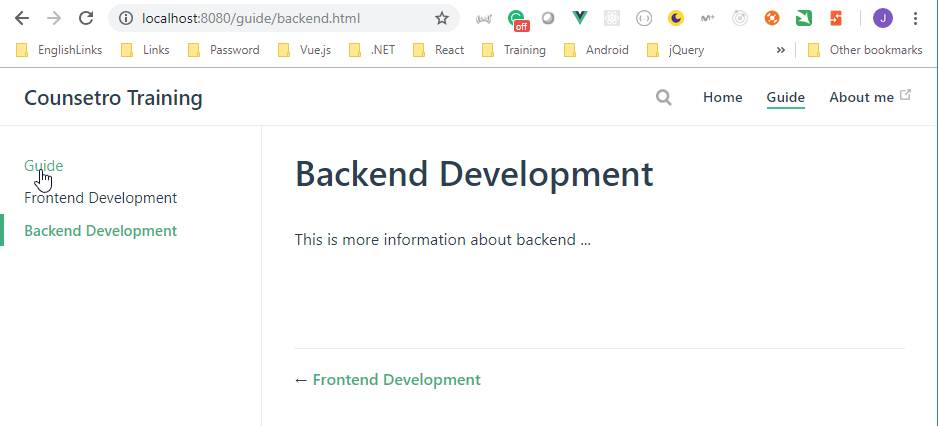
- If we want to add more pages inside the same url we have to do the following:
- Add the new pages with the name of the sub-url in lowercase and with the
.mdextension. In this case we are addingbackend.mdandfrontend.md.
# Backend Development

This is more information about backend ...
# Frontend Development

This is more information about frontend ...
- If we want the sidebar menu includes the links to this pages we have to modify the
config.jsagain.
module.exports = {
  title: `Counsetro Training`,
  description: `Just playing around`,
  themeConfig: {
    nav: [
      { text: "Home", link: "/" },
      { text: "Guide", link: "/guide/" },
      { text: "About me", link: "https://github.com/peelmicro" }
    ],
    sidebar: {
      "/guide/": ["", "frontend", "backend"]
    }
  }
};
- If we want to change the global styles, we need to create the
override.stylfile on the.vuepressfolder (this will be.vuepress\styles\palette.stylfrom version 1.0.0)
// showing default values
$accentColor = #3eaf7c
$textColor = blue // #2c3e50
$borderColor = #eaecef
$codeBgColor = #282c34
- If we want to change the style of anything inside the website, we need to create the
style.stylfile on the.vuepressfolder (this will be.vuepress\styles\index.stylfrom version 1.0.0)
.content {
  font-size 30px
}
- If we want to create specific page classes we need to:
- Modify the specific page (
frontend.mdin this case) to include the class we want to include with thepageClasselement.
---
pageClass: frontend-Class
---

# Frontend Development

This is more information about frontend ...
- Modify the
override.stylto include this new class.
// showing default values
$accentColor = #3eaf7c
$textColor = blue // #2c3e50
$borderColor = #eaecef
$codeBgColor = #282c34

.theme-container.frontend-class {
  h1 {
    color: red;
  }
}