The Gatsby Masterclass
Github Repositories
The Gatsby Masterclass Udemy course explains how to build blazing-fast, feature-rich, and overall stunning React apps with the Gatsby framework.
Table of contents
- What I've learned
- 1. Getting Started
- 2. Creating our Gatsby Project
- 3. Exploring our Gatsby Project
- 4. Pages and Components in Gatsby
- 5. Querying Data with GraphQL / GraphiQL IDE
- 6. Source Plugins and Static Queries
- 7. Transformer Plugins / Creating a Blog out of Markdown Files
- 8. Programmatically Creating Pages with Gatsby
- 9. GraphQL Arguments, Variables, and Page Queries
- 10. Pagination in Gatsby
- 11. Sorting and Filtering with GraphQL Queries / Formatting Dates and Text
- 12. Images in Gatsby / Amazing Responsive Images with Gatsby Image
- 13. Advanced Image Concepts in Gatsby / GraphQL Fragments
- 14. Contentful as our Headless CMS / Creating and Managing Products with Contentful
- 15. Creating a Shopping Cart / Checkout Functionality with Snipcart
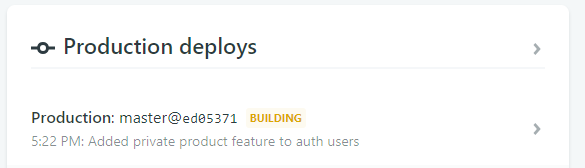
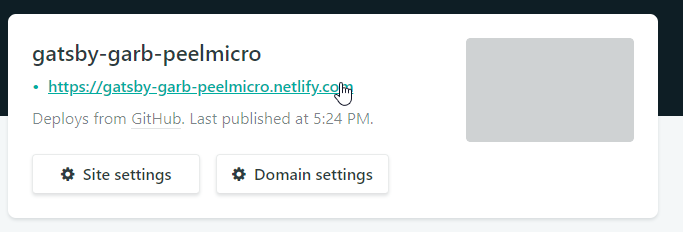
- 16. Deploying our Gatsby Sites with Netlify / Setting up Continuous Integration
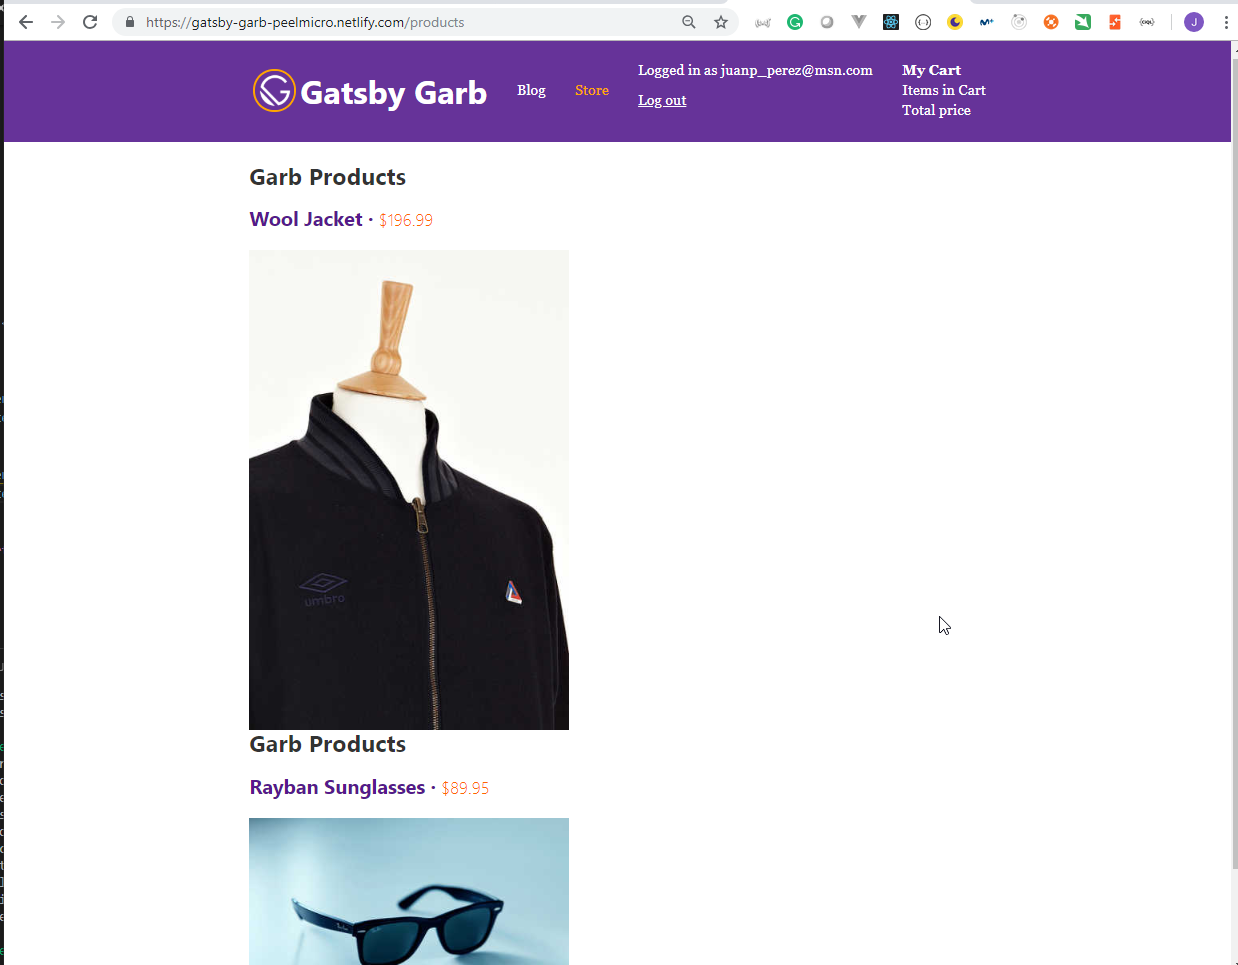
- 17. User Authentication in Gatsby / Netlify Identity
What I've learned
- Build rich, fully-featured Gatsby sites / apps from project start to deployment on the web
- Create stunning, blazing fast sites with Gatsby
- Master GraphQL to get and manage data with your React apps
- Utilize the best practices for building React projects.
1. Getting Started
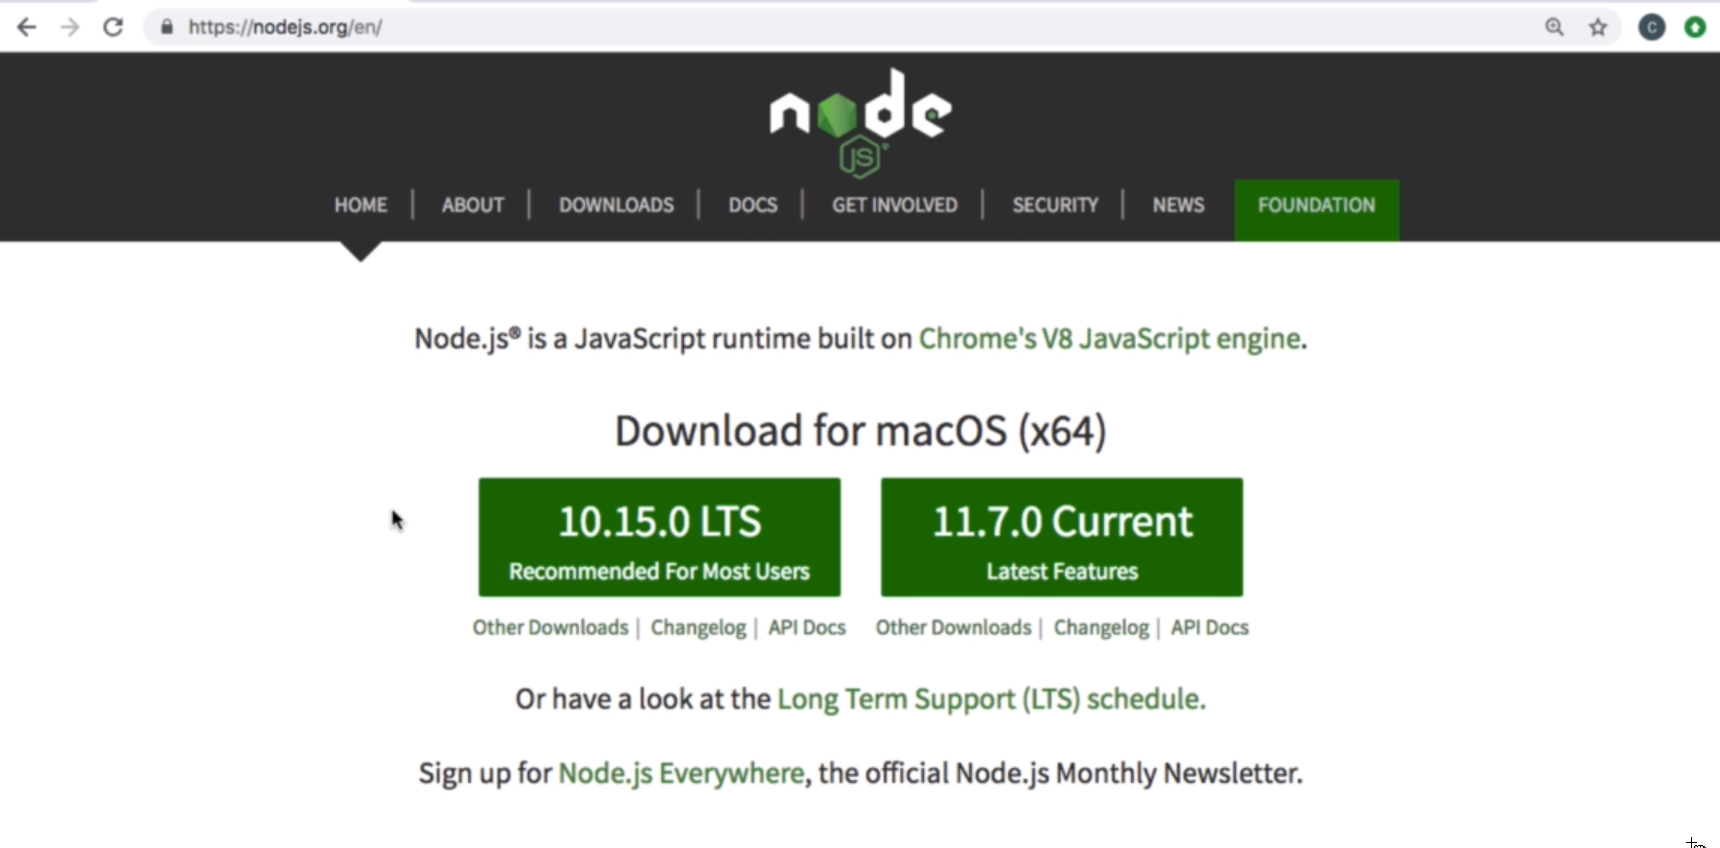
1. What You Need for this Course
- We are going to use NodeJS, Visual Studio Code, Netlify, Contenful and SNIPCART


- Instalation of GatsbyJS
Microsoft Windows [Version 10.0.17763.195]
(c) 2018 Microsoft Corporation. All rights reserved.

C:\Windows\system32>cd C:\Work\Training\Pre\Gatsby

C:\Work\Training\Pre\Gatsby>npm i --global gatsby-cli
C:\Users\juan.pablo.perez\AppData\Roaming\npm\gatsby -> C:\Users\juan.pablo.perez\AppData\Roaming\npm\node_modules\gatsby-cli\lib\index.js
+ gatsby-cli@2.4.8
added 211 packages from 119 contributors in 30.836s
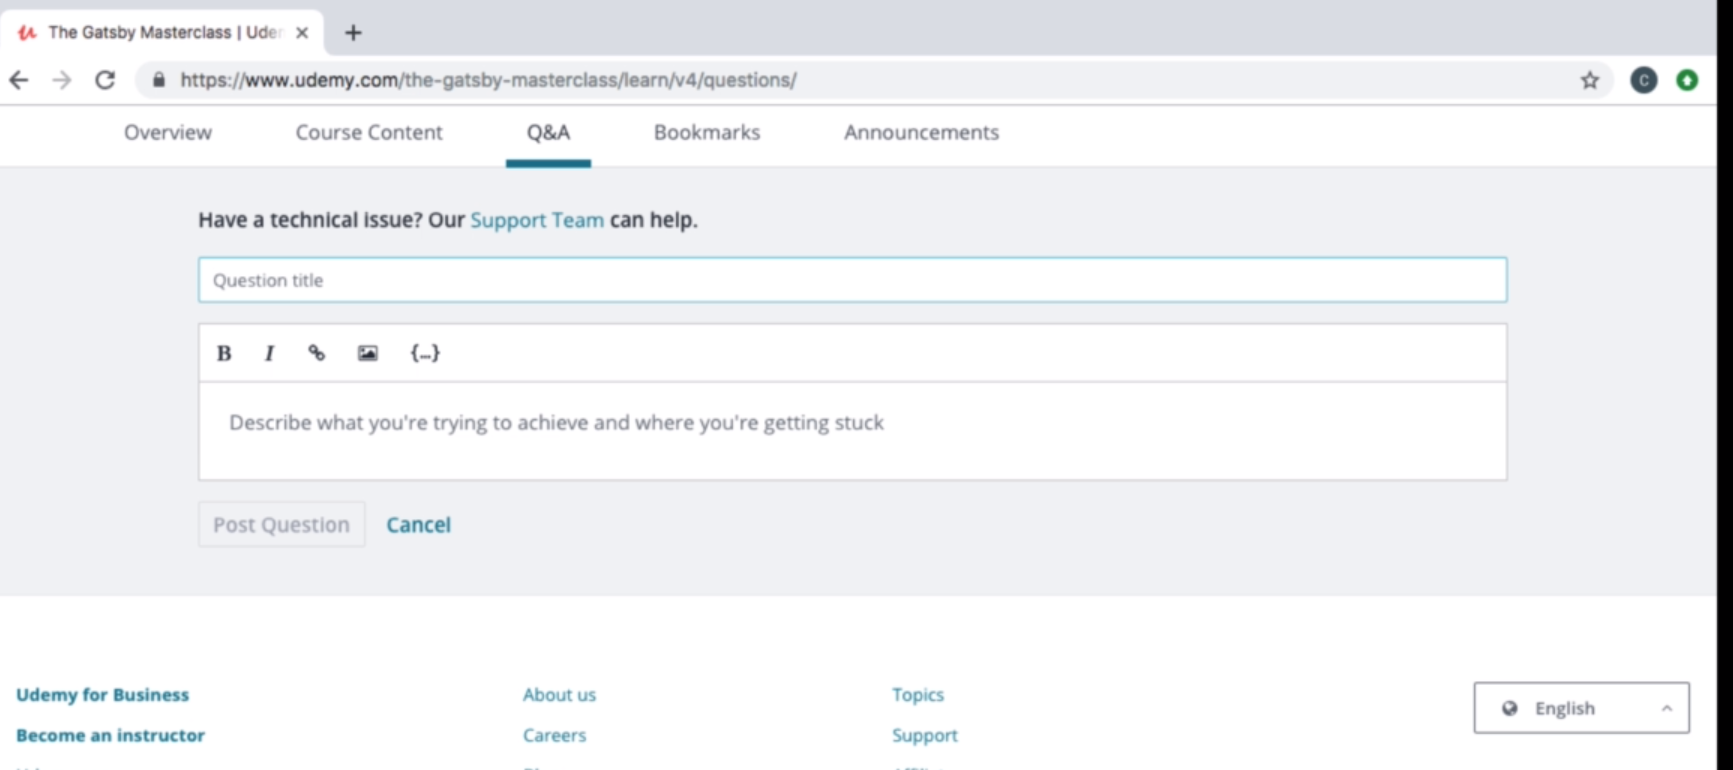
2. How to Get Help in this Course
- To get help from the creator of the course we need to put
@Reedat the begining of the title
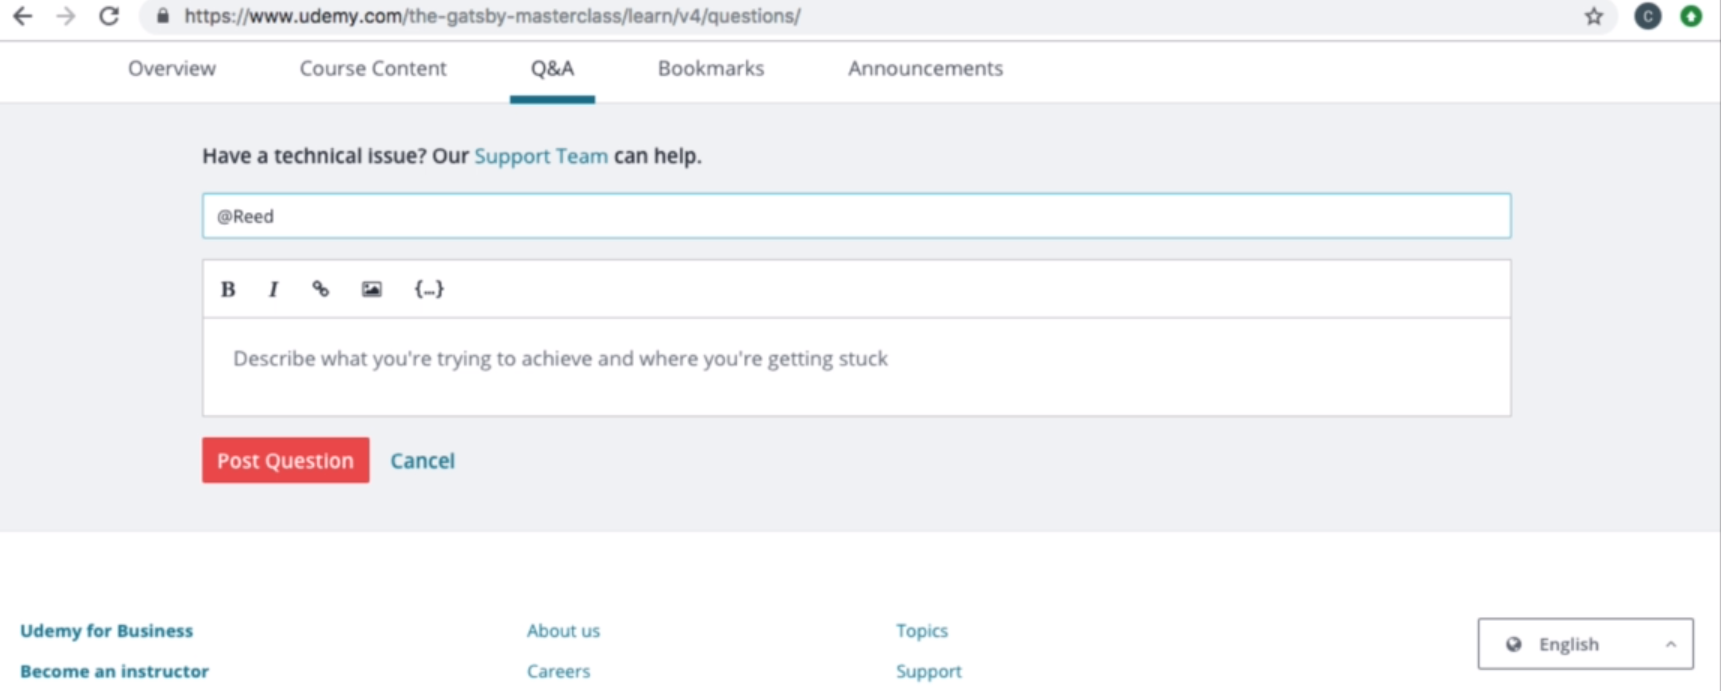
- If we want to get help for the other students we don't have to include
@Reed
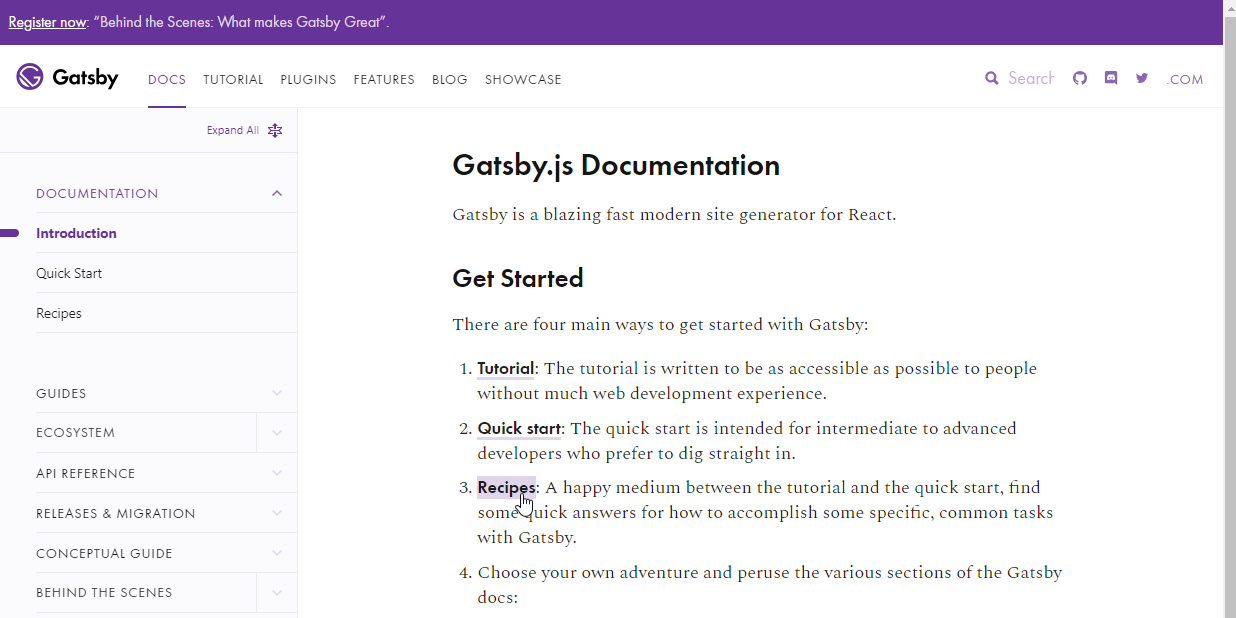
2. Creating our Gatsby Project
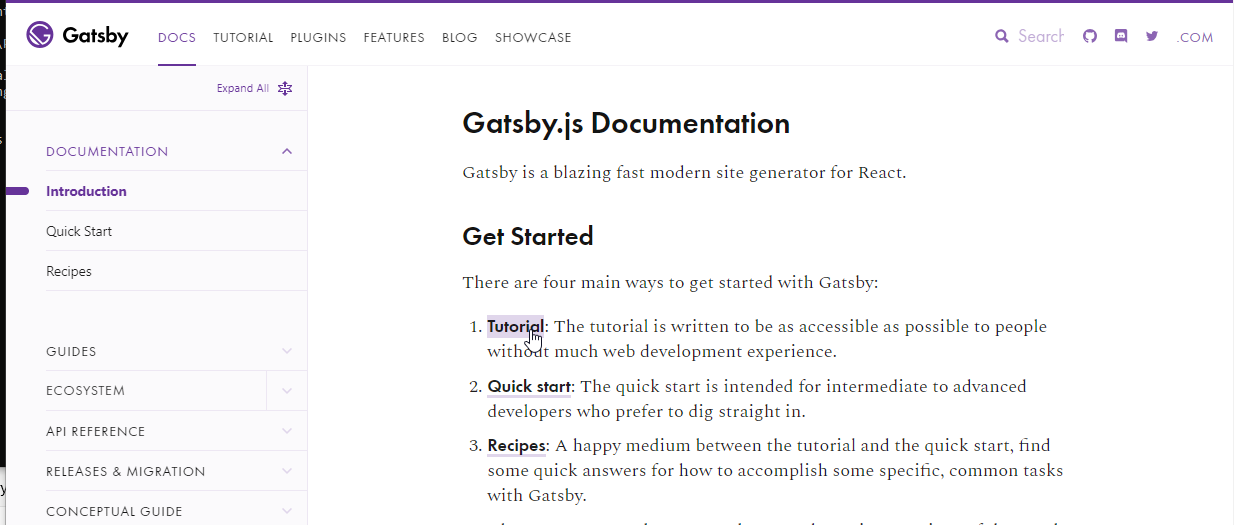
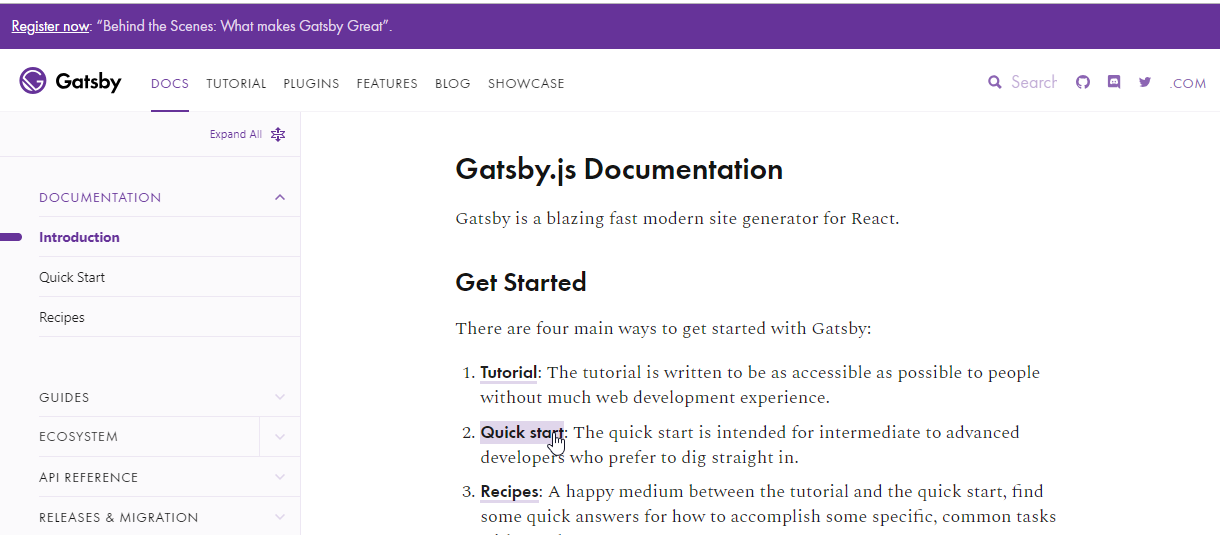
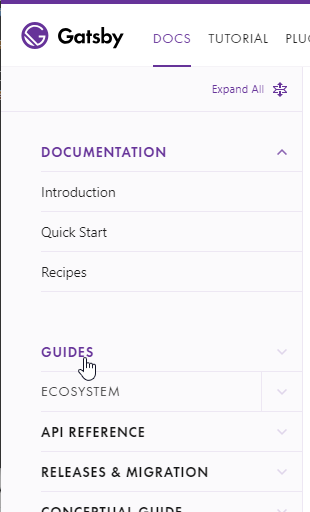
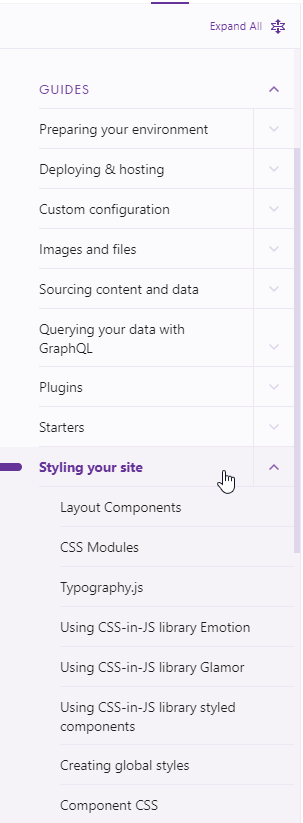
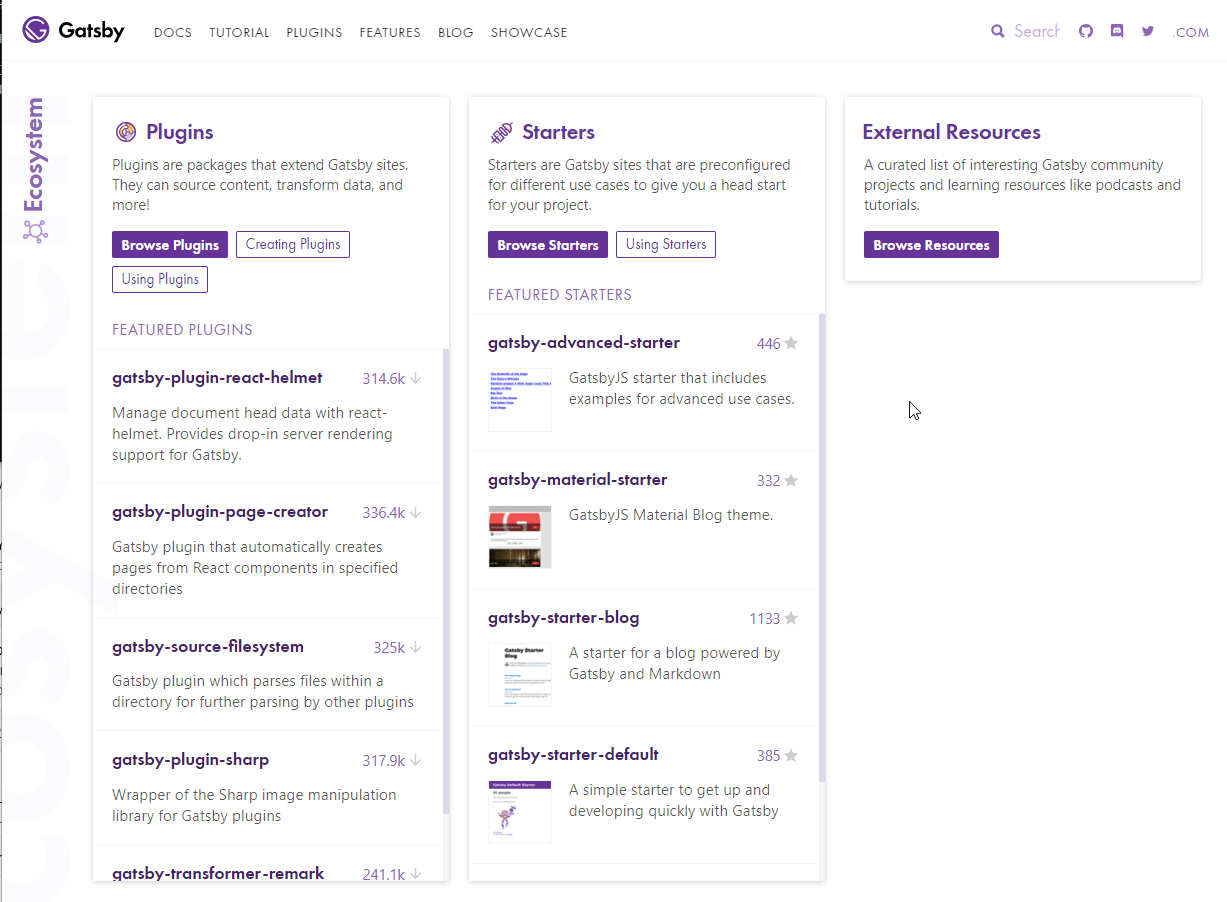
3. Using the Gatsby Docs
- Access to GatsbyJS
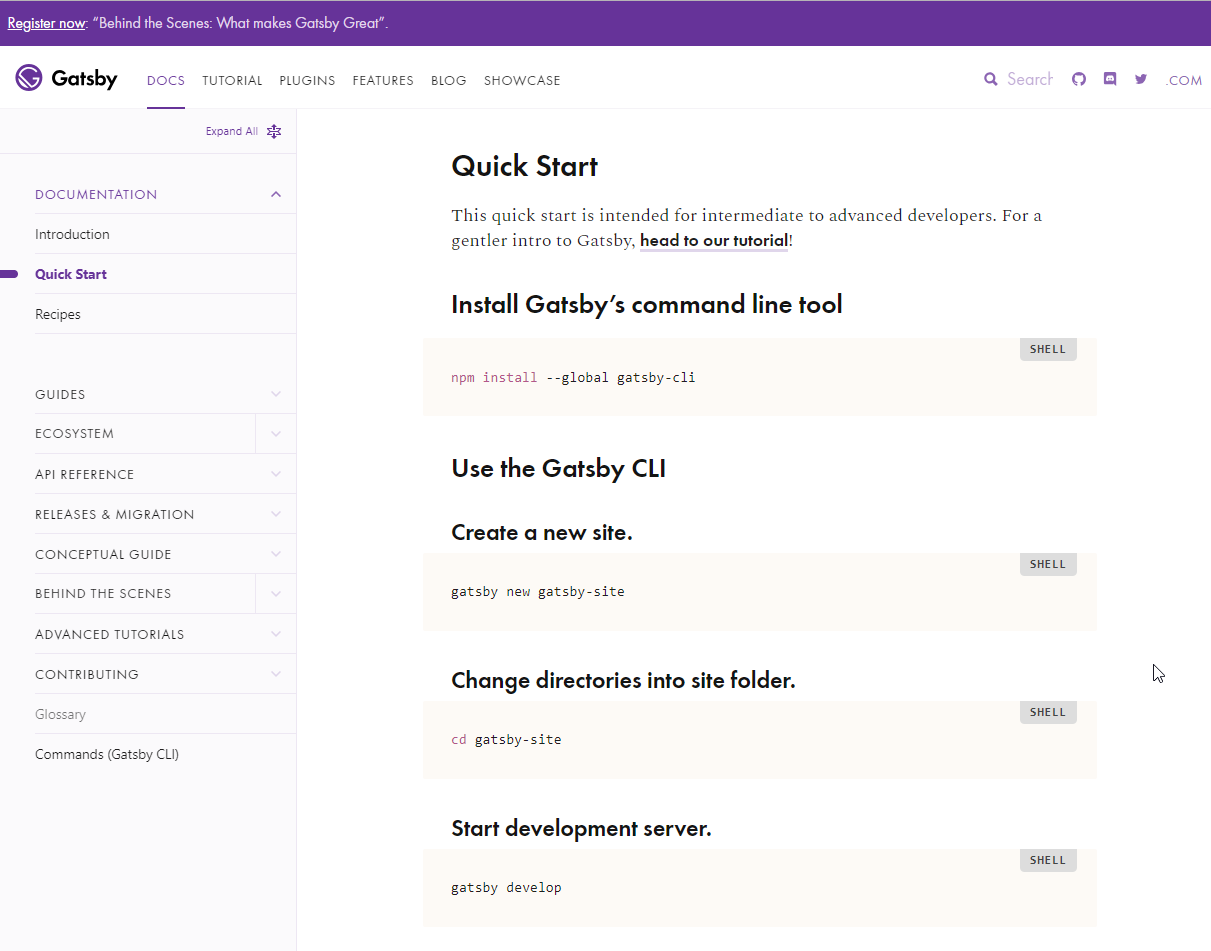

4. Creating our Project with the Gatsby CLI
C:\Work\Training\Pre\Gatsby>gatsby -v
2.4.8
- Create the new
gatsby-garbproject
C:\Work\Training\Pre\Gatsby>gatsby new gatsby-garb
info Creating new site from git: https://github.com/gatsbyjs/gatsby-starter-default.git
Cloning into 'gatsby-garb'...
remote: Enumerating objects: 10, done.
remote: Counting objects: 100% (10/10), done.
remote: Compressing objects: 100% (9/9), done.
remote: Total 1082 (delta 1), reused 5 (delta 1), pack-reused 1072 eceiving objects: 100% (1082/1082), 1.75 MiB | 851.00Receivi
ng objects: 100% (1082/1082), 2.25 MiB | 915.00 KiB/s, done.
Resolving deltas: 100% (611/611), done.
success Created starter directory layout
info Installing packages...
yarn install v1.13.0
warning package-lock.json found. Your project contains lock files generated by tools other than Yarn. It is advised not to mix package managers in order to avoid resolution inconsistencies caused by unsynchronized lock files. To clear this warning, remove package-lock.json.
[1/4] Resolving packages...
[2/4] Fetching packages...
info fsevents@1.2.4: The platform "win32" is incompatible with this module.
info "fsevents@1.2.4" is an optional dependency and failed compatibility check. Excluding it from installation.
[3/4] Linking dependencies...
[4/4] Building fresh packages...
Done in 132.16s.
- Open the folde with
Visual Studio Code
C:\Work\Training\Pre\Gatsby>cd gatsby-garb

C:\Work\Training\Pre\Gatsby\gatsby-garb>code .
package.json
{
  "name": "gatsby-starter-default",
  "private": true,
  "description": "A simple starter to get up and developing quickly with Gatsby",
  "version": "0.1.0",
  "author": "Kyle Mathews <mathews.kyle@gmail.com>",
  "dependencies": {
    "gatsby": "^2.0.105",
    "gatsby-image": "^2.0.20",
    "gatsby-plugin-manifest": "^2.0.15",
    "gatsby-plugin-offline": "^2.0.22",
    "gatsby-plugin-react-helmet": "^3.0.2",
    "gatsby-plugin-sharp": "^2.0.19",
    "gatsby-source-filesystem": "^2.0.8",
    "gatsby-transformer-sharp": "^2.1.13",
    "prop-types": "^15.6.2",
    "react": "^16.6.3",
    "react-dom": "^16.6.3",
    "react-helmet": "^5.2.0"
  },
  "keywords": ["gatsby"],
  "license": "MIT",
  "scripts": {
    "build": "gatsby build",
    "develop": "gatsby develop",
    "start": "npm run develop",
    "format": "prettier --write \"src/**/*.js\"",
    "test": "echo \"Write tests! -> https://gatsby.app/unit-testing\""
  },
  "devDependencies": {
    "prettier": "^1.15.2"
  },
  "repository": {
    "type": "git",
    "url": "https://github.com/gatsbyjs/gatsby-starter-default"
  },
  "bugs": {
    "url": "https://github.com/gatsbyjs/gatsby/issues"
  }
}
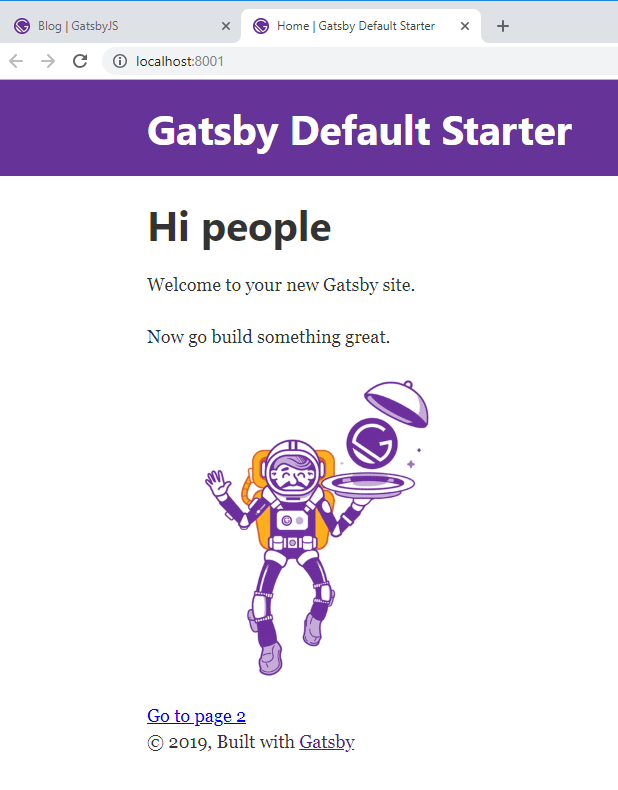
- Run the project with the
npm start,npm run developorgatsby develop
Juan.Pablo.Perez@RIMDUB-0232 MINGW64 /c/Work/Training/Pre/Gatsby/gatsby-garb
$ npm start

> gatsby-starter-default@0.1.0 start C:\Work\Training\Pre\Gatsby\gatsby-garb
> npm run develop


> gatsby-starter-default@0.1.0 develop C:\Work\Training\Pre\Gatsby\gatsby-garb
> gatsby develop

Something is already running at port 8000
Would you like to run the app at another port instead? [Y/n]Y

success load plugins — 0.372 s
success onPreInit — 2.495 s
success delete html and css files from previous builds — 0.033 s
success initialize cache — 0.070 s
success copy gatsby files — 0.602 s
success onPreBootstrap — 0.027 s
success source and transform nodes — 0.130 s
success building schema — 0.736 s
success createPages — 0.001 s
success createPagesStatefully — 0.108 s
success onPreExtractQueries — 0.011 s
success update schema — 0.264 s
success extract queries from components — 0.418 s
success run graphql queries — 0.794 s — 8/8 10.22 queries/second
success write out page data — 0.091 s
success write out redirect data — 0.011 s
Generating image thumbnails [==============================] 6/6 0.4 secs 100%

info bootstrap finished - 91.617 s

> done generating icons for manifest
success onPostBootstrap — 0.329 s
> Warning: React version not specified in eslint-plugin-react settings. See https://github.com/yannickcr/eslint-plugin-react#configuration .
 DONE  Compiled successfully in 12729ms                                                                                                                                                            7:26:31 PM

You can now view gatsby-starter-default in the browser.

  http://localhost:8001/

View GraphiQL, an in-browser IDE, to explore your site's data and schema

  http://localhost:8001/___graphql

Note that the development build is not optimized.
To create a production build, use gatsby build

i 「wdm」:
i 「wdm」: Compiled successfully.
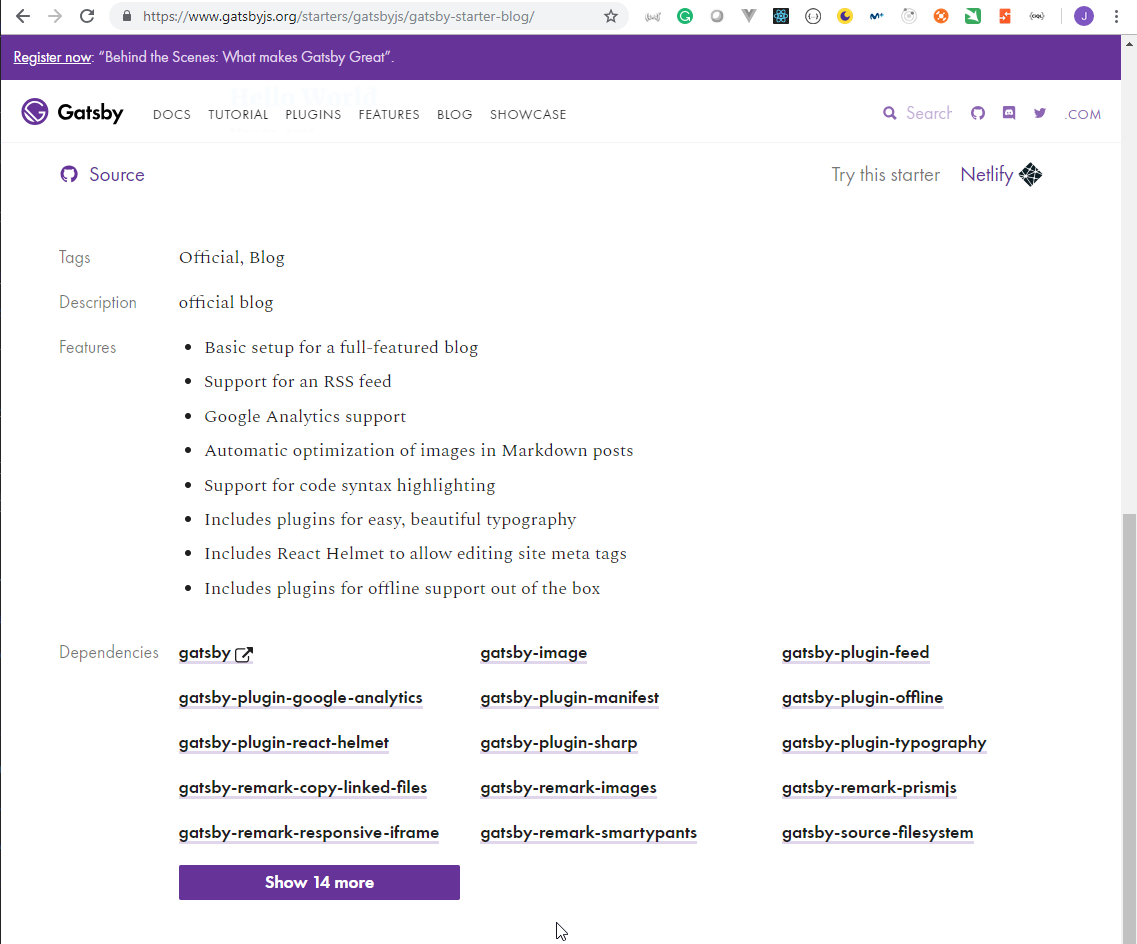
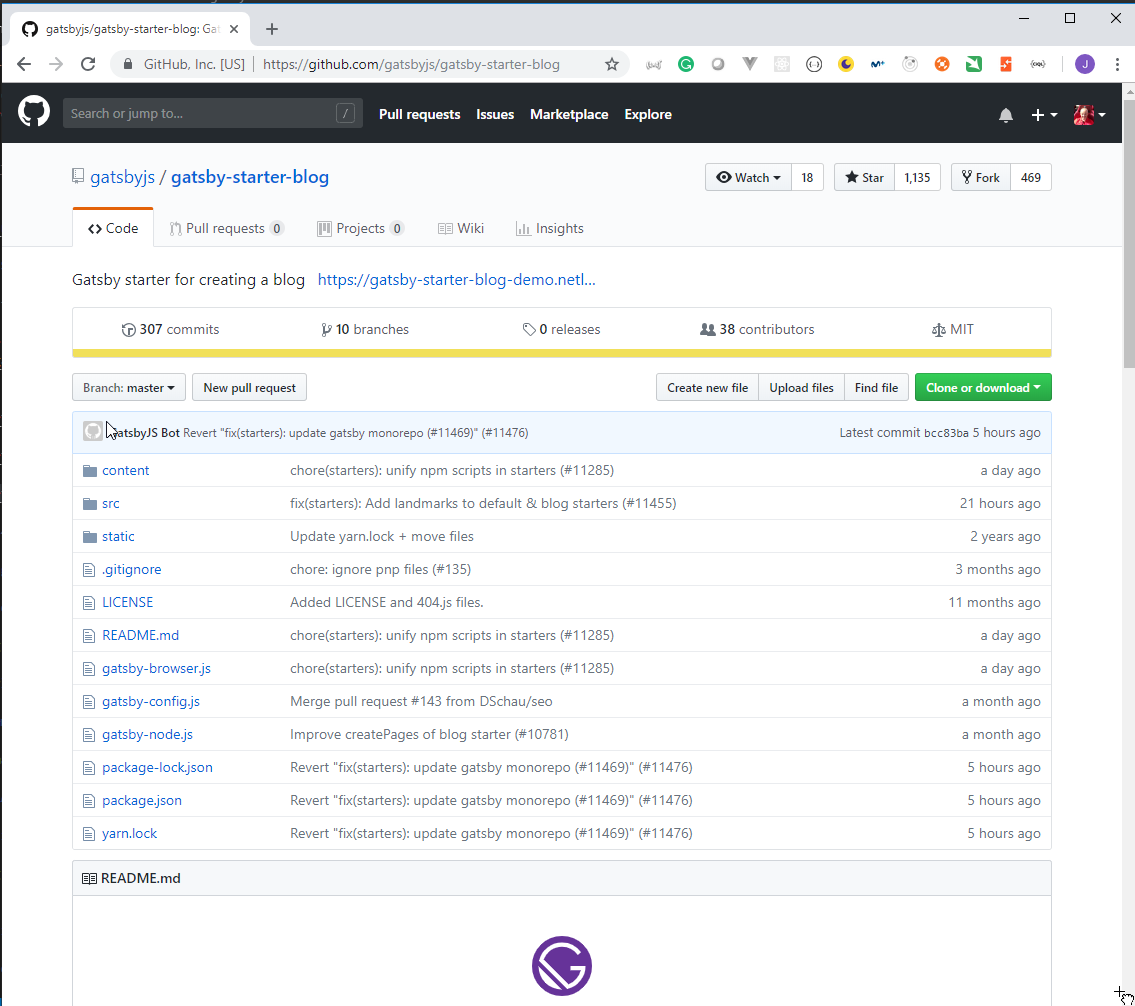
5. Gatsby Starters to Easily Bootstrap New Projects (Optional)
There are different starters apart from the
Gaspy Default StarterWe can chose another starter from Gatsby Starters
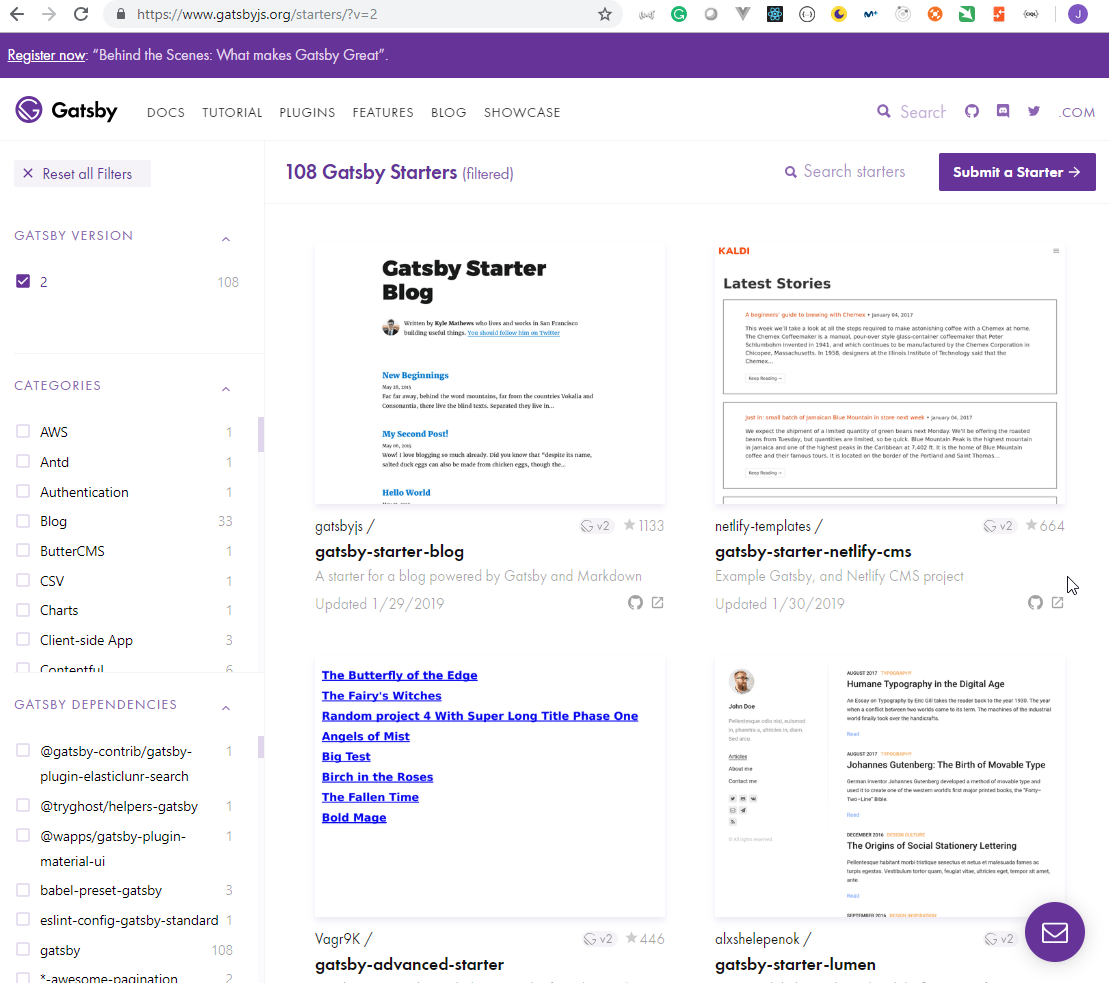

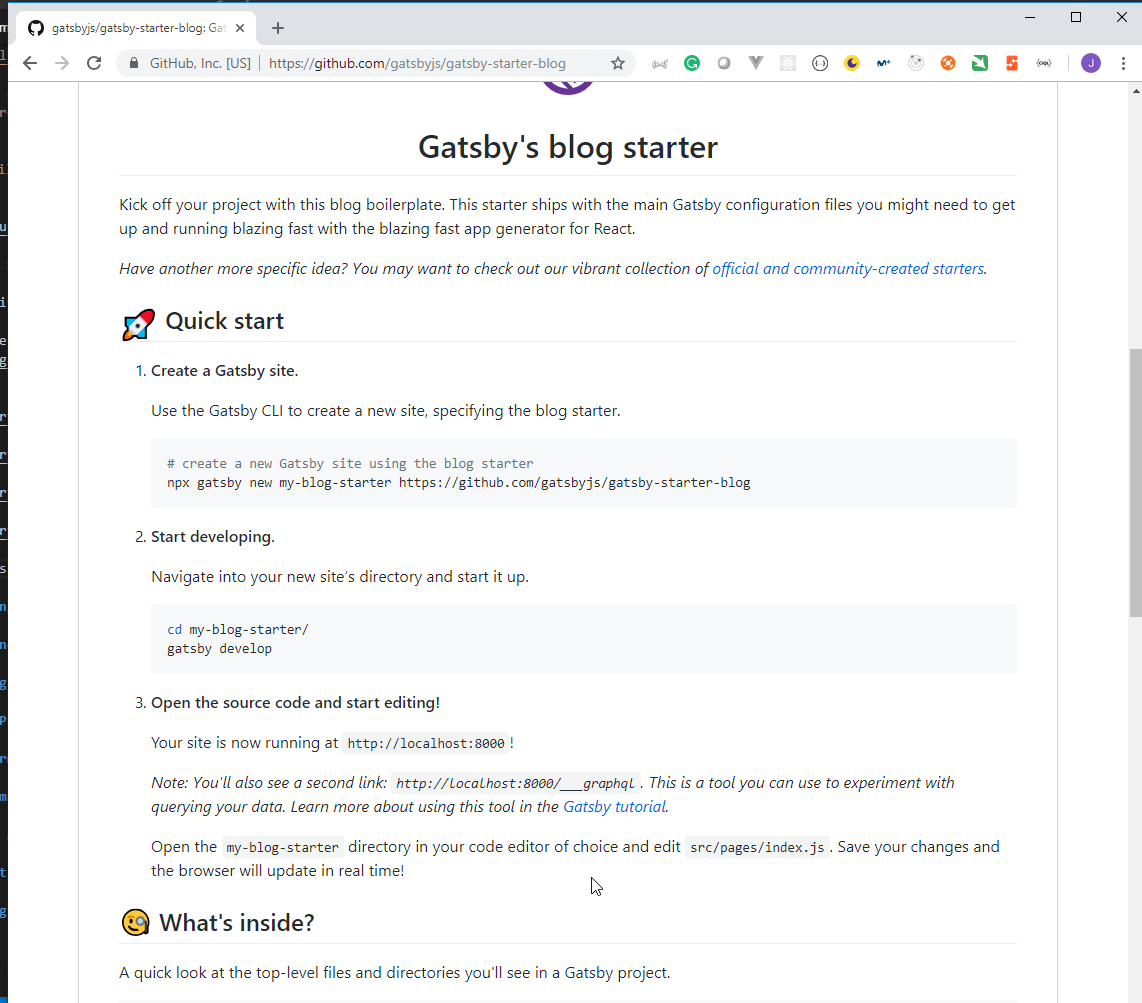
# create a new Gatsby site using the blog starter
npx gatsby new my-blog-starter https://github.com/gatsbyjs/gatsby-starter-blog
cd my-blog-starter/
gatsby develop
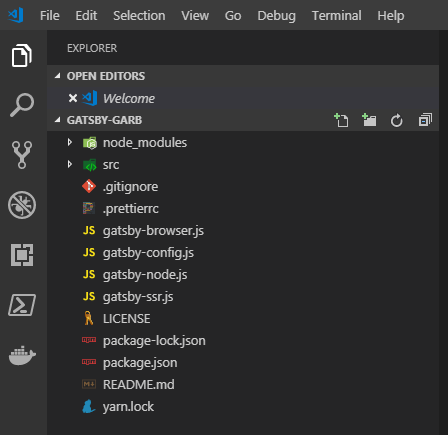
3. Exploring our Gatsby Project
6. Gatsby Project File Structure
- We can find more information in Gatsby Project Structure
/
|-- /.cache
|-- /plugins
|-- /public
|-- /src
    |-- /pages
    |-- /templates
    |-- html.js
|-- /static
|-- gatsby-config.js
|-- gatsby-node.js
|-- gatsby-ssr.js
|-- gatsby-browser.js
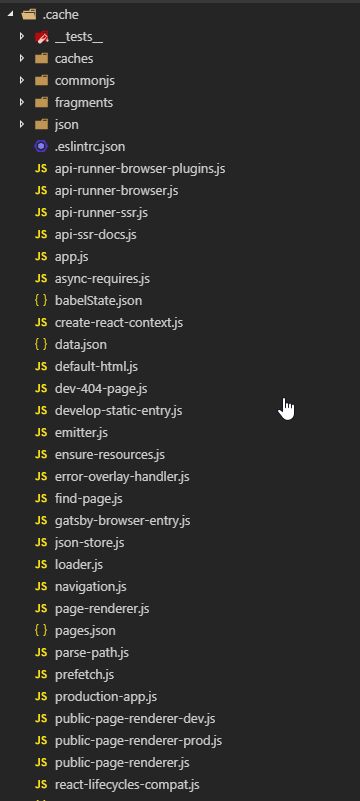
/.cacheAutomatically generated. This folder is an internal cache created automatically by Gatsby. The files inside this folder are not meant for modification. Should be .gitignore-d.
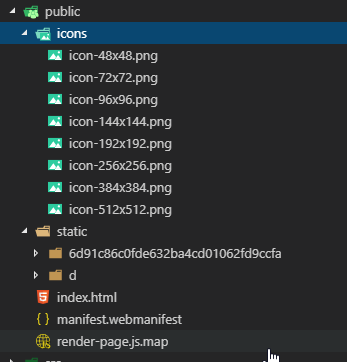
/publicAutomatically generated. The output ofgatsby buildprocess will be exposed inside this folder. Should be .gitignore-d. It contains the data that will be used to deploy the solution.
Juan.Pablo.Perez@RIMDUB-0232 MINGW64 /c/Work/Training/Pre/Gatsby/gatsby-garb
$ gatsby build
success open and validate gatsby-configs — 0.011 s
success load plugins — 0.297 s
success onPreInit — 3.037 s
success delete html and css files from previous builds — 0.034 s
success initialize cache — 0.012 s
success copy gatsby files — 0.391 s
success onPreBootstrap — 0.006 s
success source and transform nodes — 0.097 s
success building schema — 0.739 s
success createPages — 0.001 s
success createPagesStatefully — 0.068 s
success onPreExtractQueries — 0.008 s
success update schema — 0.148 s
success extract queries from components — 0.134 s
success run graphql queries — 0.079 s — 7/7 90.40 queries/second
success write out page data — 0.015 s
success write out redirect data — 0.002 s
⠄ onPostBootstrapdone generating icons for manifest
success onPostBootstrap — 0.191 s

info bootstrap finished - 15.895 s

success Building production JavaScript and CSS bundles — 13.383 s
success Building static HTML for pages — 1.530 s — 4/4 4.94 pages/second
info Done building in 30.819 sec
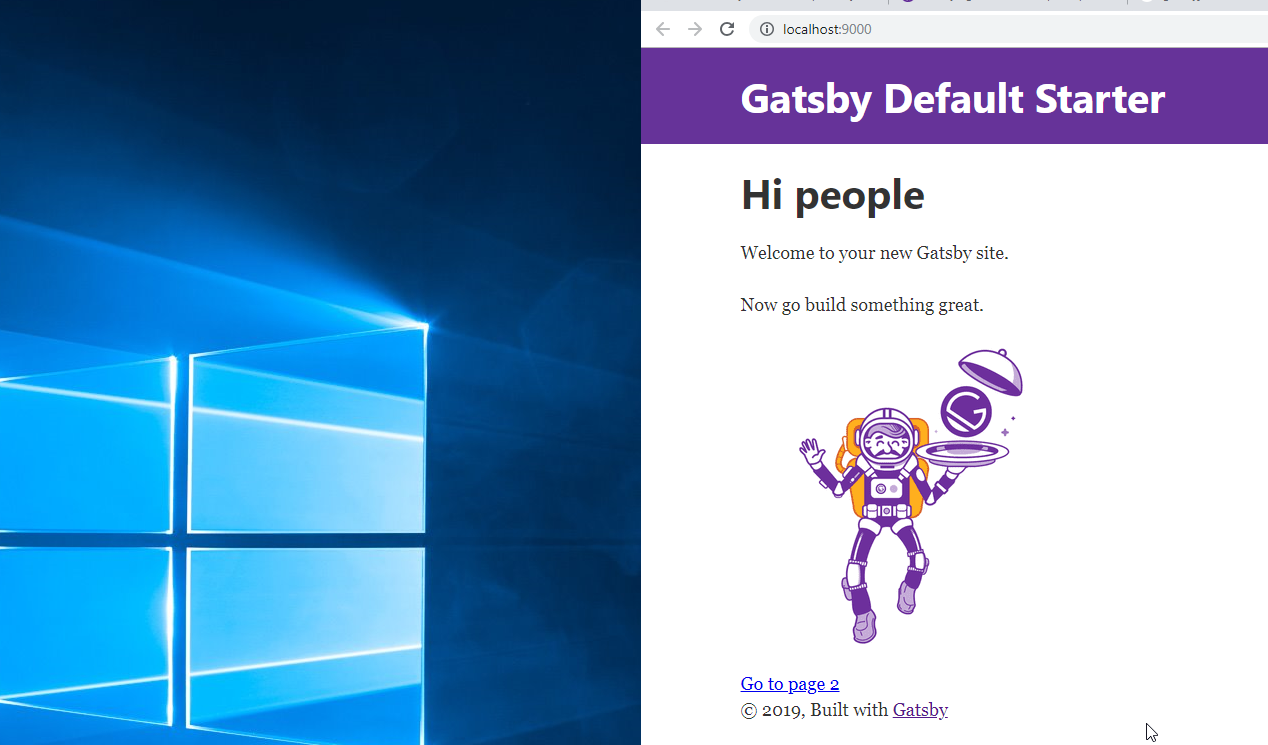
- With
gatsby servea NodeJs server is started to run the code from the/publicfolder.
Juan.Pablo.Perez@RIMDUB-0232 MINGW64 /c/Work/Training/Pre/Gatsby/gatsby-garb
$ gatsby serve
info gatsby serve running at: http://localhost:9000/
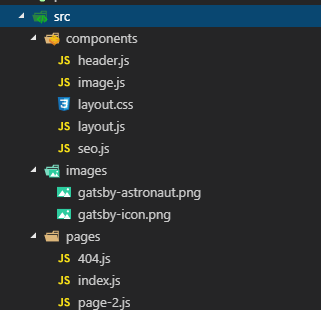
/srcThis directory will contain all of the code related to what you will see on the frontend of your site (what you see in the browser), like your site header, or a page template. “Src” is a convention for “source code”./pagesare ReactJs Components that under src/pages become pages automatically with paths based on their file name. Check out the pages docs for more detail./templatesContains templates for programmatically creating pages. Check out the templates docs for more detail.html.jsFor custom configuration of default .cache/default_html.js. Check out the custom html docs for more detail./componentsare ReactJs components./imagescontain all the images of our solution.
.prettierrccontains the configuration of Prettier used to help the use of the editor.
.prettierrc
{
  "semi": false,
  "singleQuote": true,
  "trailingComma": "es5"
}
- We can run
npm formatto format all the JavaScript document from the/srcfolder.
Juan.Pablo.Perez@RIMDUB-0232 MINGW64 /c/Work/Training/Pre/Gatsby/gatsby-garb
$ npm run format

> gatsby-starter-default@0.1.0 format C:\Work\Training\Pre\Gatsby\gatsby-garb
> prettier --write "src/**/*.js"

src\components\header.js 78ms
src\components\image.js 36ms
src\components\layout.js 27ms
src\components\seo.js 32ms
src\pages\404.js 18ms
src\pages\index.js 16ms
src\pages\page-2.js 10ms
7. Gatsby API Files / Using Git for File Tracking
- The
gatsby-browser.jsdocument is used to work with the Gatsby's Browser APIs
gatsby-browser.js
/**
 * Implement Gatsby's Browser APIs in this file.
 *
 * See: https://www.gatsbyjs.org/docs/browser-apis/
 */

// You can delete this file if you're not using it
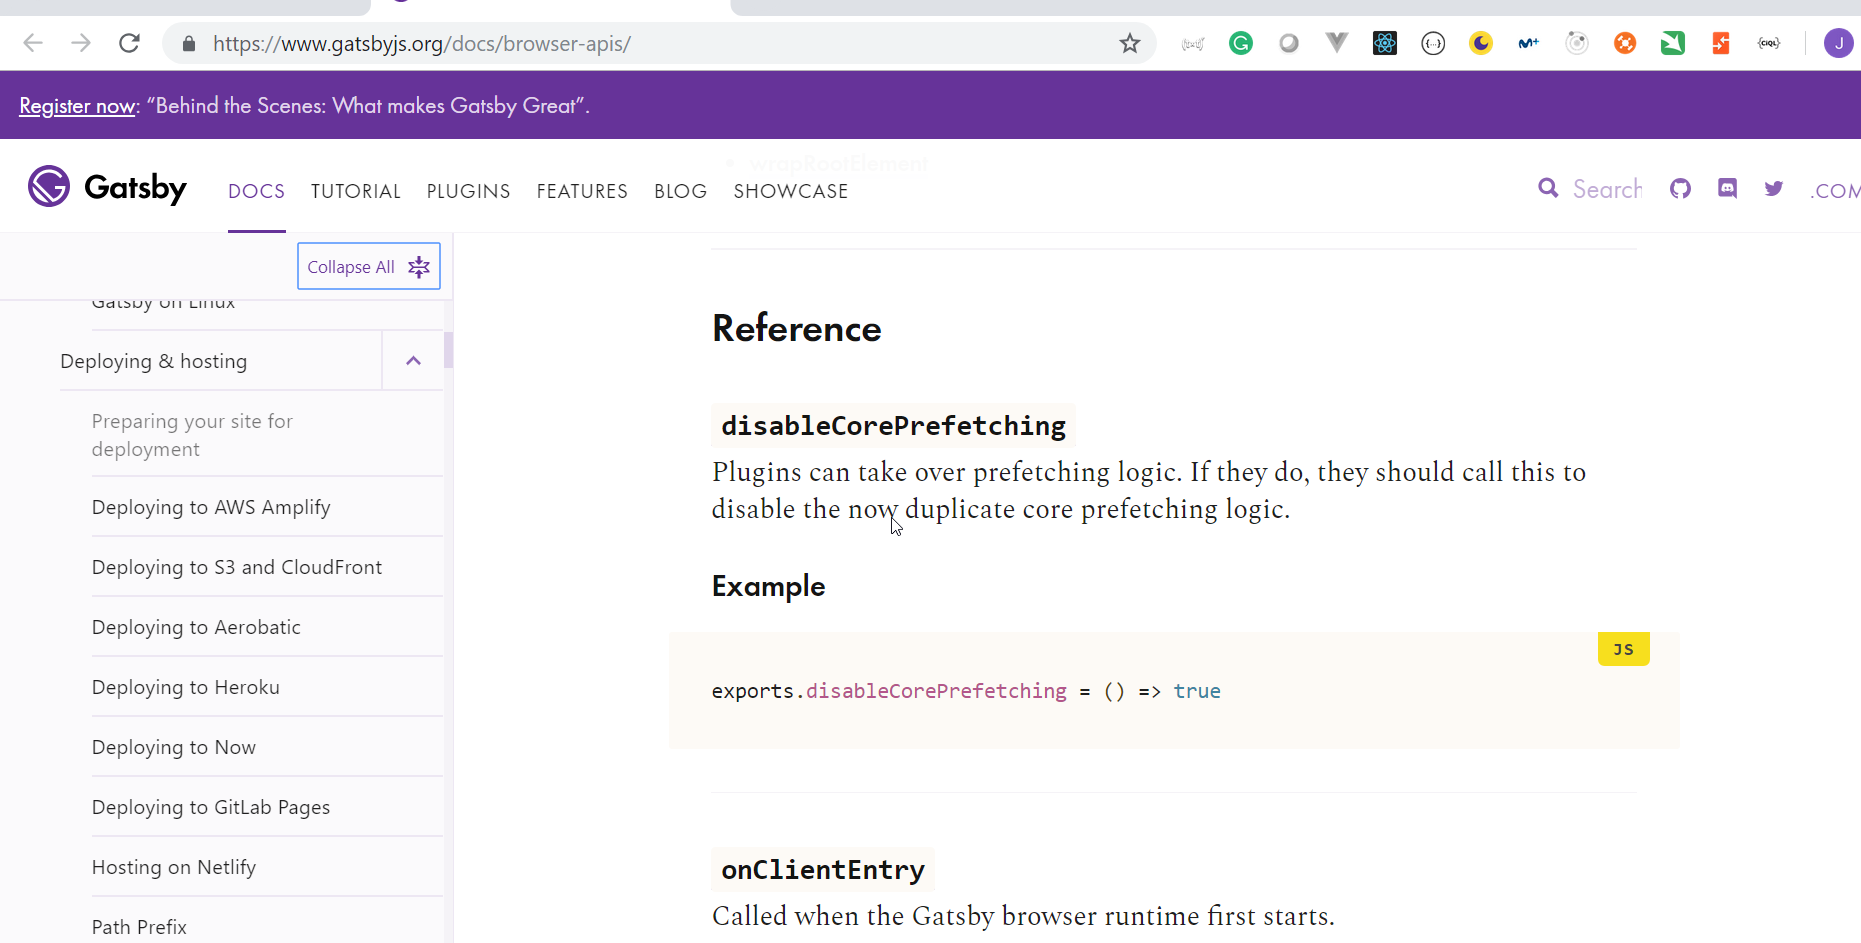
- For example we could use the
onRouteUpdatefunction.
gatsby-browser.js
exports.onRouteUpdate = ({ location, action }) => {
  console.log("route changed!", { location, action });
};
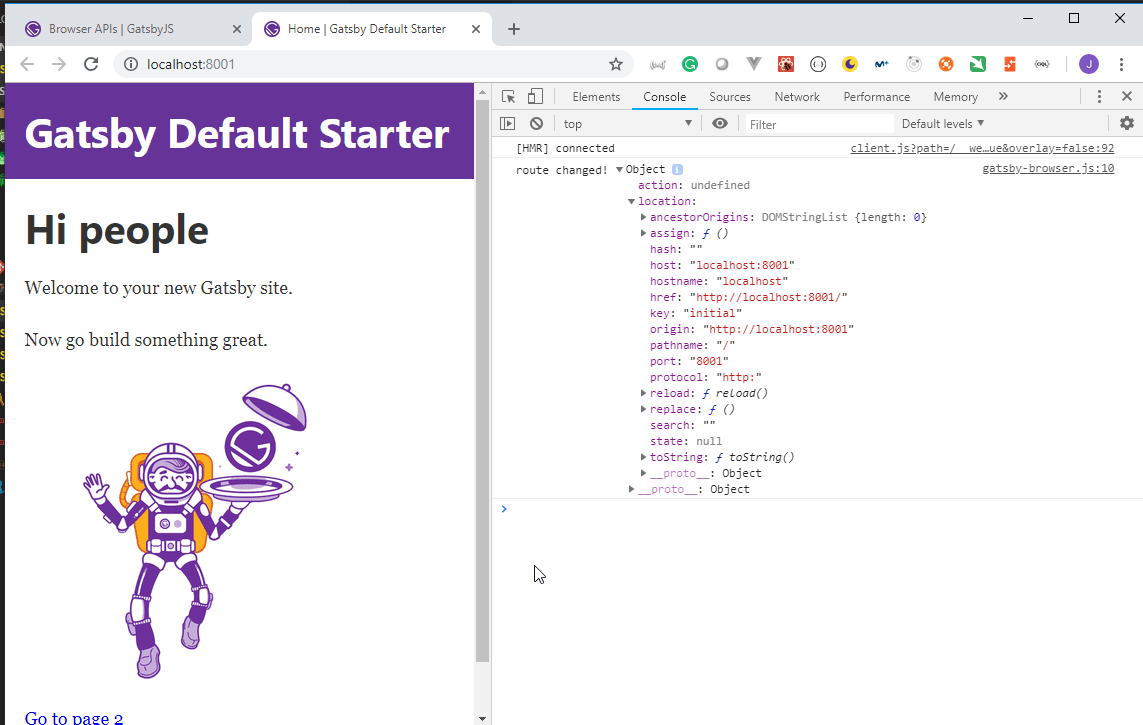
we need to restart the server calling againg to npm start after any change to the gatsby-*.js documents.
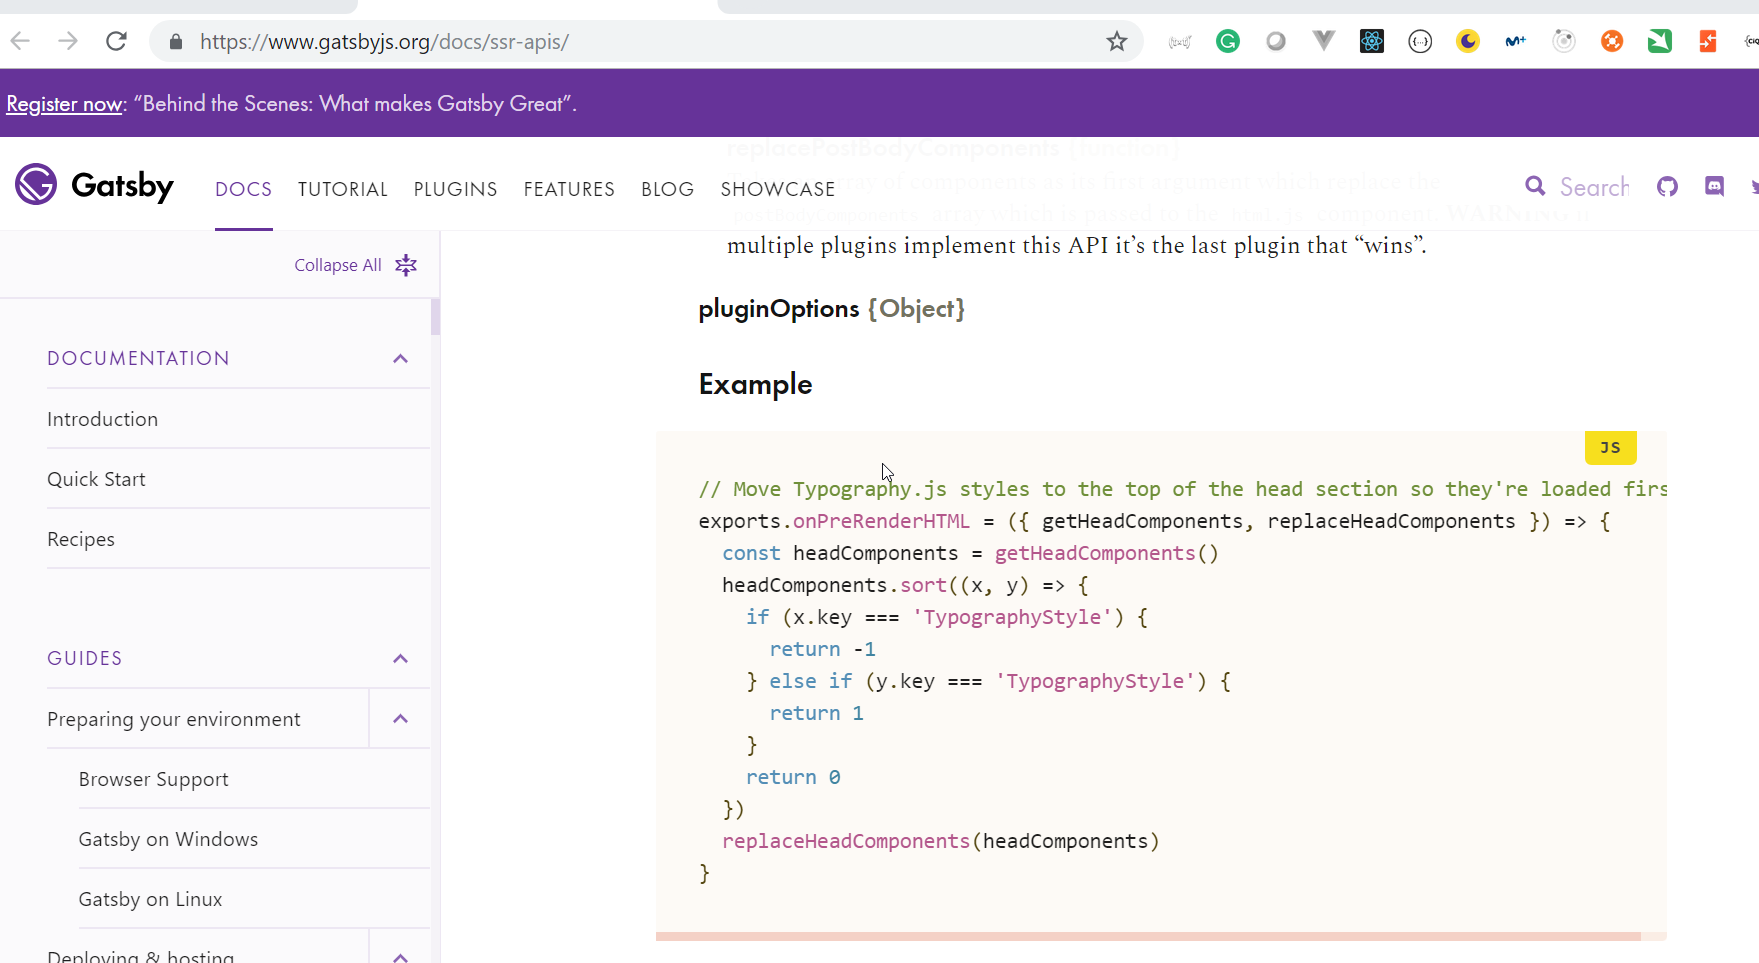
- The
gatsby-ssr.jsdocument is used to work with the Gatsby Server Rendering APIs
- Init the
gitrepository
Juan.Pablo.Perez@RIMDUB-0232 MINGW64 /c/Work/Training/Pre/Gatsby/gatsby-garb
$ git init
Initialized empty Git repository in C:/Work/Training/Pre/Gatsby/gatsby-garb/.git/
![]()
Juan.Pablo.Perez@RIMDUB-0232 MINGW64 /c/Work/Training/Pre/Gatsby/gatsby-garb (master)
$ git add .

Juan.Pablo.Perez@RIMDUB-0232 MINGW64 /c/Work/Training/Pre/Gatsby/gatsby-garb (master)
$ git status
On branch master

No commits yet

Changes to be committed:
  (use "git rm --cached <file>..." to unstage)

        new file:   .gitignore
        new file:   .prettierrc
        new file:   LICENSE
        new file:   README.md
        new file:   gatsby-browser.js
        new file:   gatsby-config.js
        new file:   gatsby-node.js
        new file:   gatsby-ssr.js
        new file:   package-lock.json
        new file:   package.json
        new file:   src/components/header.js
        new file:   src/components/image.js
        new file:   src/components/layout.css
        new file:   src/components/layout.js
        new file:   src/components/seo.js
        new file:   src/images/gatsby-astronaut.png
        new file:   src/images/gatsby-icon.png
        new file:   src/pages/404.js
        new file:   src/pages/index.js
        new file:   src/pages/page-2.js
        new file:   yarn.lock


Juan.Pablo.Perez@RIMDUB-0232 MINGW64 /c/Work/Training/Pre/Gatsby/gatsby-garb (master)
$ git commit -m "Initial commit"
[master (root-commit) cf449c4] Initial commit
 21 files changed, 28590 insertions(+)
 create mode 100644 .gitignore
 create mode 100644 .prettierrc
 create mode 100644 LICENSE
 create mode 100644 README.md
 create mode 100644 gatsby-browser.js
 create mode 100644 gatsby-config.js
 create mode 100644 gatsby-node.js
 create mode 100644 gatsby-ssr.js
 create mode 100644 package-lock.json
 create mode 100644 package.json
 create mode 100644 src/components/header.js
 create mode 100644 src/components/image.js
 create mode 100644 src/components/layout.css
 create mode 100644 src/components/layout.js
 create mode 100644 src/components/seo.js
 create mode 100644 src/images/gatsby-astronaut.png
 create mode 100644 src/images/gatsby-icon.png
 create mode 100644 src/pages/404.js
 create mode 100644 src/pages/index.js
 create mode 100644 src/pages/page-2.js
 create mode 100644 yarn.lock
- We can remove the
gatsby-browser.jsand thegatsby-ssr.jsdocuments. because are not going to be used in this course.
![]()
Juan.Pablo.Perez@RIMDUB-0232 MINGW64 /c/Work/Training/Pre/Gatsby/gatsby-garb (master)
$ git add .

Juan.Pablo.Perez@RIMDUB-0232 MINGW64 /c/Work/Training/Pre/Gatsby/gatsby-garb (master)
$ git commit -m "Removed unneeded files gatsby-browser.js and gatsby-ssr.js"
[master 5c9a312] Removed unneeded files gatsby-browser.js and gatsby-ssr.js
 2 files changed, 18 deletions(-)
 delete mode 100644 gatsby-browser.js
 delete mode 100644 gatsby-ssr.js
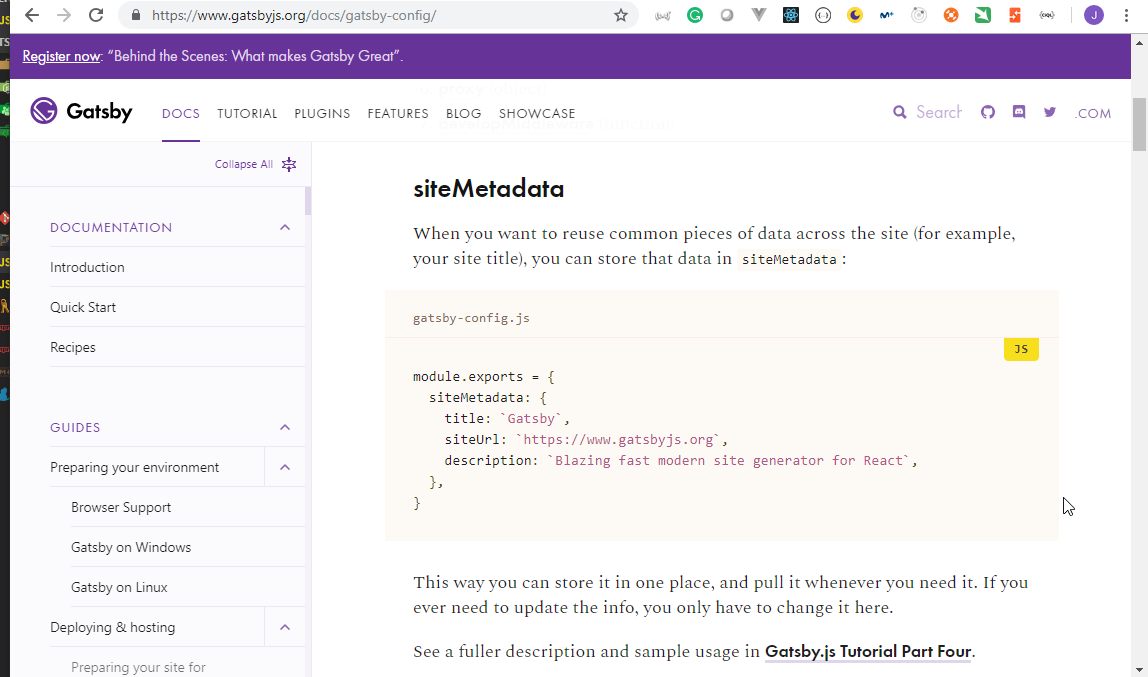
- The
gatsby-config.jsis the main configuration file Gatsby Config
gatsby-config.js
module.exports = {
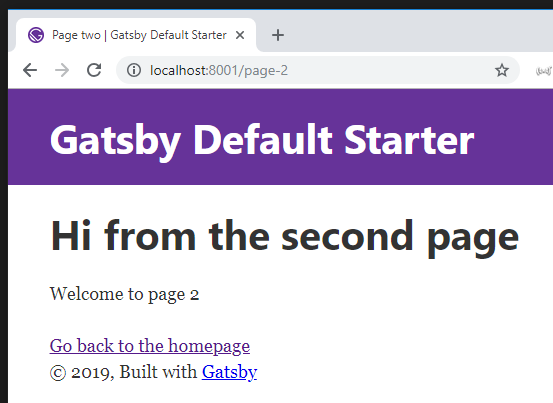
siteMetadata: {
title: `Gatsby Default Starter`,
description: `Kick off your next, great Gatsby project with this default starter. This barebones starter ships with the main Gatsby configuration files you might need.`,
author: `@gatsbyjs`
},
plugins: [
`gatsby-plugin-react-helmet`,
{
resolve: `gatsby-source-filesystem`,
options: {
name: `images`,
path: `${__dirname}/src/images`
}
},
`gatsby-transformer-sharp`,
`gatsby-plugin-sharp`,
{
resolve: `gatsby-plugin-manifest`,
options: {
name: `gatsby-starter-default`,
short_name: `starter`,
start_url: `/`,
background_color: `#663399`,
theme_color: `#663399`,
display: `minimal-ui`,
icon: `src/images/gatsby-icon.png` // This path is relative to the root of the site.
}
}
// this (optional) plugin enables Progressive Web App + Offline functionality
// To learn more, visit: https://gatsby.app/offline
// 'gatsby-plugin-offline',
]
};
- The
gatsby-node.jsdocument is used to work with the Gatsby Node APIs
gatsby-node.js
/**
 * Implement Gatsby's Node APIs in this file.
 *
 * See: https://www.gatsbyjs.org/docs/node-apis/
 */

// You can delete this file if you're not using it
4. Pages and Components in Gatsby
8. Creating Pages, Routes and Nested Routes in Gatsby
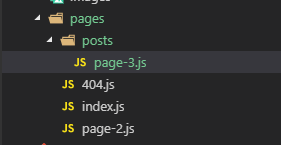
- Create our own page on the
pagesdirectory adding the newpage-3.jsdocument.
src -> pages -> page-3.js
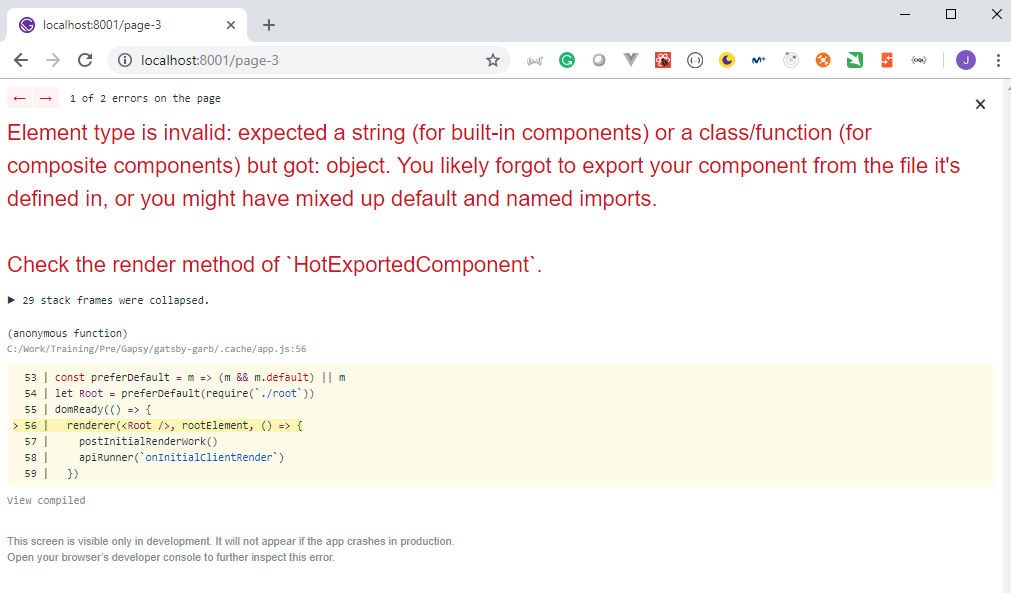
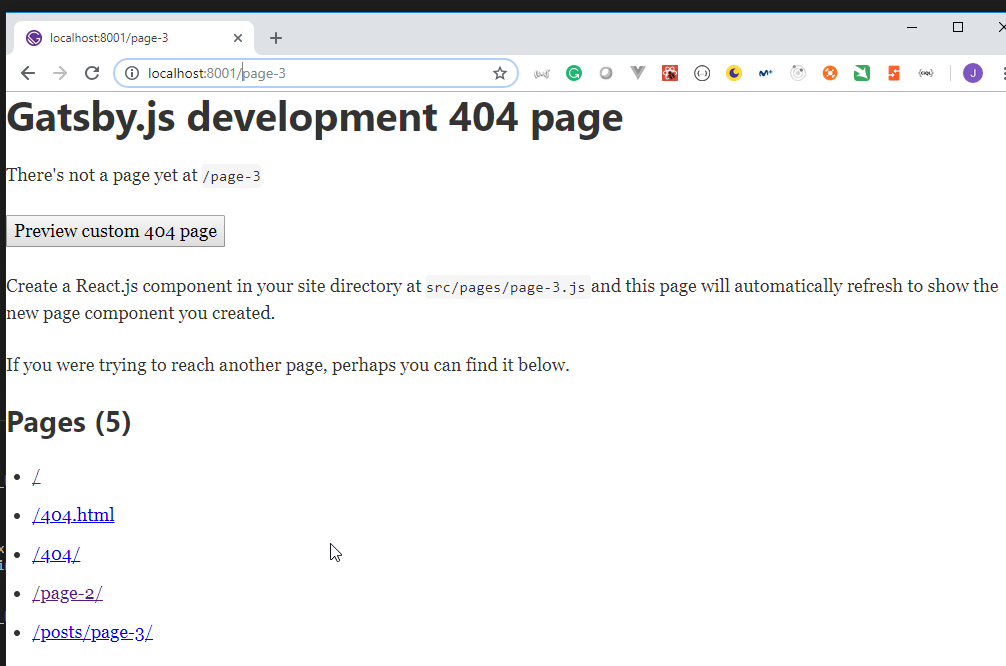
- Even though the page doesn't have any content
GatsbyJsrecompiles
- But if we try to access the page we get logically an error:
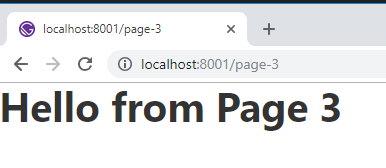
- We need to create our
ReactJscomponent
src -> pages -> page-3.js
import React from "react";

export default () => (
  <div>
    <h1>Hello from Page 3</h1>
  </div>
);
- And now, even thought we haven't created the
route, the page is shown properly. Therouteis thenameof thepage.
In order to create
nestedroutes we just have to create asubfolderwith the route we want to create.Create the new
postsfolder and move thepage-3from the main folder to thepostsfolder.

9. Adding App Structure with Layout Component / Links in Gatsby
- The
layoutcomponent allows us to have a common layout that can be used in the different pages.
src -> componets -> layout.js
import React from "react";
import PropTypes from "prop-types";
import { StaticQuery, graphql } from "gatsby";

import Header from "./header";
import "./layout.css";

const Layout = ({ children }) => (
  <StaticQuery
    query={graphql`
      query SiteTitleQuery {
        site {
          siteMetadata {
            title
          }
        }
      }
    `}
    render={data => (
      <>
        <Header siteTitle={data.site.siteMetadata.title} />
        <div
          style={{
            margin: `0 auto`,
            maxWidth: 960,
            padding: `0px 1.0875rem 1.45rem`,
            paddingTop: 0
          }}
        >
          {children}
          <footer>
            © {new Date().getFullYear()}, Built with
            {` `}
            <a href="https://www.gatsbyjs.org">Gatsby</a>
          </footer>
        </div>
      </>
    )}
  />
);

Layout.propTypes = {
  children: PropTypes.node.isRequired
};

export default Layout;
- The
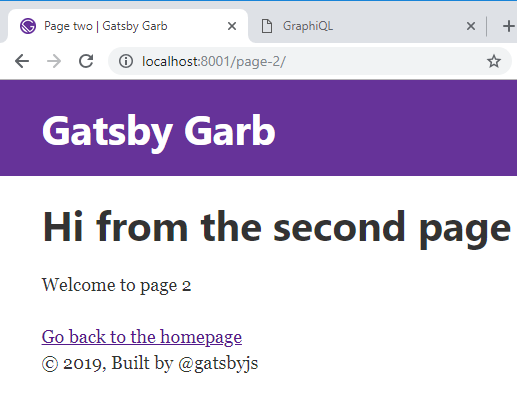
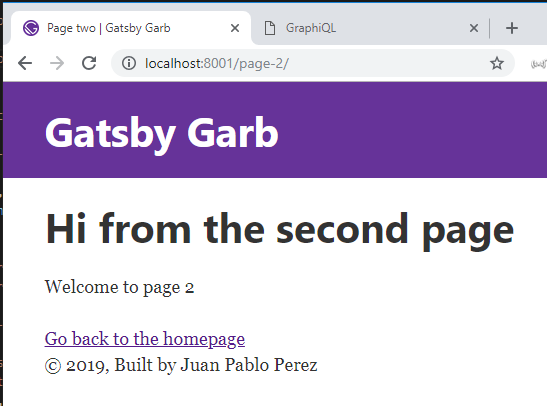
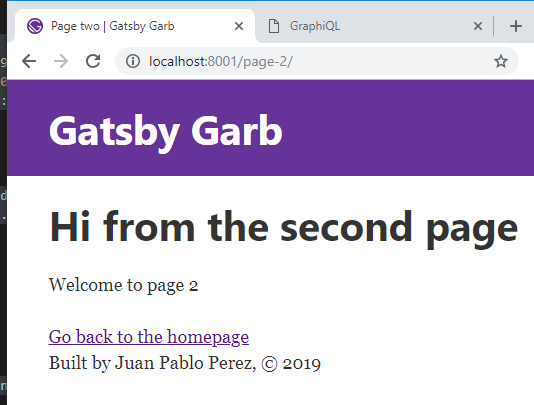
page-2page created by defualt uses thislayoutcomponent
src -> pages -> page-2.js
import React from "react";
import { Link } from "gatsby";

import Layout from "../components/layout";
import SEO from "../components/seo";

const SecondPage = () => (
  <Layout>
    <SEO title="Page two" />
    <h1>Hi from the second page</h1>
    <p>Welcome to page 2</p>
    <Link to="/">Go back to the homepage</Link>
  </Layout>
);

export default SecondPage;
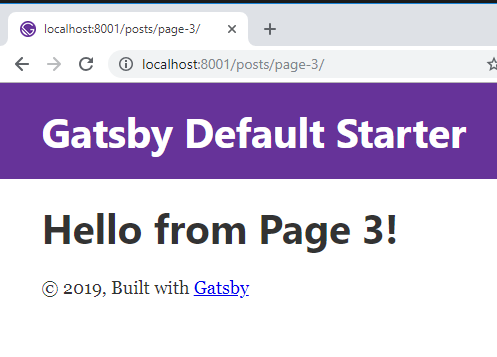
- We can modify our
page-3page to use thelayoutcomponent.
src -> pages -> posts -> page-3.js
import React from "react";
import Layout from "../../components/layout";

export default () => (
  <Layout>
    <h1>Hello from Page 3!</h1>
  </Layout>
);
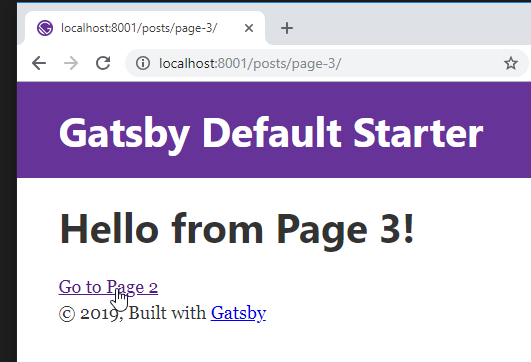
- We can move through pages using the GatsbyJs
Linkcomponent.
src -> pages -> posts -> page-3.js
import React from "react";
import { Link } from "gatsby";
import Layout from "../../components/layout";

export default () => (
  <Layout>
    <h1>Hello from Page 3!</h1>
    <Link to="/page-2">Go to Page 2</Link>
  </Layout>
);
5. Querying Data with GraphQL / GraphiQL IDE
10. Getting Site Metadata with GraphQL and Static Queries
- In the
layoutcomponent there isGrpahQLcall that gets information from ametadata repositoryusing the GastbyJsStaticQuerycomponent, that allows very easily use common pieces of the Web Site in any other component or page. Most of the metadata is configured on thegatsby-config.jsdocument.
src -> components -> layout.js
.
.
.
 <StaticQuery
    query={graphql`
      query SiteTitleQuery {
        site {
          siteMetadata {
            title
          }
        }
      }
    `}
.
.
.
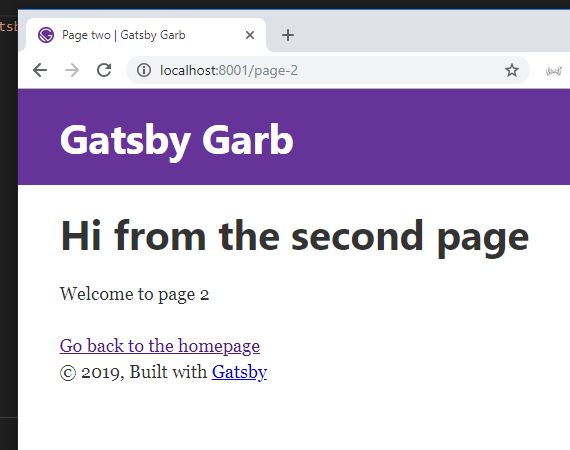
- We can change the value of the
titlejust changing thesiteMetadata.titlevalue.
gatsby-config.js
module.exports = {
  siteMetadata: {
    title: `Gatsby Garb`,
    description: `Kick off your next, great Gatsby project with this default starter. This barebones starter ships with the main Gatsby configuration files you might need.`,
    author: `@gatsbyjs`
  },
  plugins: [
    `gatsby-plugin-react-helmet`,
    {
      resolve: `gatsby-source-filesystem`,
      options: {
        name: `images`,
        path: `${__dirname}/src/images`
      }
    },
    `gatsby-transformer-sharp`,
    `gatsby-plugin-sharp`,
    {
      resolve: `gatsby-plugin-manifest`,
      options: {
        name: `gatsby-starter-default`,
        short_name: `starter`,
        start_url: `/`,
        background_color: `#663399`,
        theme_color: `#663399`,
        display: `minimal-ui`,
        icon: `src/images/gatsby-icon.png` // This path is relative to the root of the site.
      }
    }
    // this (optional) plugin enables Progressive Web App + Offline functionality
    // To learn more, visit: https://gatsby.app/offline
    // 'gatsby-plugin-offline',
  ]
};
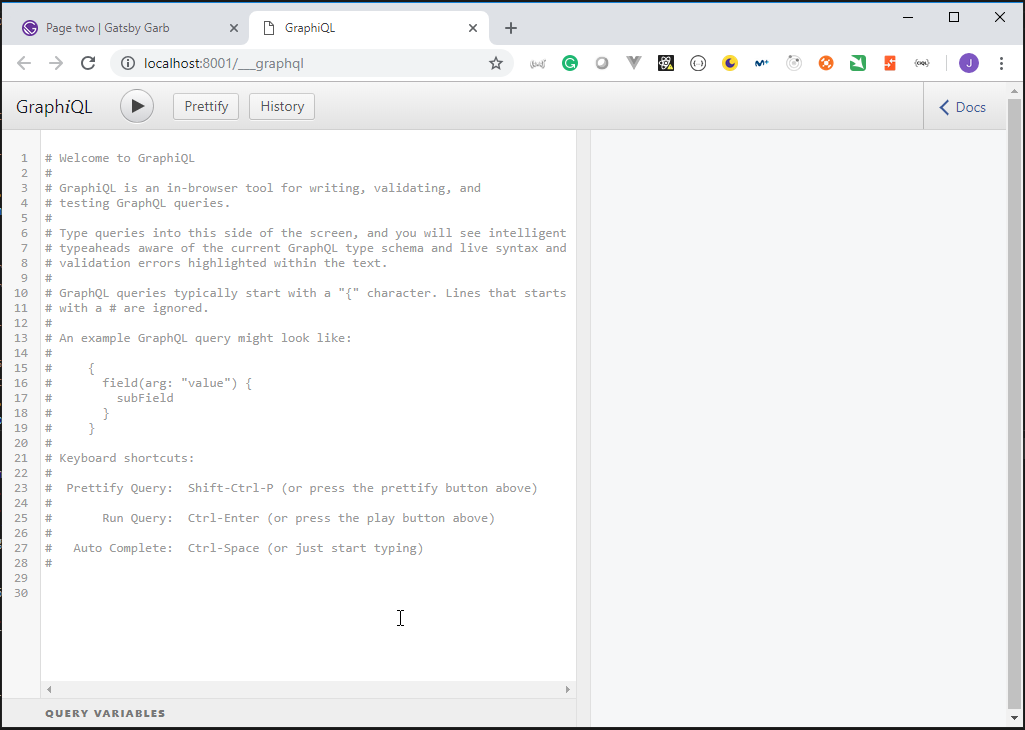
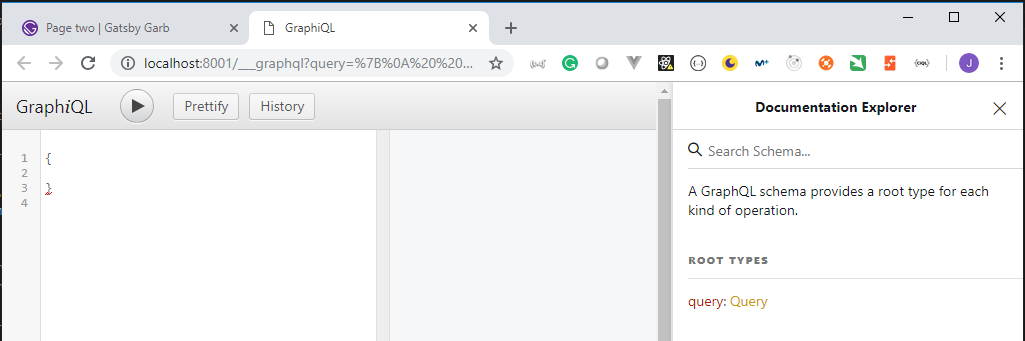
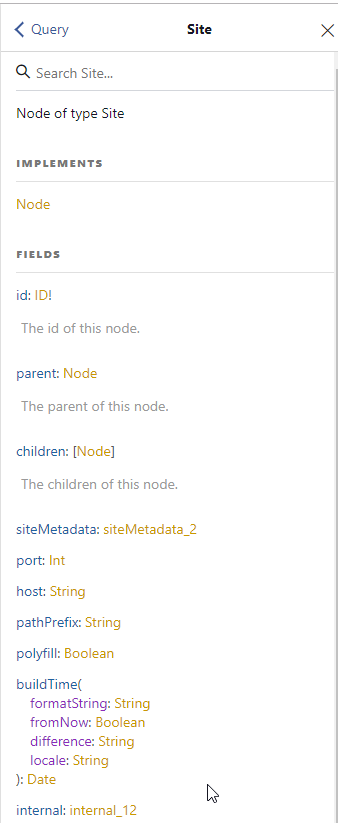
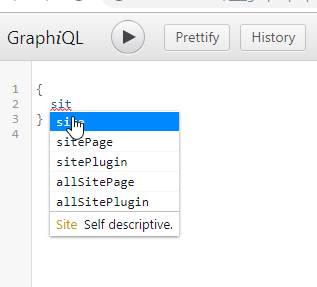
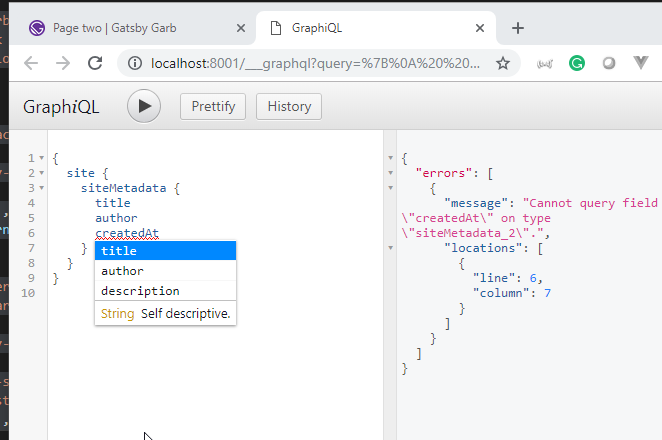
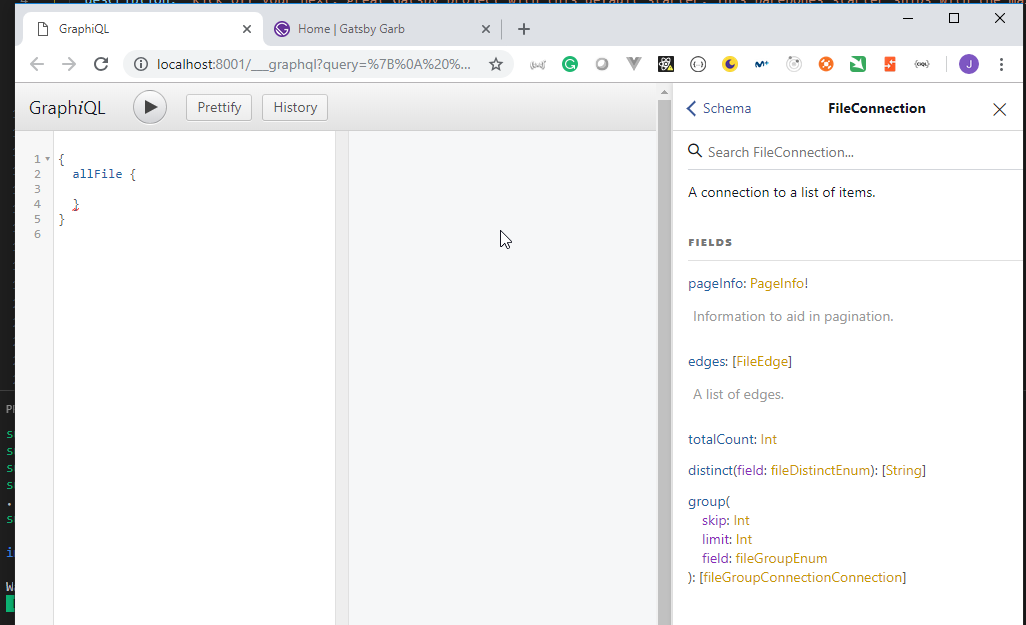
11. Using GraphiQL IDE to run our GraphQL Queries
We can use the GraphiQL IDE to practice what metadat information we can obtain from site.
We can access it from http://localhost:8001/___graphql
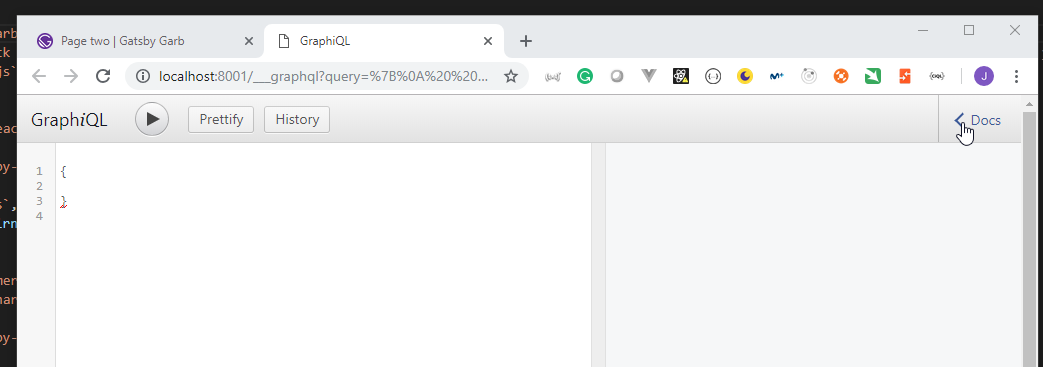
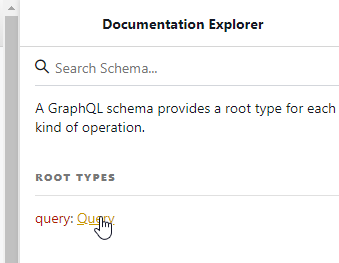
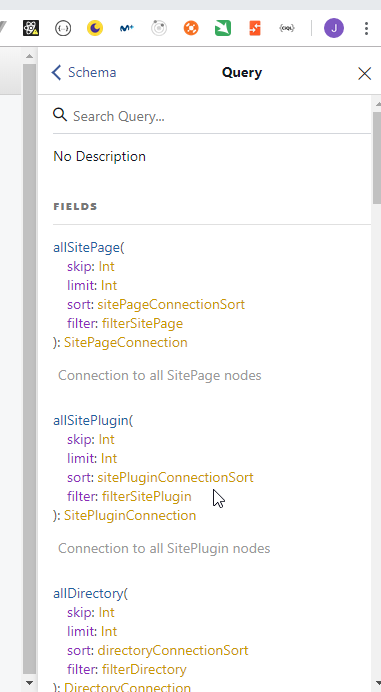
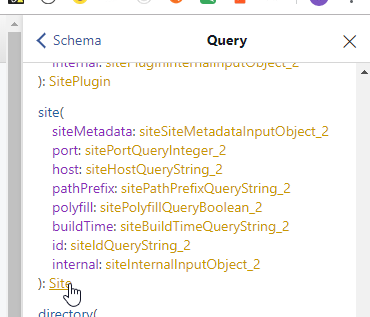
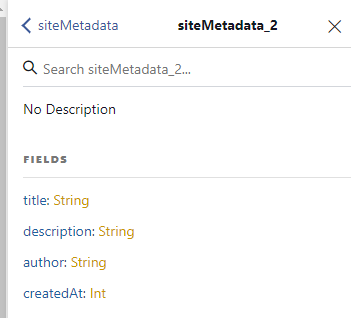
- Clicking on the
<Docswe can access theDocumentation Explorer
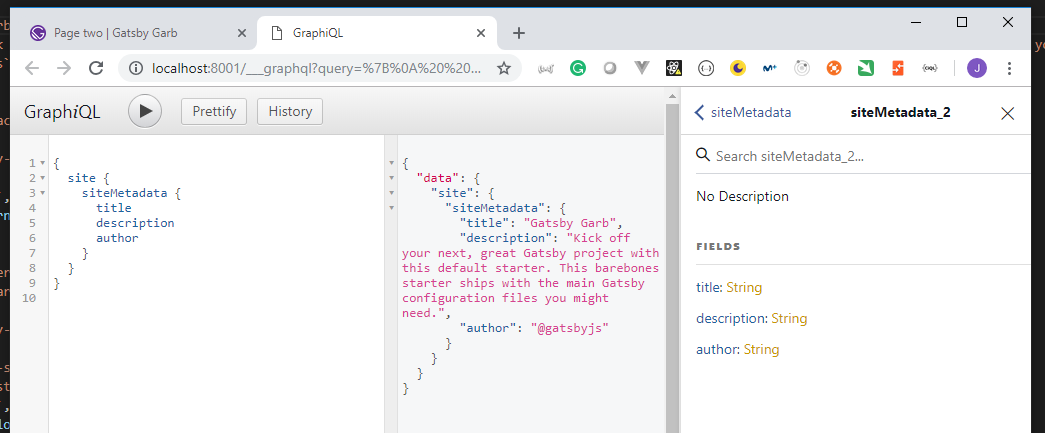
request
{
  site {
    siteMetadata {
      title
      description
    }
  }
}
response
{
  "data": {
    "site": {
      "siteMetadata": {
        "title": "Gatsby Garb",
        "description": "Kick off your next, great Gatsby project with this default starter. This barebones starter ships with the main Gatsby configuration files you might need."
      }
    }
  }
}
12. Executing GraphQL Queries in our Gatsby Components
- Include the
authoron the footer modifying thelayoutcomponent.
src -> components -> layout.js
import React from "react";
import PropTypes from "prop-types";
import { StaticQuery, graphql } from "gatsby";

import Header from "./header";
import "./layout.css";

const getSiteMetadata = graphql`
  {
    site {
      siteMetadata {
        title
        author
      }
    }
  }
`;

const Layout = ({ children }) => (
  <StaticQuery
    query={getSiteMetadata}
    render={data => (
      <>
        <Header siteTitle={data.site.siteMetadata.title} />
        <div
          style={{
            margin: `0 auto`,
            maxWidth: 960,
            padding: `0px 1.0875rem 1.45rem`,
            paddingTop: 0
          }}
        >
          {children}
          <footer>
            © {new Date().getFullYear()}, Built by{" "}
            {data.site.siteMetadata.author}
          </footer>
        </div>
      </>
    )}
  />
);

Layout.propTypes = {
  children: PropTypes.node.isRequired
};

export default Layout;
gatsby-config.js
module.exports = {
  siteMetadata: {
    title: `Gatsby Garb`,
    description: `Kick off your next, great Gatsby project with this default starter. This barebones starter ships with the main Gatsby configuration files you might need.`,
    author: `Juan Pablo Perez`
  },
  plugins: [
    `gatsby-plugin-react-helmet`,
    {
      resolve: `gatsby-source-filesystem`,
      options: {
        name: `images`,
        path: `${__dirname}/src/images`
      }
    },
    `gatsby-transformer-sharp`,
    `gatsby-plugin-sharp`,
    {
      resolve: `gatsby-plugin-manifest`,
      options: {
        name: `gatsby-starter-default`,
        short_name: `starter`,
        start_url: `/`,
        background_color: `#663399`,
        theme_color: `#663399`,
        display: `minimal-ui`,
        icon: `src/images/gatsby-icon.png` // This path is relative to the root of the site.
      }
    }
    // this (optional) plugin enables Progressive Web App + Offline functionality
    // To learn more, visit: https://gatsby.app/offline
    // 'gatsby-plugin-offline',
  ]
};
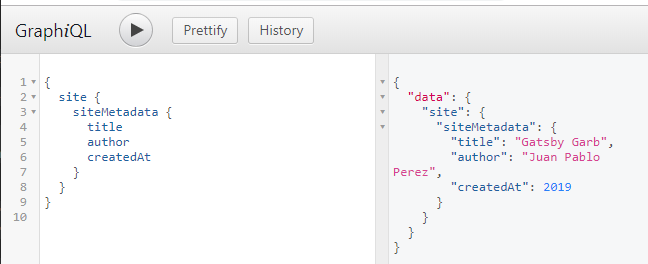
13. Adding / Querying for Custom Fields on Site Metadata
- We can add personal data adding new fields to the
siteMetadataobject.
gatsby-config.js
module.exports = {
  siteMetadata: {
    title: `Gatsby Garb`,
    description: `Kick off your next, great Gatsby project with this default starter. This barebones starter ships with the main Gatsby configuration files you might need.`,
    author: `Juan Pablo Perez`,
    createdAt: 2019
  },
  plugins: [
    `gatsby-plugin-react-helmet`,
    {
      resolve: `gatsby-source-filesystem`,
      options: {
        name: `images`,
        path: `${__dirname}/src/images`
      }
    },
    `gatsby-transformer-sharp`,
    `gatsby-plugin-sharp`,
    {
      resolve: `gatsby-plugin-manifest`,
      options: {
        name: `gatsby-starter-default`,
        short_name: `starter`,
        start_url: `/`,
        background_color: `#663399`,
        theme_color: `#663399`,
        display: `minimal-ui`,
        icon: `src/images/gatsby-icon.png` // This path is relative to the root of the site.
      }
    }
    // this (optional) plugin enables Progressive Web App + Offline functionality
    // To learn more, visit: https://gatsby.app/offline
    // 'gatsby-plugin-offline',
  ]
};
- We need to restart the developtment script calling again
npm start
- We can include the field at the botton of the
layoutas well.
src -> components -> layout.js
import React from "react";
import PropTypes from "prop-types";
import { StaticQuery, graphql } from "gatsby";

import Header from "./header";
import "./layout.css";

const getSiteMetadata = graphql`
  {
    site {
      siteMetadata {
        title
        author
        createdAt
      }
    }
  }
`;

const Layout = ({ children }) => (
  <StaticQuery
    query={getSiteMetadata}
    render={data => (
      <>
        <Header siteTitle={data.site.siteMetadata.title} />
        <div
          style={{
            margin: `0 auto`,
            maxWidth: 960,
            padding: `0px 1.0875rem 1.45rem`,
            paddingTop: 0
          }}
        >
          {children}
          <footer>
            Built by {data.site.siteMetadata.author}, ©{" "}
            {data.site.siteMetadata.createdAt}
          </footer>
        </div>
      </>
    )}
  />
);

Layout.propTypes = {
  children: PropTypes.node.isRequired
};

export default Layout;
6. Source Plugins and Static Queries
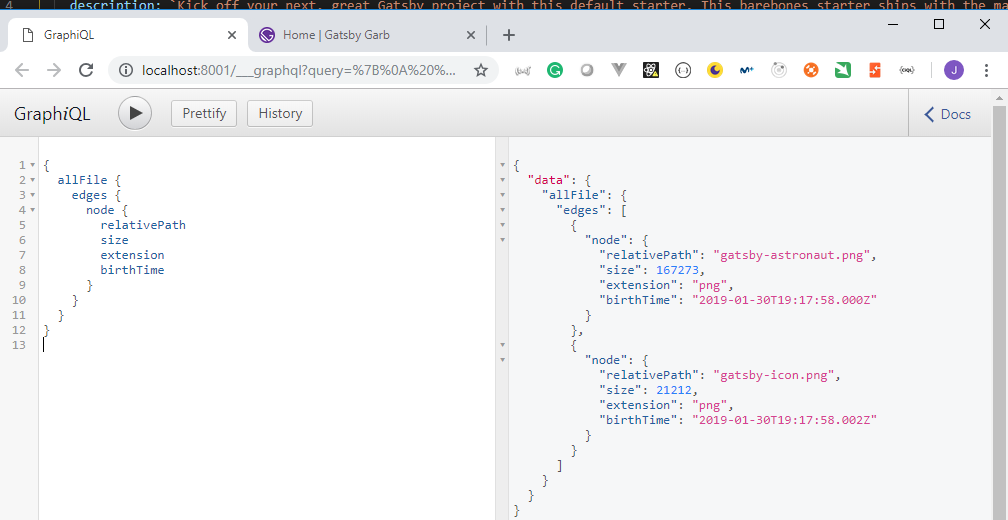
14. Querying for Filesystem Data with the gatsby-source-filesystem
- We cannot olny query from the metadata but for other sources as well. We can query data from the
file systemusing thegastby-source-filesystemsource.
gatsby-config.js
.
.
.
  plugins: [
    `gatsby-plugin-react-helmet`,
    {
      resolve: `gatsby-source-filesystem`,
      options: {
        name: `images`,
        path: `${__dirname}/src/images`,
      },
    },
.
.
.
.
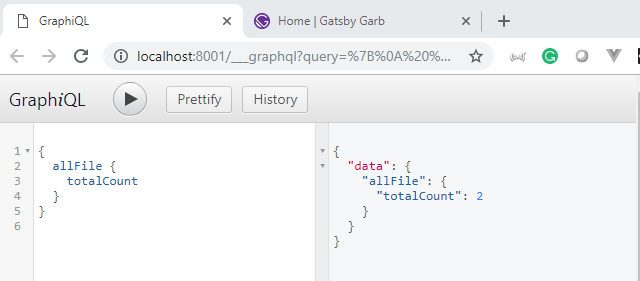
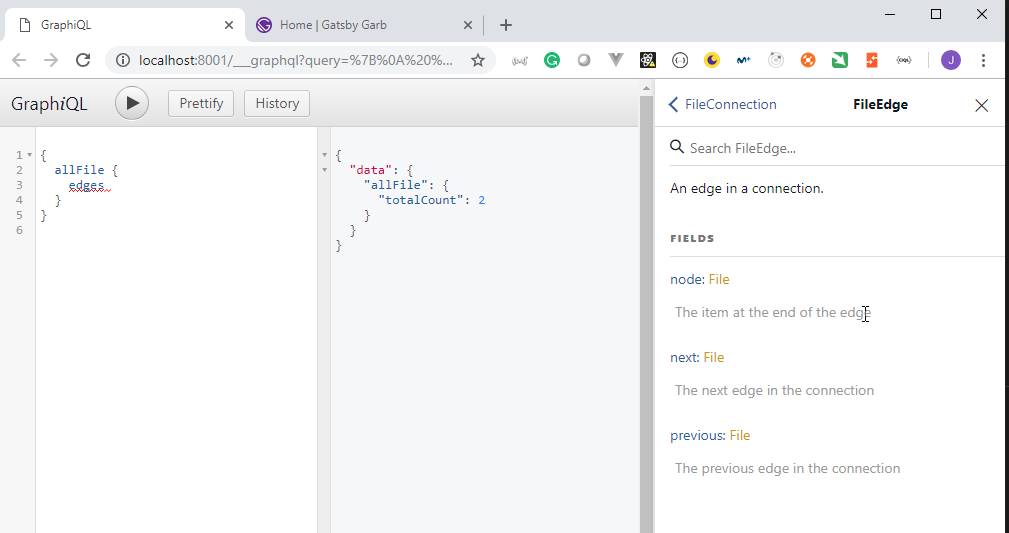
request
{
  allFile {
    edges {
      node {
        relativePath
        size
        extension
        birthTime
      }
    }
  }
}
response
{
  "data": {
    "allFile": {
      "edges": [
        {
          "node": {
            "relativePath": "gatsby-astronaut.png",
            "size": 167273,
            "extension": "png",
            "birthTime": "2019-01-30T19:17:58.000Z"
          }
        },
        {
          "node": {
            "relativePath": "gatsby-icon.png",
            "size": 21212,
            "extension": "png",
            "birthTime": "2019-01-30T19:17:58.002Z"
          }
        }
      ]
    }
  }
}
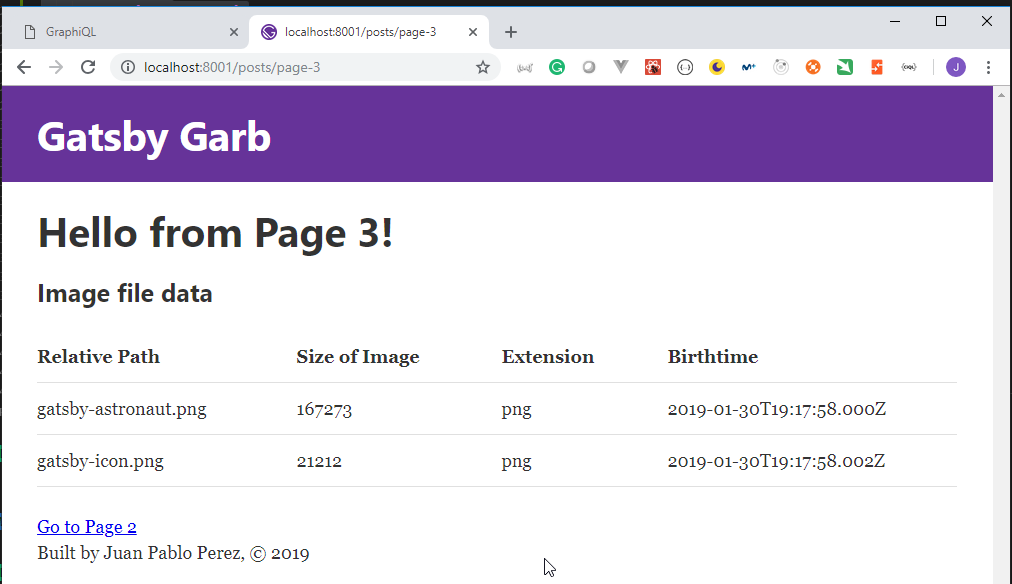
15. Executing Static Queries from Scratch
- Modify the
page-3.jsdocument to show information about the images
src -> pages -> posts -> page-3.js
import React from "react";
import { graphql, StaticQuery, Link } from "gatsby";
import Layout from "../../components/layout";

const getImageData = graphql`
  {
    allFile {
      edges {
        node {
          relativePath
          size
          extension
          birthTime
        }
      }
    }
  }
`;
export default () => (
  <Layout>
    <h1>Hello from Page 3!</h1>
    <h3>Image file data</h3>
    <StaticQuery
      query={getImageData}
      render={data => (
        <table>
          <thead>
            <tr>
              <th>Relative Path</th>
              <th>Size of Image</th>
              <th>Extension</th>
              <th>Birthtime</th>
            </tr>
          </thead>
          <tbody>
            {data.allFile.edges.map(({ node }, index) => (
              <tr key={index}>
                <td>{node.relativePath}</td>
                <td>{node.size}</td>
                <td>{node.extension}</td>
                <td>{node.birthTime}</td>
              </tr>
            ))}
          </tbody>
        </table>
      )}
    />
    <Link to="/page-2">Go to Page 2</Link>
  </Layout>
);
7. Transformer Plugins / Creating a Blog out of Markdown Files
16. Transformer Plugins / Using gatsby-transformer-remark to Transform Markdown
The
transformerplugin allows to get file data, like thesourceplugin, but it also allows us to transform it.We are going to use it to transform
Markdowndocument intoHtmldocuments.Install the
gatsby-transformer-remarkplugin
C:\Work\Training\Pre\Gatsby\gatsby-garb>npm i gatsby-transformer-remark

> sharp@0.21.3 install C:\Work\Training\Pre\Gatsby\gatsby-garb\node_modules\sharp
> (node install/libvips && node install/dll-copy && prebuild-install) || (node-gyp rebuild && node install/dll-copy)

info sharp Using cached C:\Users\juan.pablo.perez\AppData\Roaming\npm-cache\_libvips\libvips-8.7.0-win32-x64.tar.gz
info sharp Creating C:\Work\Training\Pre\Gatsby\gatsby-garb\node_modules\sharp\build\Release
info sharp Copying DLLs from C:\Work\Training\Pre\Gatsby\gatsby-garb\node_modules\sharp\vendor\lib to C:\Work\Training\Pre\Gatsby\gatsby-garb\node_modules\sharp\build\Release

> cwebp-bin@5.0.0 postinstall C:\Work\Training\Pre\Gatsby\gatsby-garb\node_modules\cwebp-bin
> node lib/install.js

  √ cwebp pre-build test passed successfully

> mozjpeg@6.0.1 postinstall C:\Work\Training\Pre\Gatsby\gatsby-garb\node_modules\mozjpeg
> node lib/install.js

  √ mozjpeg pre-build test passed successfully

> pngquant-bin@5.0.1 postinstall C:\Work\Training\Pre\Gatsby\gatsby-garb\node_modules\pngquant-bin
> node lib/install.js

  √ pngquant pre-build test passed successfully
npm WARN optional SKIPPING OPTIONAL DEPENDENCY: fsevents@1.2.4 (node_modules\fsevents):
npm WARN notsup SKIPPING OPTIONAL DEPENDENCY: Unsupported platform for fsevents@1.2.4: wanted {"os":"darwin","arch":"any"} (current: {"os":"win32","arch":"x64"})

+ gatsby-transformer-remark@2.2.4
added 1778 packages from 846 contributors, updated 143 packages and audited 25499 packages in 75.754s
found 0 vulnerabilities
- Modiy the
gatsby-config.jsto include the newplugin
gatsby-config.js
module.exports = {
  siteMetadata: {
    title: `Gatsby Garb`,
    description: `Kick off your next, great Gatsby project with this default starter. This barebones starter ships with the main Gatsby configuration files you might need.`,
    author: `Juan Pablo Perez`,
    createdAt: 2019
  },
  plugins: [
    `gatsby-plugin-react-helmet`,
    {
      resolve: `gatsby-source-filesystem`,
      options: {
        name: `images`,
        path: `${__dirname}/src/images`
      }
    },
    `gatsby-transformer-remark`,
    {
      resolve: `gatsby-source-filesystem`,
      options: {
        name: `pages`,
        path: `${__dirname}/src/pages`
      }
    },
    `gatsby-transformer-sharp`,
    `gatsby-plugin-sharp`,
    {
      resolve: `gatsby-plugin-manifest`,
      options: {
        name: `gatsby-starter-default`,
        short_name: `starter`,
        start_url: `/`,
        background_color: `#663399`,
        theme_color: `#663399`,
        display: `minimal-ui`,
        icon: `src/images/gatsby-icon.png` // This path is relative to the root of the site.
      }
    }
    // this (optional) plugin enables Progressive Web App + Offline functionality
    // To learn more, visit: https://gatsby.app/offline
    // 'gatsby-plugin-offline',
  ]
};
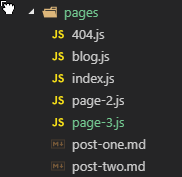
- Add the new
blog.jsdocument page (empty, at the moment)
src\pages\blog.js
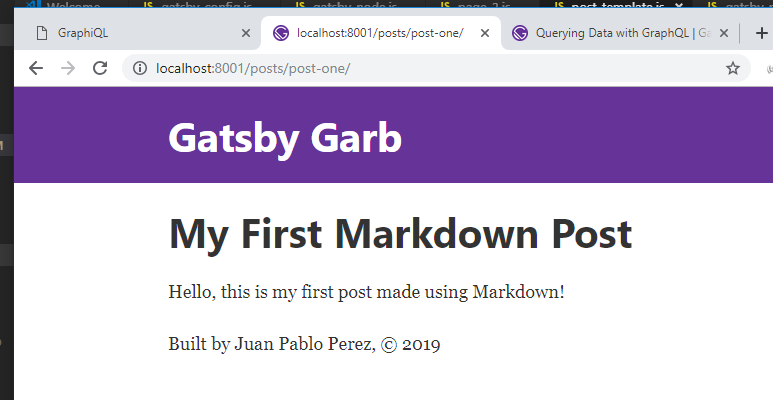
- Add the new
post-one.mdMarkdown file
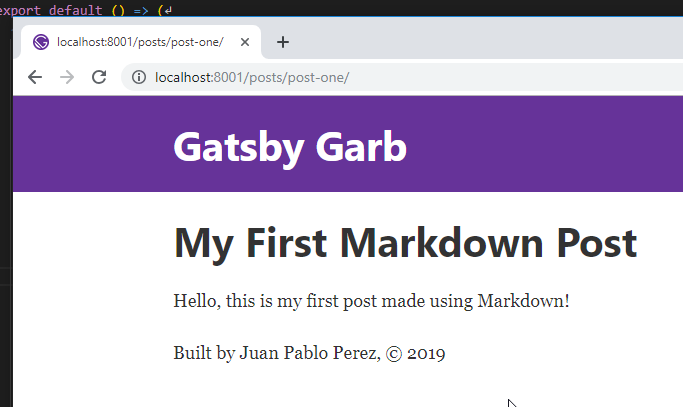
src\pages\post-one.md
---
title: "My First Markdown Post"
date: "2019-02-09"
---

Hello, this is my first post made using Markdown!
![]()
Request
{
  allMarkdownRemark {
    totalCount
  }
}
Response
{
  "data": {
    "allMarkdownRemark": {
      "totalCount": 1
    }
  }
}
Request
{
  allMarkdownRemark {
    edges {
      node {
        frontmatter {
          title
          date
        }
        html
      }
    }
  }
}
Response
{
  "data": {
    "allMarkdownRemark": {
      "edges": [
        {
          "node": {
            "frontmatter": {
              "title": "My First Markdown Post",
              "date": "2019-02-09"
            },
            "html": "<p>Hello, this is my first post made using Markdown!</p>"
          }
        }
      ]
    }
  }
}
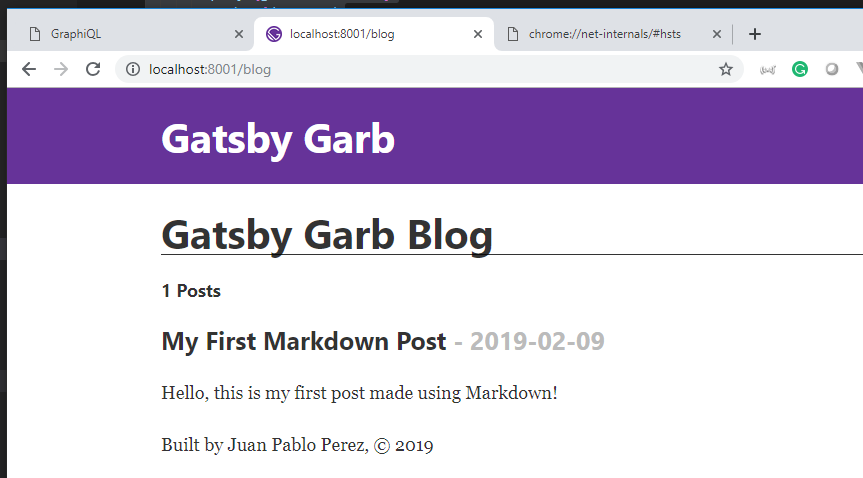
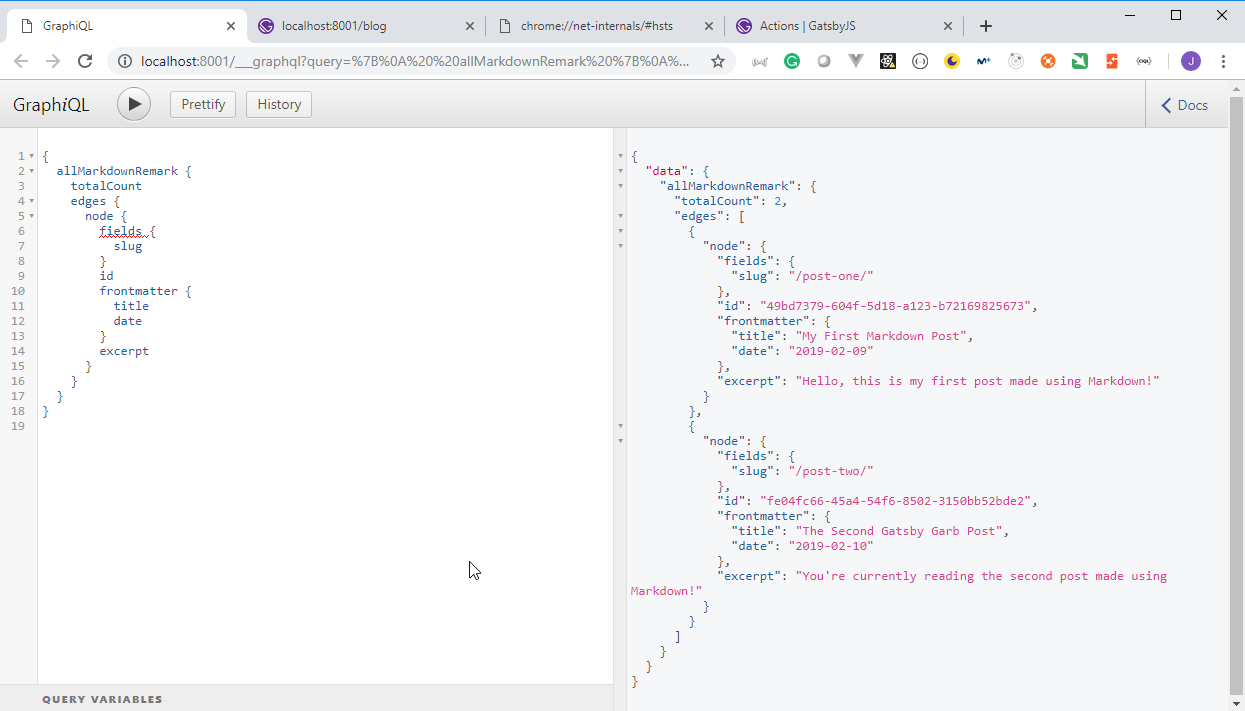
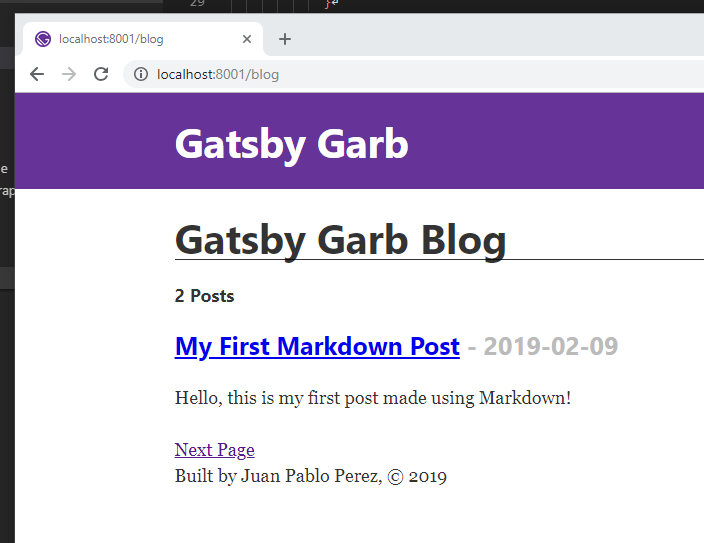
17. Displaying Preview of Markdown Posts in Blog Page
- We can use the
excerptfield to obatin a preview content.
Request
{
  allMarkdownRemark {
    totalCount
    edges {
      node {
        id
        frontmatter {
          title
          date
        }
        excerpt
      }
    }
  }
}
Response
{
  "data": {
    "allMarkdownRemark": {
      "totalCount": 1,
      "edges": [
        {
          "node": {
            "id": "49bd7379-604f-5d18-a123-b72169825673",
            "frontmatter": {
              "title": "My First Markdown Post",
              "date": "2019-02-09"
            },
            "excerpt": "Hello, this is my first post made using Markdown!"
          }
        }
      ]
    }
  }
}
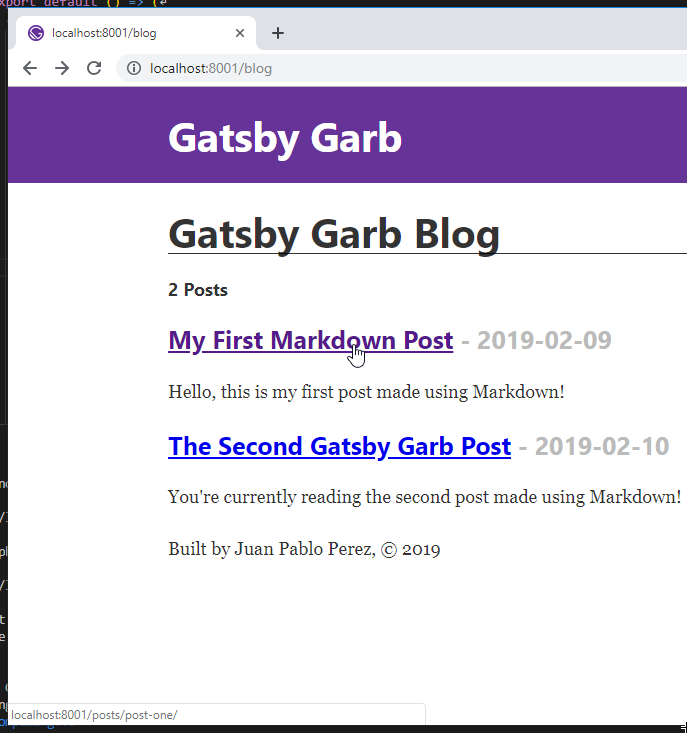
- Modify the
blog.jsdocument to include a preview of all the post Markdown documents
src\pages\blog.js
import React from "react";
import { StaticQuery, graphql } from "gatsby";

import Layout from "../components/layout";

const getMarkdownPosts = graphql`
  {
    allMarkdownRemark {
      totalCount
      edges {
        node {
          id
          frontmatter {
            title
            date
          }
          excerpt
        }
      }
    }
  }
`;

export default () => (
  <Layout>
    <div>
      <h1 style={{ display: "inlineBlock", borderBottom: "1px solid" }}>
        Gatsby Garb Blog
      </h1>
      <StaticQuery
        query={getMarkdownPosts}
        render={data => (
          <>
            <h4>{data.allMarkdownRemark.totalCount} Posts</h4>
            {data.allMarkdownRemark.edges.map(({ node }) => (
              <div key={node.id}>
                <h3>
                  {node.frontmatter.title}{" "}
                  <span style={{ color: "#bbb" }}>
                    - {node.frontmatter.date}
                  </span>
                </h3>
                <p>{node.excerpt}</p>
              </div>
            ))}
          </>
        )}
      />
    </div>
  </Layout>
);
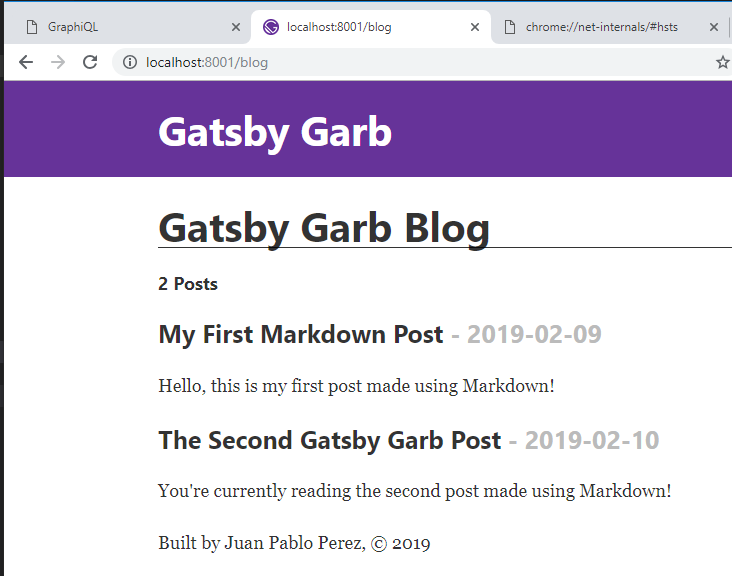
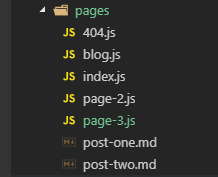
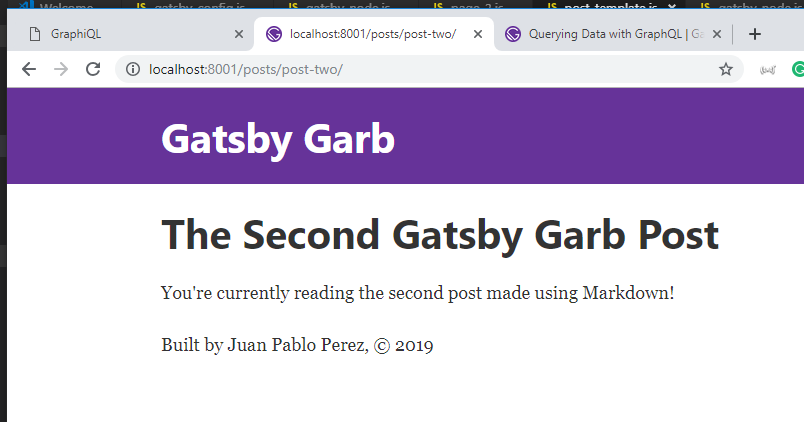
- We can add a second
Markdownpost document
src\pages\post-two.md
---
title: "The Second Gatsby Garb Post"
date: "2019-02-10"
---

You're currently reading the second post made using Markdown!
 DisplayingPreviewOfMarkdownPostsInBlogPage3
DisplayingPreviewOfMarkdownPostsInBlogPage4
DisplayingPreviewOfMarkdownPostsInBlogPage3
DisplayingPreviewOfMarkdownPostsInBlogPage4
8. Programmatically Creating Pages with Gatsby
18. Programmatically Creating Slugs for Blog Posts with gatsby-node
The
gastby-node.jsdocument allows us to create pages programatically.We are going to use
OnCreateNode
Called when a new node is created. Plugins wishing to extend or transform nodes created by other plugins should implement this API.
Example
exports.onCreateNode = ({ node, actions }) => {
  const { createNode, createNodeField } = actions;
  // Transform the new node here and create a new node or
  // create a new node field.
};
- We need to modify
gastby-node.jsto allow us to manage the use ofonCreateNode.
gastby-node.js
const { createFilePath } = require("gatsby-source-filesystem");

exports.onCreateNode = ({ node, getNode, actions }) => {
  const { createNodeField } = actions;

  if (node.internal.type === "MarkdownRemark") {
    const slug = createFilePath({ node, getNode, basepath: "posts" });
    createNodeField({
      node,
      name: "slug",
      value: slug
    });
  }
};
- We can now query the new
slugfield created.
Request
{
  allMarkdownRemark {
    totalCount
    edges {
      node {
        fields {
          slug
        }
        id
        frontmatter {
          title
          date
        }
        excerpt
      }
    }
  }
}
Response
{
  "data": {
    "allMarkdownRemark": {
      "totalCount": 2,
      "edges": [
        {
          "node": {
            "fields": {
              "slug": "/post-one/"
            },
            "id": "49bd7379-604f-5d18-a123-b72169825673",
            "frontmatter": {
              "title": "My First Markdown Post",
              "date": "2019-02-09"
            },
            "excerpt": "Hello, this is my first post made using Markdown!"
          }
        },
        {
          "node": {
            "fields": {
              "slug": "/post-two/"
            },
            "id": "fe04fc66-45a4-54f6-8502-3150bb52bde2",
            "frontmatter": {
              "title": "The Second Gatsby Garb Post",
              "date": "2019-02-10"
            },
            "excerpt": "You're currently reading the second post made using Markdown!"
          }
        }
      ]
    }
  }
}
19. Programmatically Creating Pages with gatsby-node
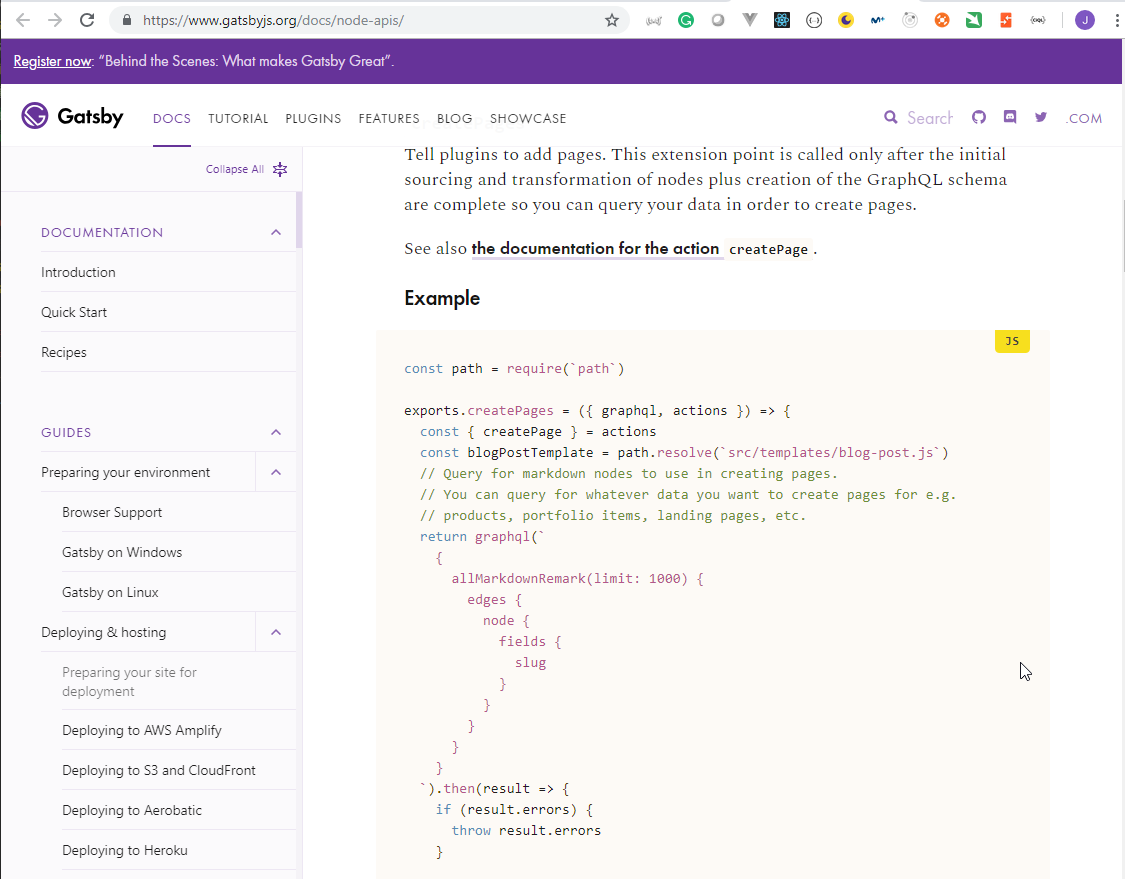
- We are going to query our page data with GraphQL and generate individual html pages from the Markdown documents. In order to do this we are going to use another function called
createPages.
Tell plugins to add pages. This extension point is called only after the initial sourcing and transformation of nodes plus creation of the GraphQL schema are complete so you can query your data in order to create pages.
Example
const path = require(`path`);

exports.createPages = ({ graphql, actions }) => {
  const { createPage } = actions;
  const blogPostTemplate = path.resolve(`src/templates/blog-post.js`);
  // Query for markdown nodes to use in creating pages.
  // You can query for whatever data you want to create pages for e.g.
  // products, portfolio items, landing pages, etc.
  return graphql(`
    {
      allMarkdownRemark(limit: 1000) {
        edges {
          node {
            fields {
              slug
            }
          }
        }
      }
    }
  `).then(result => {
    if (result.errors) {
      throw result.errors;
    }

    // Create blog post pages.
    result.data.allMarkdownRemark.edges.forEach(edge => {
      createPage({
        // Path for this page — required
        path: `${edge.node.fields.slug}`,
        component: blogPostTemplate,
        context: {
          // Add optional context data to be inserted
          // as props into the page component..
          //
          // The context data can also be used as
          // arguments to the page GraphQL query.
          //
          // The page "path" is always available as a GraphQL
          // argument.
        }
      });
    });
  });
};
- We need to modify
gastby-node.jsto allow us to manage the use ofcreatePagesusing the following query:
Request
{
  allMarkdownRemark {
    edges {
      node {
        fields {
          slug
        }
      }
    }
  }
}
Response
{
  "data": {
    "allMarkdownRemark": {
      "edges": [
        {
          "node": {
            "fields": {
              "slug": "/post-one/"
            }
          }
        },
        {
          "node": {
            "fields": {
              "slug": "/post-two/"
            }
          }
        }
      ]
    }
  }
}
- Before modifying the
gastby-node.jsdocument we neeed to create a template (ReactJs component) used to create the pages. A newtemplatesfolder must be created and inside it we need to create thepost-template.jsdocument.
templates/post-template.js
import React from "react";

import Layout from "../components/layout";

export default () => (
  <Layout>
    <h2>Programmatically created blog post!</h2>
  </Layout>
);
gastby-node.js
const path = require("path");
const { createFilePath } = require("gatsby-source-filesystem");

const PostTemplate = path.resolve("./src/templates/post-template.js");

exports.onCreateNode = ({ node, getNode, actions }) => {
  const { createNodeField } = actions;

  if (node.internal.type === "MarkdownRemark") {
    const slug = createFilePath({ node, getNode, basepath: "posts" });
    createNodeField({
      node,
      name: "slug",
      value: slug
    });
  }
};

exports.createPages = async ({ graphql, actions }) => {
  const { createPage } = actions;
  const result = await graphql(`
    {
      allMarkdownRemark {
        edges {
          node {
            fields {
              slug
            }
          }
        }
      }
    }
  `);
  const posts = result.data.allMarkdownRemark.edges;

  posts.forEach(({ node: post }) => {
    createPage({
      path: `posts${post.fields.slug}`,
      component: PostTemplate,
      context: {
        slug: post.fields.slug
      }
    });
  });
};
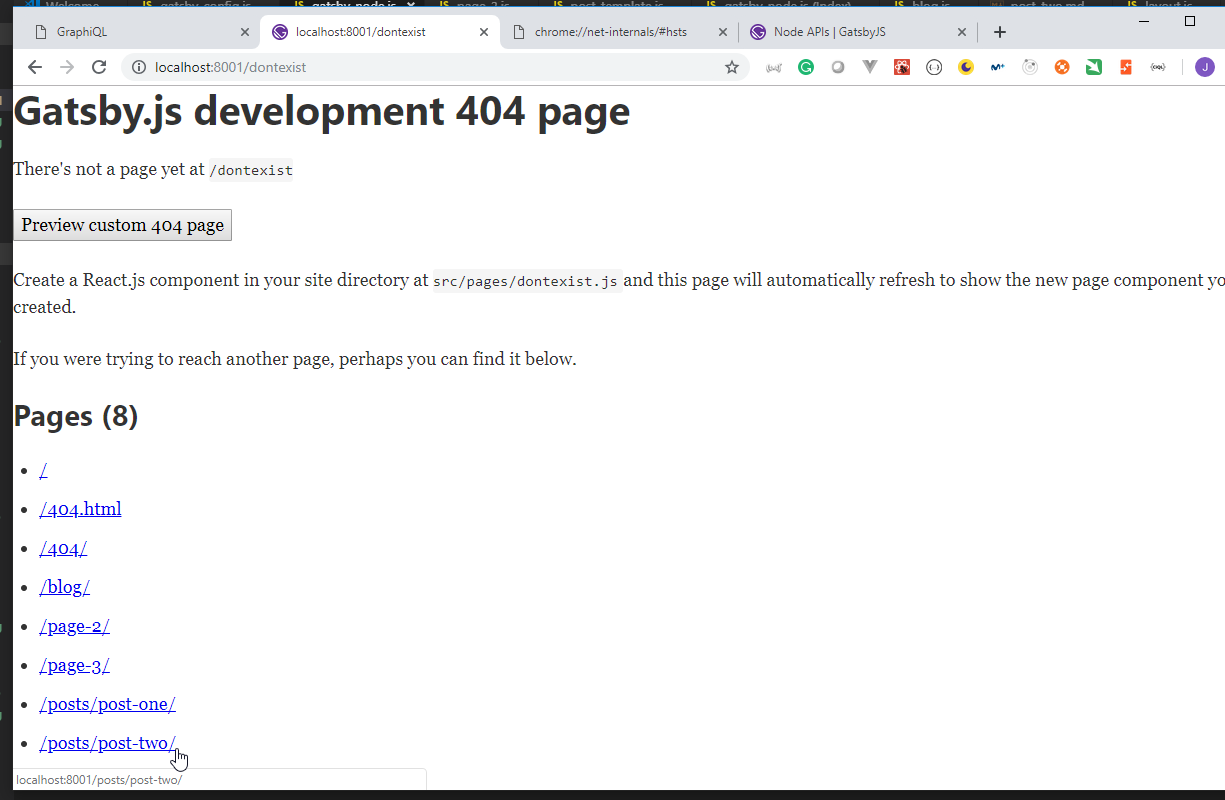
- Move
page-3.jsout of thepostsfolder to thepagesfolder and then remove thepostsfolder.
- After restarting the node server we can see that even though there is no
postfolder created it is created dinamically byGatsby.

9. GraphQL Arguments, Variables, and Page Queries
20. Using GraphQL Arguments and Variables to Get Individual Posts
- We can use the
markdownRemarkGraphQL funtion to get information about an individual post.
Request
{
  markdownRemark(fields: { slug: { eq: "/post-two/" } }) {
    html
    frontmatter {
      title
    }
  }
}
Response
{
  "data": {
    "markdownRemark": {
      "html": "<p>You're currently reading the second post made using Markdown!</p>",
      "frontmatter": {
        "title": "The Second Gatsby Garb Post"
      }
    }
  }
}
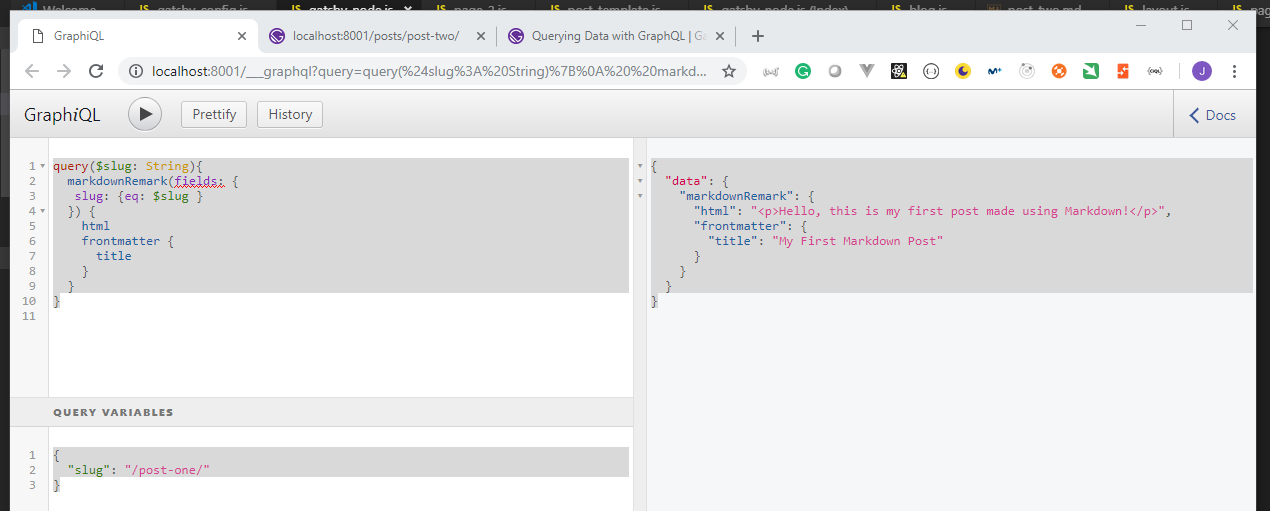
- We can use the
querygraphQL command to query using variables
Request
query($slug: String) {
  markdownRemark(fields: { slug: { eq: $slug } }) {
    html
    frontmatter {
      title
    }
  }
}
Query variables
{
  "slug": "/post-one/"
}
Response
{
  "data": {
    "markdownRemark": {
      "html": "<p>Hello, this is my first post made using Markdown!</p>",
      "frontmatter": {
        "title": "My First Markdown Post"
      }
    }
  }
}
21. Fetching Individual Post Data by Slug with Page Queries
- Modify the
post-template.jstemplate document to properly generate thehtmlpages.
src/templates/post-template.js
import React from "react";
import { graphql } from "gatsby";

import Layout from "../components/layout";

const PostTemplate = ({ data: post }) => (
  <Layout>
    <h1>{post.markdownRemark.frontmatter.title}</h1>
    <div dangerouslySetInnerHTML={{ __html: post.markdownRemark.html }} />
  </Layout>
);

// This will be rendered and sent to the `data` parameter
export const query = graphql`
  query($slug: String) {
    markdownRemark(fields: { slug: { eq: $slug } }) {
      html
      frontmatter {
        title
      }
    }
  }
`;

export default PostTemplate;
10. Pagination in Gatsby
22. Links to Blog Posts / Programmatically Creating Blog Pages
- Modify the
blog.jsdocument to include the link using thefields/slugfield.
pages\blog.js
import React from "react";
import { StaticQuery, graphql, Link } from "gatsby";

import Layout from "../components/layout";

const getMarkdownPosts = graphql`
  {
    allMarkdownRemark {
      totalCount
      edges {
        node {
          fields {
            slug
          }
          id
          frontmatter {
            title
            date
          }
          excerpt
        }
      }
    }
  }
`;

export default () => (
  <Layout>
    <div>
      <h1 style={{ display: "inlineBlock", borderBottom: "1px solid" }}>
        Gatsby Garb Blog
      </h1>
      <StaticQuery
        query={getMarkdownPosts}
        render={data => (
          <>
            <h4>{data.allMarkdownRemark.totalCount} Posts</h4>
            {data.allMarkdownRemark.edges.map(({ node }) => (
              <div key={node.id}>
                <h3>
                  <Link to={`/post${node.fields.slug}`}>
                    {node.frontmatter.title}
                  </Link>{" "}
                  <span style={{ color: "#bbb" }}>
                    - {node.frontmatter.date}
                  </span>
                </h3>
                <p>{node.excerpt}</p>
              </div>
            ))}
          </>
        )}
      />
    </div>
  </Layout>
);
- Move
pages\blog.jstotemplates\blog_template.js
- Modify the
gatsby-node.jsdocument to include pagination of the Blogs.
gatsby-node.js
const path = require("path");
const { createFilePath } = require("gatsby-source-filesystem");

const PostTemplate = path.resolve("./src/templates/post-template.js");
const BlogTemplate = path.resolve("./src/templates/blog-template.js");

exports.onCreateNode = ({ node, getNode, actions }) => {
  const { createNodeField } = actions;

  if (node.internal.type === "MarkdownRemark") {
    const slug = createFilePath({ node, getNode, basepath: "posts" });
    createNodeField({
      node,
      name: "slug",
      value: slug
    });
  }
};

exports.createPages = async ({ graphql, actions }) => {
  const { createPage } = actions;
  const result = await graphql(`
    {
      allMarkdownRemark {
        edges {
          node {
            fields {
              slug
            }
          }
        }
      }
    }
  `);
  const posts = result.data.allMarkdownRemark.edges;

  posts.forEach(({ node: post }) => {
    createPage({
      path: `posts${post.fields.slug}`,
      component: PostTemplate,
      context: {
        slug: post.fields.slug
      }
    });
  });

  posts.forEach((_, index, postArr) => {
    const totalPages = postArr.length;
    const postsPerPage = 1;
    const currentPage = index + 1;
    const isFirstPage = index === 0;
    const isLastPage = currentPage === totalPages;
    createPage({
      path: isFirstPage ? "/blog/" : `blog/${currentPage}`,
      component: BlogTemplate,
      context: {
        limit: postsPerPage,
        skip: index * postsPerPage,
        isFirstPage,
        isLastPage,
        currentPage,
        totalPages
      }
    });
  });
};
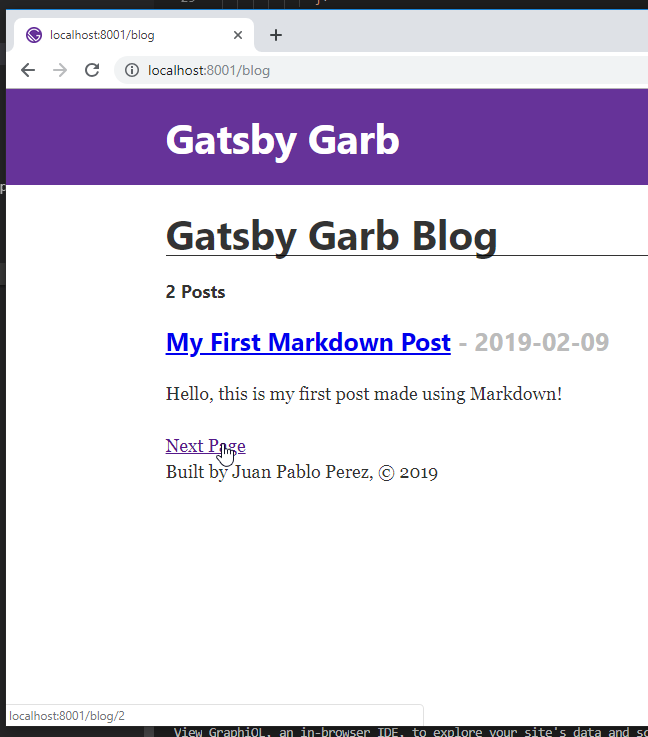
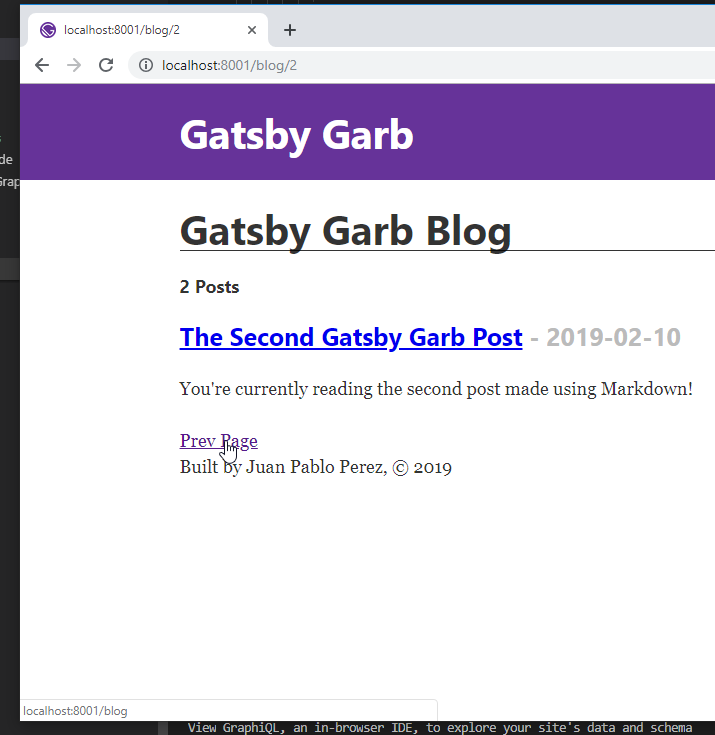
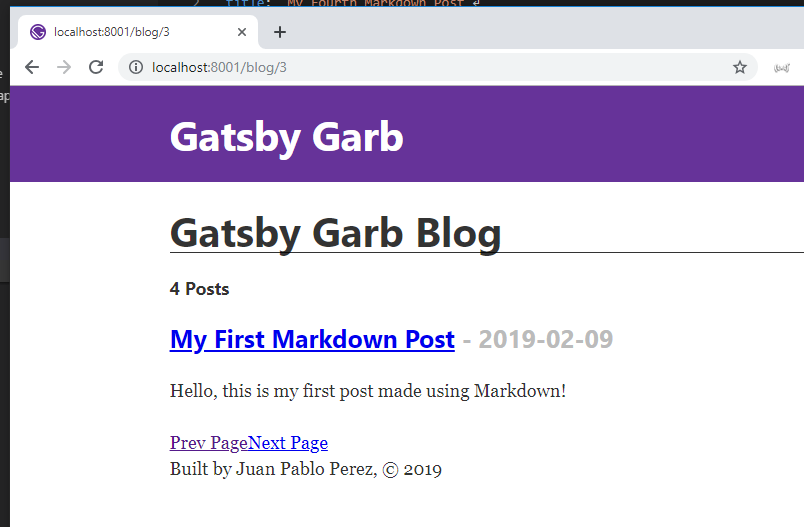
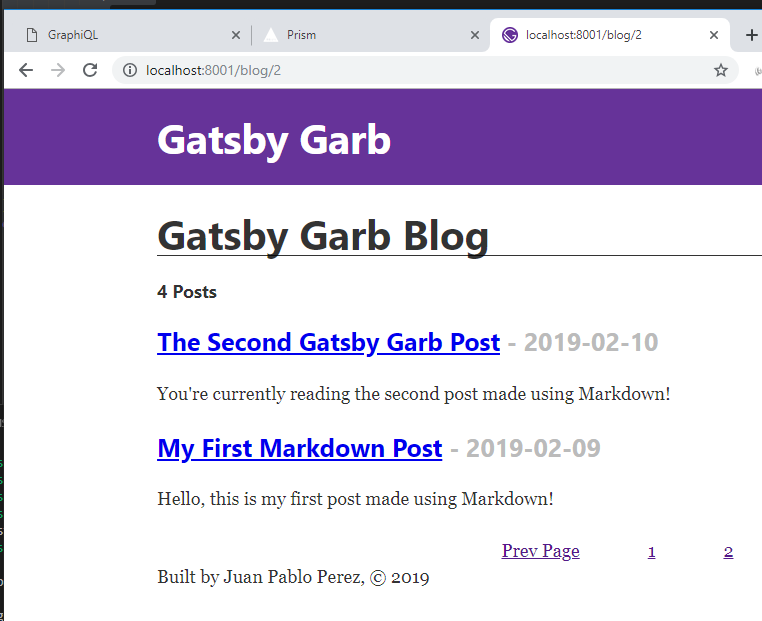
23. Adding Pagination with Prev Page / Next Page Links
- Update the
blog_template.jsto include and use the new fields added.
templates\blog_template.js
import React from "react";
import { graphql, Link } from "gatsby";

import Layout from "../components/layout";

export default ({ data, pageContext }) => {
  const { currentPage, isFirstPage, isLastPage } = pageContext;
  const nextPage = `/blog/${String(currentPage + 1)}`;
  const prevPage =
    currentPage - 1 === 1 ? "/blog" : `/blog/${String(currentPage - 1)}`;
  return (
    <Layout>
      <div>
        <h1 style={{ display: "inlineBlock", borderBottom: "1px solid" }}>
          Gatsby Garb Blog
        </h1>
        <h4>{data.allMarkdownRemark.totalCount} Posts</h4>
        {data.allMarkdownRemark.edges.map(({ node }) => (
          <div key={node.id}>
            <h3>
              <Link to={`/posts${node.fields.slug}`}>
                {node.frontmatter.title}
              </Link>{" "}
              <span style={{ color: "#bbb" }}>- {node.frontmatter.date}</span>
            </h3>
            <p>{node.excerpt}</p>
          </div>
        ))}
        {/* Pagination Links */}
        <div>
          {!isFirstPage && (
            <Link to={prevPage} rel="prev">
              Prev Page
            </Link>
          )}
          {!isLastPage && (
            <Link to={nextPage} rel="next">
              Next Page
            </Link>
          )}
        </div>
      </div>
    </Layout>
  );
};
export const query = graphql`
  query($skip: Int!, $limit: Int!) {
    allMarkdownRemark(skip: $skip, limit: $limit) {
      totalCount
      edges {
        node {
          fields {
            slug
          }
          id
          frontmatter {
            title
            date
          }
          excerpt
        }
      }
    }
  }
`;
24. Adding Numbered Pagination
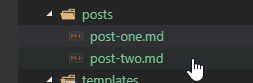
- Move all the posts to the new
postsfolder

- We need to modify the
gatsby-transformer-remarkplugin to point at thepostsfolder in thegastby-config.jsdocument.gastby-config.js
module.exports = {
  siteMetadata: {
    title: `Gatsby Garb`,
    description: `Kick off your next, great Gatsby project with this default starter. This barebones starter ships with the main Gatsby configuration files you might need.`,
    author: `Juan Pablo Perez`,
    createdAt: 2019
  },
  plugins: [
    `gatsby-plugin-react-helmet`,
    {
      resolve: `gatsby-source-filesystem`,
      options: {
        name: `images`,
        path: `${__dirname}/src/images`
      }
    },
    `gatsby-transformer-remark`,
    {
      resolve: `gatsby-source-filesystem`,
      options: {
        name: `posts`,
        path: `${__dirname}/src/posts`
      }
    },
    `gatsby-transformer-sharp`,
    `gatsby-plugin-sharp`,
    {
      resolve: `gatsby-plugin-manifest`,
      options: {
        name: `gatsby-starter-default`,
        short_name: `starter`,
        start_url: `/`,
        background_color: `#663399`,
        theme_color: `#663399`,
        display: `minimal-ui`,
        icon: `src/images/gatsby-icon.png` // This path is relative to the root of the site.
      }
    }
    // this (optional) plugin enables Progressive Web App + Offline functionality
    // To learn more, visit: https://gatsby.app/offline
    // 'gatsby-plugin-offline',
  ]
};
- Create two new posts
post-three.md
---
title: "Third Gatsby Garb Post"
date: "2019-02-13"
---

Hello, this is my third post so far!
post-four.md
---
title: "My Fourth Markdown Post"
date: "2019-02-14"
---

Hello, this is my fourth post made using Markdown and I'm getting practice!
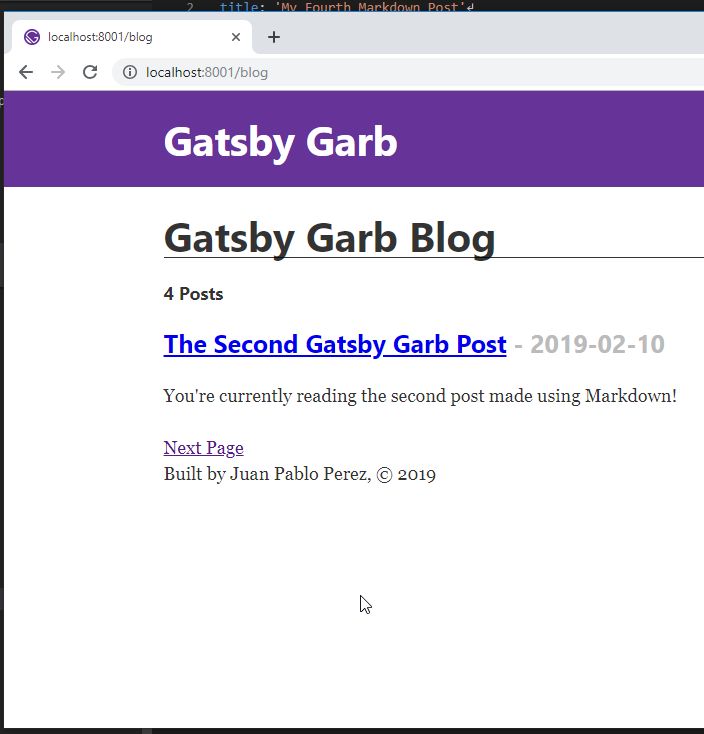
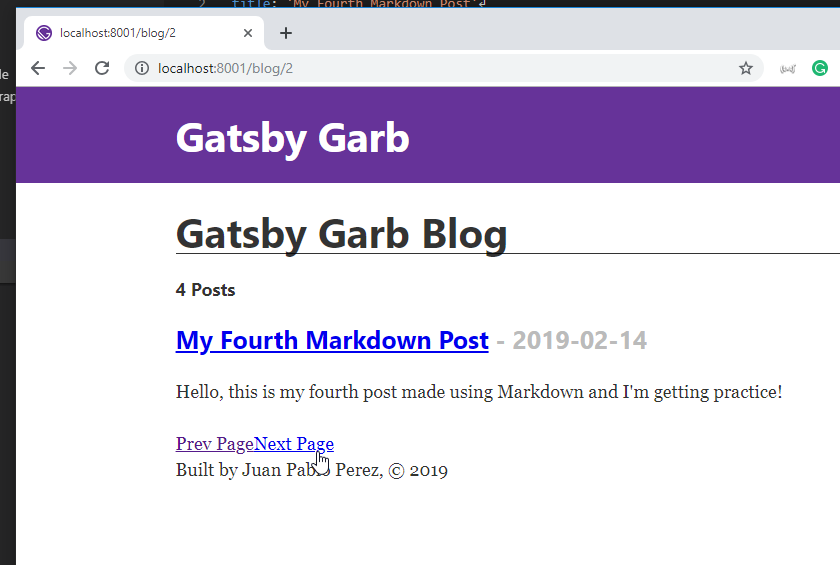

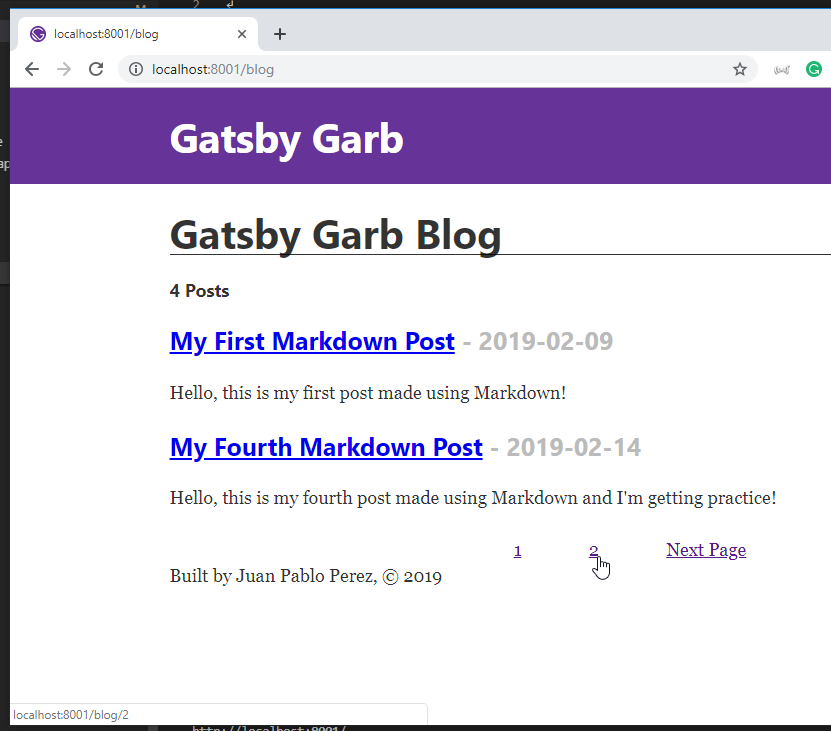
- Modify the
blog-template.jsdocument to include the number of each page.
templates\blog_template.js
import React from "react";
import { graphql, Link } from "gatsby";

import Layout from "../components/layout";

export default ({ data, pageContext }) => {
  const { currentPage, isFirstPage, isLastPage, totalPages } = pageContext;
  const nextPage = `/blog/${String(currentPage + 1)}`;
  const prevPage =
    currentPage - 1 === 1 ? "/blog" : `/blog/${String(currentPage - 1)}`;
  return (
    <Layout>
      <div>
        <h1 style={{ display: "inlineBlock", borderBottom: "1px solid" }}>
          Gatsby Garb Blog
        </h1>
        <h4>{data.allMarkdownRemark.totalCount} Posts</h4>
        {data.allMarkdownRemark.edges.map(({ node }) => (
          <div key={node.id}>
            <h3>
              <Link to={`/posts${node.fields.slug}`}>
                {node.frontmatter.title}
              </Link>{" "}
              <span style={{ color: "#bbb" }}>- {node.frontmatter.date}</span>
            </h3>
            <p>{node.excerpt}</p>
          </div>
        ))}
        {/* Pagination Links */}
        <div>
          {!isFirstPage && (
            <Link to={prevPage} rel="prev">
              Prev Page
            </Link>
          )}
          {Array.from({ length: totalPages }, (_, index) => (
            <Link key={index} to={`/blog/${index === 0 ? "" : index + 1}`}>
              {index + 1}
            </Link>
          ))}
          {!isLastPage && (
            <Link to={nextPage} rel="next">
              Next Page
            </Link>
          )}
        </div>
      </div>
    </Layout>
  );
};
export const query = graphql`
  query($skip: Int!, $limit: Int!) {
    allMarkdownRemark(skip: $skip, limit: $limit) {
      totalCount
      edges {
        node {
          fields {
            slug
          }
          id
          frontmatter {
            title
            date
          }
          excerpt
        }
      }
    }
  }
`;
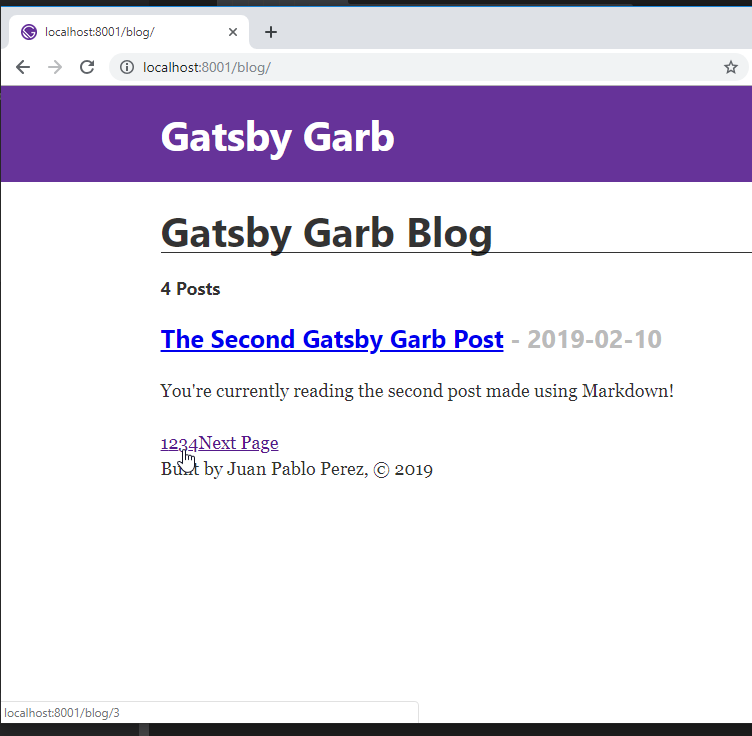
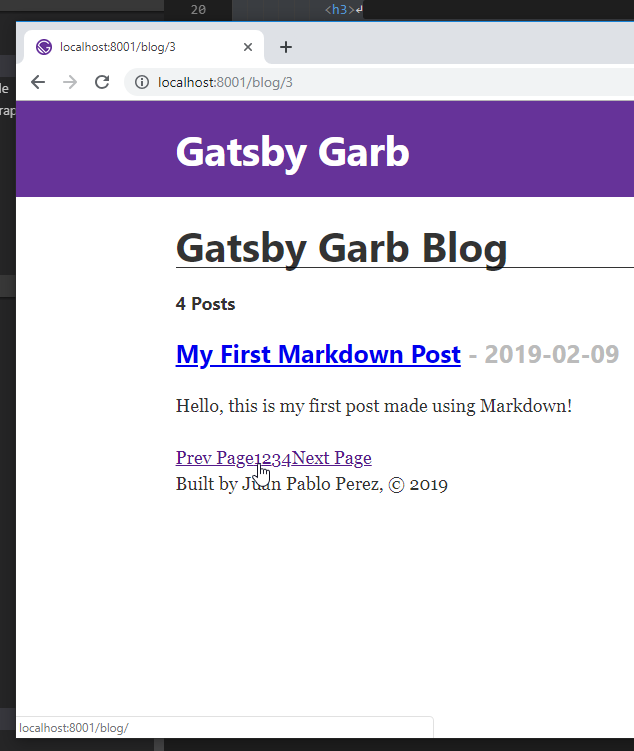
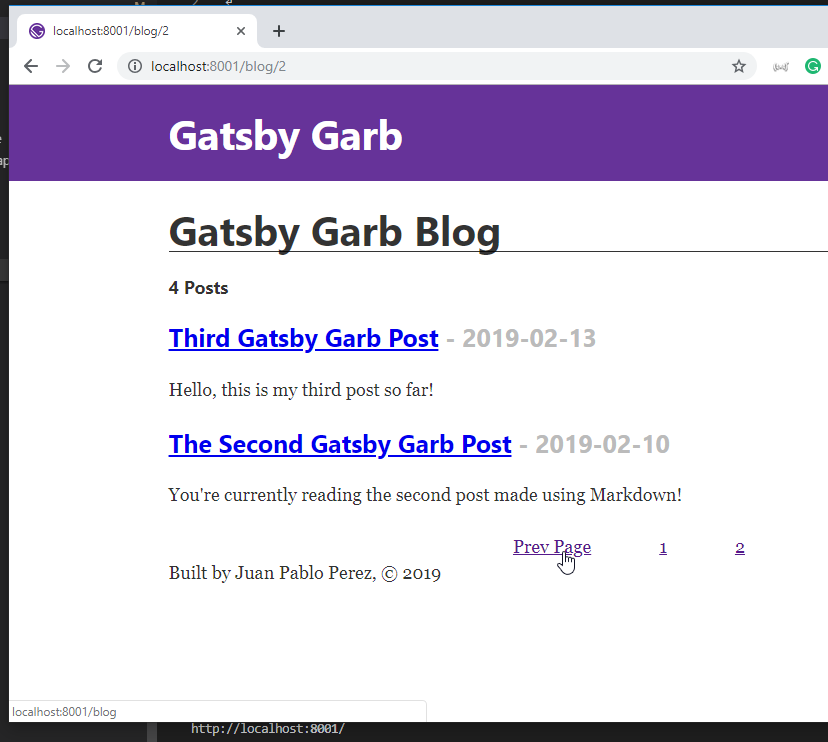
- We are going to format the pagination
templates\blog_template.js
import React from "react";
import { graphql, Link } from "gatsby";

import Layout from "../components/layout";

export default ({ data, pageContext }) => {
  const { currentPage, isFirstPage, isLastPage, totalPages } = pageContext;
  const nextPage = `/blog/${String(currentPage + 1)}`;
  const prevPage =
    currentPage - 1 === 1 ? "/blog" : `/blog/${String(currentPage - 1)}`;
  return (
    <Layout>
      <div>
        <h1 style={{ display: "inlineBlock", borderBottom: "1px solid" }}>
          Gatsby Garb Blog
        </h1>
        <h4>{data.allMarkdownRemark.totalCount} Posts</h4>
        {data.allMarkdownRemark.edges.map(({ node }) => (
          <div key={node.id}>
            <h3>
              <Link to={`/posts${node.fields.slug}`}>
                {node.frontmatter.title}
              </Link>{" "}
              <span style={{ color: "#bbb" }}>- {node.frontmatter.date}</span>
            </h3>
            <p>{node.excerpt}</p>
          </div>
        ))}
        {/* Pagination Links */}
        <div
          style={{
            display: "flex",
            alignItems: "center",
            justifyContent: "space-around",
            maxWidth: 300,
            margin: "0 auto"
          }}
        >
          {!isFirstPage && (
            <Link to={prevPage} rel="prev">
              Prev Page
            </Link>
          )}
          {Array.from({ length: totalPages }, (_, index) => (
            <Link key={index} to={`/blog/${index === 0 ? "" : index + 1}`}>
              {index + 1}
            </Link>
          ))}
          {!isLastPage && (
            <Link to={nextPage} rel="next">
              Next Page
            </Link>
          )}
        </div>
      </div>
    </Layout>
  );
};
export const query = graphql`
  query($skip: Int!, $limit: Int!) {
    allMarkdownRemark(skip: $skip, limit: $limit) {
      totalCount
      edges {
        node {
          fields {
            slug
          }
          id
          frontmatter {
            title
            date
          }
          excerpt
        }
      }
    }
  }
`;
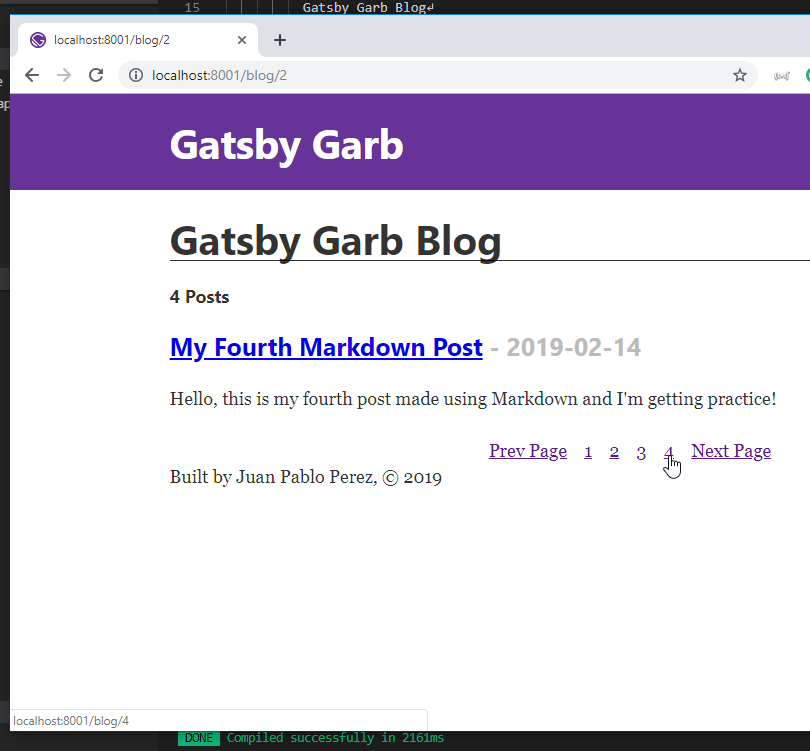
- We need to modify the
gatsby-node.jsto make the number of posts per page configurable.
gatsby-node.js
const path = require("path");
const { createFilePath } = require("gatsby-source-filesystem");

const PostTemplate = path.resolve("./src/templates/post-template.js");
const BlogTemplate = path.resolve("./src/templates/blog-template.js");

exports.onCreateNode = ({ node, getNode, actions }) => {
  const { createNodeField } = actions;

  if (node.internal.type === "MarkdownRemark") {
    const slug = createFilePath({ node, getNode, basepath: "posts" });
    createNodeField({
      node,
      name: "slug",
      value: slug
    });
  }
};

exports.createPages = async ({ graphql, actions }) => {
  const { createPage } = actions;
  const result = await graphql(`
    {
      allMarkdownRemark {
        edges {
          node {
            fields {
              slug
            }
          }
        }
      }
    }
  `);
  const posts = result.data.allMarkdownRemark.edges;

  posts.forEach(({ node: post }) => {
    createPage({
      path: `posts${post.fields.slug}`,
      component: PostTemplate,
      context: {
        slug: post.fields.slug
      }
    });
  });

  const postsPerPage = 2;
  const totalPages = Math.ceil(posts.length / postsPerPage);

  Array.from({ length: totalPages }).forEach((_, index) => {
    const currentPage = index + 1;
    const isFirstPage = index === 0;
    const isLastPage = currentPage === totalPages;
    createPage({
      path: isFirstPage ? "/blog/" : `blog/${currentPage}`,
      component: BlogTemplate,
      context: {
        limit: postsPerPage,
        skip: index * postsPerPage,
        isFirstPage,
        isLastPage,
        currentPage,
        totalPages
      }
    });
  });
};
11. Sorting and Filtering with GraphQL Queries / Formatting Dates and Text
25. Sorting, Filtering, Limiting, Skipping w/ GraphQL Arguments / Listing Blog Posts
Query using skip and limit.
{
  allMarkdownRemark(limit: 2, skip: 1) {
    totalCount
    edges {
      node {
        id
        frontmatter {
          title
          date
        }
        excerpt
      }
    }
  }
}
Response
{
  "data": {
    "allMarkdownRemark": {
      "totalCount": 4,
      "edges": [
        {
          "node": {
            "id": "683d1527-5d01-5c36-8f4a-900b528c9473",
            "frontmatter": {
              "title": "My Fourth Markdown Post",
              "date": "2019-02-14"
            },
            "excerpt": "Hello, this is my fourth post made using Markdown and I'm getting practice!"
          }
        },
        {
          "node": {
            "id": "d4004257-d250-5042-8af4-618d9114a084",
            "frontmatter": {
              "title": "Third Gatsby Garb Post",
              "date": "2019-02-13"
            },
            "excerpt": "Hello, this is my third post so far!"
          }
        }
      ]
    }
  }
}
Query using filter.
{
  allMarkdownRemark(
    filter: { frontmatter: { title: { eq: "My Fourth Markdown Post" } } }
  ) {
    totalCount
    edges {
      node {
        id
        frontmatter {
          title
          date
        }
        excerpt
      }
    }
  }
}
Response
{
  "data": {
    "allMarkdownRemark": {
      "totalCount": 1,
      "edges": [
        {
          "node": {
            "id": "683d1527-5d01-5c36-8f4a-900b528c9473",
            "frontmatter": {
              "title": "My Fourth Markdown Post",
              "date": "2019-02-14"
            },
            "excerpt": "Hello, this is my fourth post made using Markdown and I'm getting practice!"
          }
        }
      ]
    }
  }
}
Query using filter with nin.
{
  allMarkdownRemark(
    filter: {
      frontmatter: {
        title: { nin: ["My Fourth Markdown Post", "Third Gatsby Garb Post"] }
      }
    }
  ) {
    totalCount
    edges {
      node {
        id
        frontmatter {
          title
          date
        }
        excerpt
      }
    }
  }
}
Response
{
  "data": {
    "allMarkdownRemark": {
      "totalCount": 2,
      "edges": [
        {
          "node": {
            "id": "ac80ba83-9ee3-51dc-9ceb-c602bc97302a",
            "frontmatter": {
              "title": "My First Markdown Post",
              "date": "2019-02-09"
            },
            "excerpt": "Hello, this is my first post made using Markdown!"
          }
        },
        {
          "node": {
            "id": "2cbc3788-9a75-5571-9ee1-25664101c806",
            "frontmatter": {
              "title": "The Second Gatsby Garb Post",
              "date": "2019-02-10"
            },
            "excerpt": "You're currently reading the second post made using Markdown!"
          }
        }
      ]
    }
  }
}
Query using sort.
{
  allMarkdownRemark(sort: { fields: [frontmatter___date], order: DESC }) {
    totalCount
    edges {
      node {
        id
        frontmatter {
          title
          date
        }
        excerpt
      }
    }
  }
}
Response
{
  "data": {
    "allMarkdownRemark": {
      "totalCount": 4,
      "edges": [
        {
          "node": {
            "id": "683d1527-5d01-5c36-8f4a-900b528c9473",
            "frontmatter": {
              "title": "My Fourth Markdown Post",
              "date": "2019-02-14"
            },
            "excerpt": "Hello, this is my fourth post made using Markdown and I'm getting practice!"
          }
        },
        {
          "node": {
            "id": "d4004257-d250-5042-8af4-618d9114a084",
            "frontmatter": {
              "title": "Third Gatsby Garb Post",
              "date": "2019-02-13"
            },
            "excerpt": "Hello, this is my third post so far!"
          }
        },
        {
          "node": {
            "id": "2cbc3788-9a75-5571-9ee1-25664101c806",
            "frontmatter": {
              "title": "The Second Gatsby Garb Post",
              "date": "2019-02-10"
            },
            "excerpt": "You're currently reading the second post made using Markdown!"
          }
        },
        {
          "node": {
            "id": "ac80ba83-9ee3-51dc-9ceb-c602bc97302a",
            "frontmatter": {
              "title": "My First Markdown Post",
              "date": "2019-02-09"
            },
            "excerpt": "Hello, this is my first post made using Markdown!"
          }
        }
      ]
    }
  }
}
- Modify the
gatsby-node.jsdocument to limit the number of documents returned to 1,000.
gatsby-node.js
const path = require("path");
const { createFilePath } = require("gatsby-source-filesystem");

const PostTemplate = path.resolve("./src/templates/post-template.js");
const BlogTemplate = path.resolve("./src/templates/blog-template.js");

exports.onCreateNode = ({ node, getNode, actions }) => {
  const { createNodeField } = actions;

  if (node.internal.type === "MarkdownRemark") {
    const slug = createFilePath({ node, getNode, basepath: "posts" });
    createNodeField({
      node,
      name: "slug",
      value: slug
    });
  }
};

exports.createPages = async ({ graphql, actions }) => {
  const { createPage } = actions;
  const result = await graphql(`
    {
      allMarkdownRemark(limit: 1000) {
        edges {
          node {
            fields {
              slug
            }
          }
        }
      }
    }
  `);
  const posts = result.data.allMarkdownRemark.edges;

  posts.forEach(({ node: post }) => {
    createPage({
      path: `posts${post.fields.slug}`,
      component: PostTemplate,
      context: {
        slug: post.fields.slug
      }
    });
  });

  const postsPerPage = 2;
  const totalPages = Math.ceil(posts.length / postsPerPage);

  Array.from({ length: totalPages }).forEach((_, index) => {
    const currentPage = index + 1;
    const isFirstPage = index === 0;
    const isLastPage = currentPage === totalPages;
    createPage({
      path: isFirstPage ? "/blog/" : `blog/${currentPage}`,
      component: BlogTemplate,
      context: {
        limit: postsPerPage,
        skip: index * postsPerPage,
        isFirstPage,
        isLastPage,
        currentPage,
        totalPages
      }
    });
  });
};
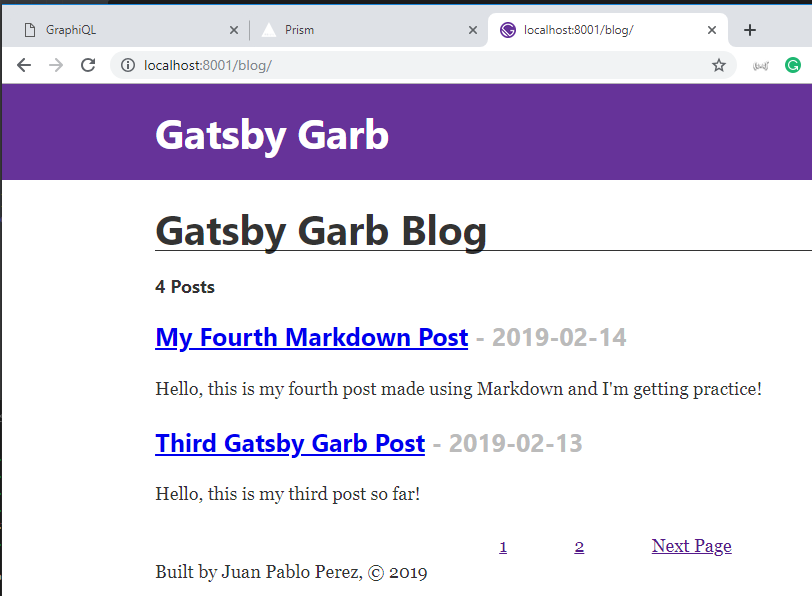
- Modify the
templates\blog-template.jsdocument to use theorderclause.
templates\blog-template.js
import React from "react";
import { graphql, Link } from "gatsby";

import Layout from "../components/layout";

export default ({ data, pageContext }) => {
  const { currentPage, isFirstPage, isLastPage, totalPages } = pageContext;
  const nextPage = `/blog/${String(currentPage + 1)}`;
  const prevPage =
    currentPage - 1 === 1 ? "/blog" : `/blog/${String(currentPage - 1)}`;
  return (
    <Layout>
      <div>
        <h1 style={{ display: "inlineBlock", borderBottom: "1px solid" }}>
          Gatsby Garb Blog
        </h1>
        <h4>{data.allMarkdownRemark.totalCount} Posts</h4>
        {data.allMarkdownRemark.edges.map(({ node }) => (
          <div key={node.id}>
            <h3>
              <Link to={`/posts${node.fields.slug}`}>
                {node.frontmatter.title}
              </Link>{" "}
              <span style={{ color: "#bbb" }}>- {node.frontmatter.date}</span>
            </h3>
            <p>{node.excerpt}</p>
          </div>
        ))}
        {/* Pagination Links */}
        <div
          style={{
            display: "flex",
            alignItems: "center",
            justifyContent: "space-around",
            maxWidth: 300,
            margin: "0 auto"
          }}
        >
          {!isFirstPage && (
            <Link to={prevPage} rel="prev">
              Prev Page
            </Link>
          )}
          {Array.from({ length: totalPages }, (_, index) => (
            <Link key={index} to={`/blog/${index === 0 ? "" : index + 1}`}>
              {index + 1}
            </Link>
          ))}
          {!isLastPage && (
            <Link to={nextPage} rel="next">
              Next Page
            </Link>
          )}
        </div>
      </div>
    </Layout>
  );
};
export const query = graphql`
  query($skip: Int!, $limit: Int!) {
    allMarkdownRemark(
      skip: $skip
      limit: $limit
      sort: { fields: [frontmatter___date], order: DESC }
    ) {
      totalCount
      edges {
        node {
          fields {
            slug
          }
          id
          frontmatter {
            title
            date
          }
          excerpt
        }
      }
    }
  }
`;
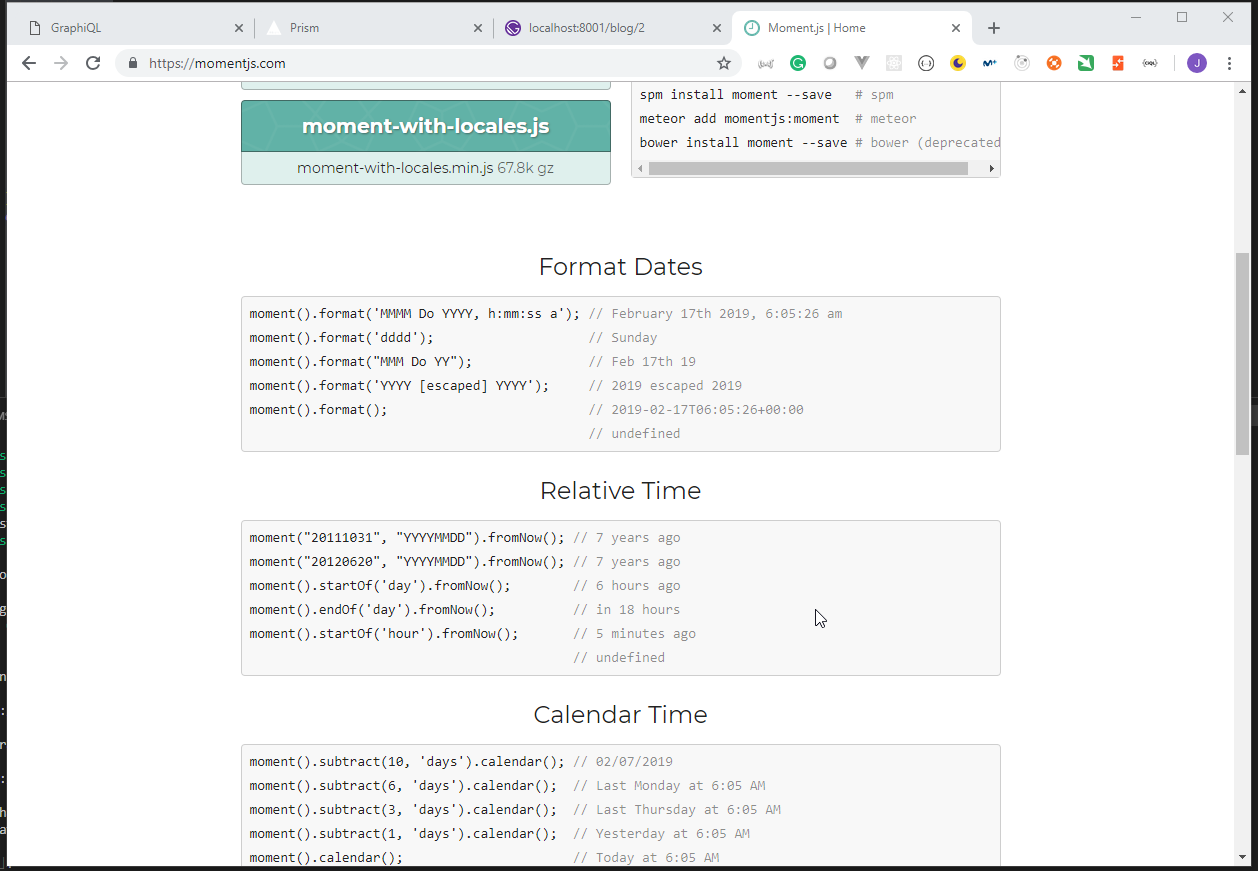
26. Formatting Dates in Gatsby / Format Function in Moment

Query using moment to format dates.
{
  allMarkdownRemark(
    limit: 2
    sort: { fields: [frontmatter___date], order: DESC }
  ) {
    totalCount
    edges {
      node {
        id
        frontmatter {
          title
          date(formatString: "dddd, MMMM Do YYYY")
        }
        excerpt
      }
    }
  }
}
Response
{
  "data": {
    "allMarkdownRemark": {
      "totalCount": 4,
      "edges": [
        {
          "node": {
            "id": "683d1527-5d01-5c36-8f4a-900b528c9473",
            "frontmatter": {
              "title": "My Fourth Markdown Post",
              "date": "Thursday, February 14th 2019"
            },
            "excerpt": "Hello, this is my fourth post made using Markdown and I'm getting practice!"
          }
        },
        {
          "node": {
            "id": "d4004257-d250-5042-8af4-618d9114a084",
            "frontmatter": {
              "title": "Third Gatsby Garb Post",
              "date": "Wednesday, February 13th 2019"
            },
            "excerpt": "Hello, this is my third post so far!"
          }
        }
      ]
    }
  }
}
Query using locale.
{
  allMarkdownRemark(
    limit: 2
    sort: { fields: [frontmatter___date], order: DESC }
  ) {
    totalCount
    edges {
      node {
        id
        frontmatter {
          title
          date(formatString: "dddd, DD MMMM YYYY", locale: "es")
        }
        excerpt
      }
    }
  }
}
Response
{
  "data": {
    "allMarkdownRemark": {
      "totalCount": 4,
      "edges": [
        {
          "node": {
            "id": "683d1527-5d01-5c36-8f4a-900b528c9473",
            "frontmatter": {
              "title": "My Fourth Markdown Post",
              "date": "jueves, 14 febrero 2019"
            },
            "excerpt": "Hello, this is my fourth post made using Markdown and I'm getting practice!"
          }
        },
        {
          "node": {
            "id": "d4004257-d250-5042-8af4-618d9114a084",
            "frontmatter": {
              "title": "Third Gatsby Garb Post",
              "date": "miércoles, 13 febrero 2019"
            },
            "excerpt": "Hello, this is my third post so far!"
          }
        }
      ]
    }
  }
}
Query using fromNow.
{
  allMarkdownRemark(
    limit: 2
    sort: { fields: [frontmatter___date], order: DESC }
  ) {
    totalCount
    edges {
      node {
        id
        frontmatter {
          title
          date(fromNow: true)
        }
        excerpt
      }
    }
  }
}
Response
{
  "data": {
    "allMarkdownRemark": {
      "totalCount": 4,
      "edges": [
        {
          "node": {
            "id": "683d1527-5d01-5c36-8f4a-900b528c9473",
            "frontmatter": {
              "title": "My Fourth Markdown Post",
              "date": "3 days ago"
            },
            "excerpt": "Hello, this is my fourth post made using Markdown and I'm getting practice!"
          }
        },
        {
          "node": {
            "id": "d4004257-d250-5042-8af4-618d9114a084",
            "frontmatter": {
              "title": "Third Gatsby Garb Post",
              "date": "4 days ago"
            },
            "excerpt": "Hello, this is my third post so far!"
          }
        }
      ]
    }
  }
}
Query using difference.
{
  allMarkdownRemark(
    limit: 2
    sort: { fields: [frontmatter___date], order: DESC }
  ) {
    totalCount
    edges {
      node {
        id
        frontmatter {
          title
          date(difference: "hours")
        }
        excerpt
      }
    }
  }
}
Response
{
  "data": {
    "allMarkdownRemark": {
      "totalCount": 4,
      "edges": [
        {
          "node": {
            "id": "683d1527-5d01-5c36-8f4a-900b528c9473",
            "frontmatter": {
              "title": "My Fourth Markdown Post",
              "date": "78"
            },
            "excerpt": "Hello, this is my fourth post made using Markdown and I'm getting practice!"
          }
        },
        {
          "node": {
            "id": "d4004257-d250-5042-8af4-618d9114a084",
            "frontmatter": {
              "title": "Third Gatsby Garb Post",
              "date": "102"
            },
            "excerpt": "Hello, this is my third post so far!"
          }
        }
      ]
    }
  }
}
27. Formatting Excerpts
Query shorting the excerpts values.
{
  allMarkdownRemark(
    limit: 2
    sort: { fields: [frontmatter___date], order: DESC }
  ) {
    totalCount
    edges {
      node {
        id
        frontmatter {
          title
          date(difference: "hours")
        }
        excerpt(pruneLength: 15)
      }
    }
  }
}
Response
{
  "data": {
    "allMarkdownRemark": {
      "totalCount": 4,
      "edges": [
        {
          "node": {
            "id": "683d1527-5d01-5c36-8f4a-900b528c9473",
            "frontmatter": {
              "title": "My Fourth Markdown Post",
              "date": "78"
            },
            "excerpt": "Hello, this is…"
          }
        },
        {
          "node": {
            "id": "d4004257-d250-5042-8af4-618d9114a084",
            "frontmatter": {
              "title": "Third Gatsby Garb Post",
              "date": "102"
            },
            "excerpt": "Hello, this is…"
          }
        }
      ]
    }
  }
}
Query using excerpts truncate.
{
  allMarkdownRemark(
    limit: 2
    sort: { fields: [frontmatter___date], order: DESC }
  ) {
    totalCount
    edges {
      node {
        id
        frontmatter {
          title
          date(difference: "hours")
        }
        excerpt(pruneLength: 15, truncate: true)
      }
    }
  }
}
Response
{
  "data": {
    "allMarkdownRemark": {
      "totalCount": 4,
      "edges": [
        {
          "node": {
            "id": "683d1527-5d01-5c36-8f4a-900b528c9473",
            "frontmatter": {
              "title": "My Fourth Markdown Post",
              "date": "78"
            },
            "excerpt": "Hello, this is…"
          }
        },
        {
          "node": {
            "id": "d4004257-d250-5042-8af4-618d9114a084",
            "frontmatter": {
              "title": "Third Gatsby Garb Post",
              "date": "102"
            },
            "excerpt": "Hello, this is…"
          }
        }
      ]
    }
  }
}
Query using excerpts format.
{
  allMarkdownRemark(
    limit: 2
    sort: { fields: [frontmatter___date], order: DESC }
  ) {
    totalCount
    edges {
      node {
        id
        frontmatter {
          title
          date(difference: "hours")
        }
        html
        excerpt(pruneLength: 15, format: HTML)
      }
    }
  }
}
Response
{
  "data": {
    "allMarkdownRemark": {
      "totalCount": 4,
      "edges": [
        {
          "node": {
            "id": "683d1527-5d01-5c36-8f4a-900b528c9473",
            "frontmatter": {
              "title": "My Fourth Markdown Post",
              "date": "78"
            },
            "html": "<p>Hello, this is my fourth post made using Markdown and I'm getting practice!</p>",
            "excerpt": "<p>Hello, this is…</p>"
          }
        },
        {
          "node": {
            "id": "d4004257-d250-5042-8af4-618d9114a084",
            "frontmatter": {
              "title": "Third Gatsby Garb Post",
              "date": "102"
            },
            "html": "<p>Hello, this is my third post so far!</p>",
            "excerpt": "<p>Hello, this is…</p>"
          }
        }
      ]
    }
  }
}
28. Time To Read for each Post / Formatting Dates on our Blog Pages
Query using timeToRead.
{
  allMarkdownRemark(
    limit: 2
    sort: { fields: [frontmatter___date], order: DESC }
  ) {
    totalCount
    edges {
      node {
        id
        frontmatter {
          title
          date(formatString: "MMM Do, YYYY")
        }
        timeToRead
        html
        excerpt(pruneLength: 15, format: HTML)
      }
    }
  }
}
Response
{
  "data": {
    "allMarkdownRemark": {
      "totalCount": 4,
      "edges": [
        {
          "node": {
            "id": "683d1527-5d01-5c36-8f4a-900b528c9473",
            "frontmatter": {
              "title": "My Fourth Markdown Post",
              "date": "78"
            },
            "timeToRead": 1,
            "html": "<p>Hello, this is my fourth post made using Markdown and I'm getting practice!</p>",
            "excerpt": "<p>Hello, this is…</p>"
          }
        },
        {
          "node": {
            "id": "d4004257-d250-5042-8af4-618d9114a084",
            "frontmatter": {
              "title": "Third Gatsby Garb Post",
              "date": "102"
            },
            "timeToRead": 1,
            "html": "<p>Hello, this is my third post so far!</p>",
            "excerpt": "<p>Hello, this is…</p>"
          }
        }
      ]
    }
  }
}
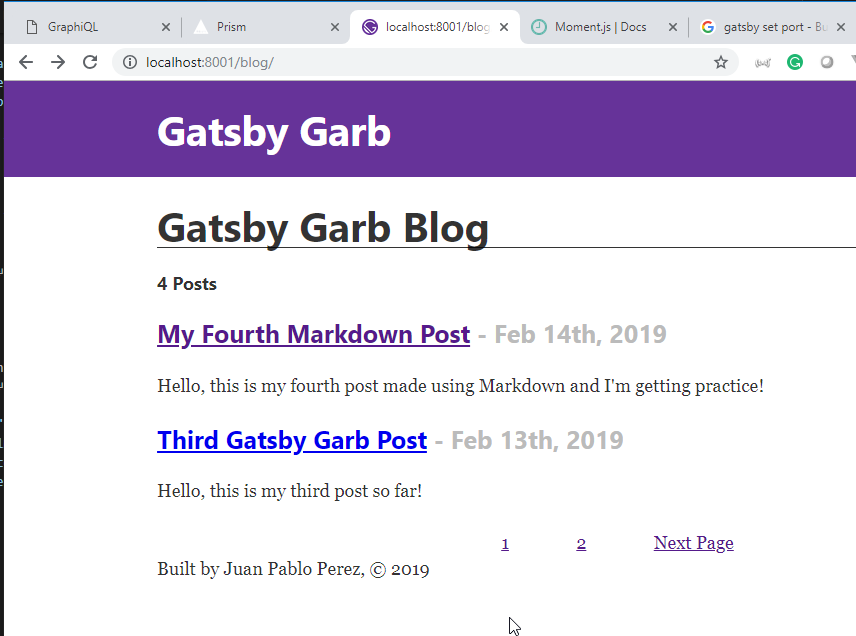
- Modify the
templates\blog-template.jsdocument to format the date.
templates\blog-template.js
import React from "react";
import { graphql, Link } from "gatsby";

import Layout from "../components/layout";

export default ({ data, pageContext }) => {
  const { currentPage, isFirstPage, isLastPage, totalPages } = pageContext;
  const nextPage = `/blog/${String(currentPage + 1)}`;
  const prevPage =
    currentPage - 1 === 1 ? "/blog" : `/blog/${String(currentPage - 1)}`;
  return (
    <Layout>
      <div>
        <h1 style={{ display: "inlineBlock", borderBottom: "1px solid" }}>
          Gatsby Garb Blog
        </h1>
        <h4>{data.allMarkdownRemark.totalCount} Posts</h4>
        {data.allMarkdownRemark.edges.map(({ node }) => (
          <div key={node.id}>
            <h3>
              <Link to={`/posts${node.fields.slug}`}>
                {node.frontmatter.title}
              </Link>{" "}
              <span style={{ color: "#bbb" }}>- {node.frontmatter.date}</span>
            </h3>
            <p>{node.excerpt}</p>
          </div>
        ))}
        {/* Pagination Links */}
        <div
          style={{
            display: "flex",
            alignItems: "center",
            justifyContent: "space-around",
            maxWidth: 300,
            margin: "0 auto"
          }}
        >
          {!isFirstPage && (
            <Link to={prevPage} rel="prev">
              Prev Page
            </Link>
          )}
          {Array.from({ length: totalPages }, (_, index) => (
            <Link key={index} to={`/blog/${index === 0 ? "" : index + 1}`}>
              {index + 1}
            </Link>
          ))}
          {!isLastPage && (
            <Link to={nextPage} rel="next">
              Next Page
            </Link>
          )}
        </div>
      </div>
    </Layout>
  );
};
export const query = graphql`
  query($skip: Int!, $limit: Int!) {
    allMarkdownRemark(
      skip: $skip
      limit: $limit
      sort: { fields: [frontmatter___date], order: DESC }
    ) {
      totalCount
      edges {
        node {
          fields {
            slug
          }
          id
          frontmatter {
            title
            date(formatString: "MMM Do, YYYY")
          }
          excerpt
        }
      }
    }
  }
`;
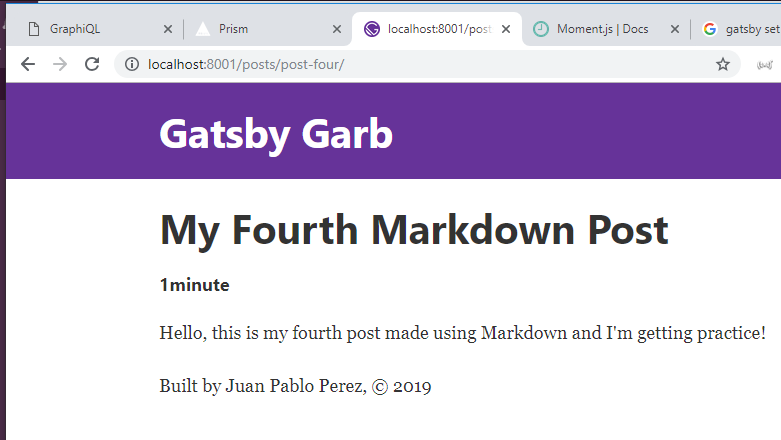
- Modify the
templates\post-template.jsdocument to include thetime to read(timeToRead) field.
templates\post-template.js
import React from "react";
import { graphql } from "gatsby";

import Layout from "../components/layout";

const PostTemplate = ({ data: post }) => (
  <Layout>
    <h1>{post.markdownRemark.frontmatter.title}</h1>
    <h4>
      {post.markdownRemark.timeToRead}
      {post.markdownRemark.timeToRead > 1 ? "minutes" : "minute"}
    </h4>
    <div dangerouslySetInnerHTML={{ __html: post.markdownRemark.html }} />
  </Layout>
);

// This will be rendered and sent to the `data` parameter
export const query = graphql`
  query($slug: String) {
    markdownRemark(fields: { slug: { eq: $slug } }) {
      html
      timeToRead
      frontmatter {
        title
      }
    }
  }
`;

export default PostTemplate;
12. Images in Gatsby / Amazing Responsive Images with Gatsby Image
29. Importing Images in Gatsby / Adding our Site Logo
- Modify the
components\header.jsdocument to use an image for the header.
components\header.js
import { Link } from "gatsby";
import PropTypes from "prop-types";
import React from "react";

import gatsbyLogo from "../images/gatsby-icon.png";

const Header = ({ siteTitle }) => (
  <div
    style={{
      background: `rebeccapurple`,
      marginBottom: `1.45rem`
    }}
  >
    <div
      style={{
        margin: `0 auto`,
        maxWidth: 960,
        padding: `1.45rem 1.0875rem`
      }}
    >
      {/* Title / Logo */}
      <span
        style={{
          display: "flex",
          alignItems: "center"
        }}
      >
        <img
          src={gatsbyLogo}
          alt="Gastby Garb Logo"
          style={{
            borderRadius: "50%",
            border: "3px solid orange",
            margin: "0 5px",
            width: `3rem`
          }}
        />
        <h1 style={{ margin: 0 }}>
          <Link
            to="/"
            style={{
              color: `white`,
              textDecoration: `none`
            }}
          >
            {siteTitle}
          </Link>
        </h1>
      </span>
    </div>
  </div>
);

Header.propTypes = {
  siteTitle: PropTypes.string
};

Header.defaultProps = {
  siteTitle: ``
};

export default Header;
- If we don't want
webpackto manage content, we should create an additional folder calledstaticand put there the images, css files, or other document that we want.
30. What is Gatsby Image / Why Use Gatsby Image
gatsby-imageis used to manage the images properly to be rendered for each device the best way it can. It is used along with theStaticQuerycomponent.It can be seen how it works having a look at the
\src\components\image.jsdocument.#
\src\components\image.js
import React from "react";
import { StaticQuery, graphql } from "gatsby";
import Img from "gatsby-image";

/*
 * This component is built using `gatsby-image` to automatically serve optimized
 * images with lazy loading and reduced file sizes. The image is loaded using a
 * `StaticQuery`, which allows us to load the image from directly within this
 * component, rather than having to pass the image data down from pages.
 *
 * For more information, see the docs:
 * - `gatsby-image`: https://gatsby.app/gatsby-image
 * - `StaticQuery`: https://gatsby.app/staticquery
 */

const Image = () => (
  <StaticQuery
    query={graphql`
      query {
        placeholderImage: file(relativePath: { eq: "gatsby-astronaut.png" }) {
          childImageSharp {
            fluid(maxWidth: 300) {
              ...GatsbyImageSharpFluid
            }
          }
        }
      }
    `}
    render={data => <Img fluid={data.placeholderImage.childImageSharp.fluid} />}
  />
);
export default Image;
31. Querying for Images in GraphiQL / gatsby-transformer-sharp Plugin in Action
- In order to use
gatsby-imagewe need to query for the image useing theplaceholderImage.
Query using file and childImageSharp.
{
  file(relativePath: { eq: "gatsby-icon.png" }) {
    childImageSharp {
      fluid {
        src
        srcSet
        srcSetWebp
        aspectRatio
        base64
        tracedSVG
        sizes
        originalImg
        originalName
      }
    }
  }
}
Response
{
  "data": {
    "file": {
      "childImageSharp": {
        "fluid": {
          "src": "/static/4a9773549091c227cd2eb82ccd9c5e3a/4d7ce/gatsby-icon.png",
          "srcSet": "/static/4a9773549091c227cd2eb82ccd9c5e3a/e22ac/gatsby-icon.png 200w,\n/static/4a9773549091c227cd2eb82ccd9c5e3a/12519/gatsby-icon.png 400w,\n/static/4a9773549091c227cd2eb82ccd9c5e3a/4d7ce/gatsby-icon.png 512w",
          "srcSetWebp": "/static/4a9773549091c227cd2eb82ccd9c5e3a/1da1b/gatsby-icon.webp 200w,\n/static/4a9773549091c227cd2eb82ccd9c5e3a/8f67f/gatsby-icon.webp 400w,\n/static/4a9773549091c227cd2eb82ccd9c5e3a/500e5/gatsby-icon.webp 512w",
          "aspectRatio": 1,
          "base64": "data:image/png;base64,iVBORw0KGgoAAAANSUhEUgAAABQAAAAUCAYAAACNiR0NAAAACXBIWXMAAAsSAAALEgHS3X78AAAD2klEQVQ4y3WUW2xUVRSGDyY+8MCLTxofvNNWqPY61Wgk4IvxEmI1ktpxOm2n01IKCg8gCYpGgxgkpTB3LjOlnaYNDQGaaC0kpbaVS0molWYql9SMGDWxRBrajt3nrOX6d+cMo5aTrOx99uXba61/7W14i0MGvrqikOEtDt+HvqcgeH+DI/LO+rKDnQ2lkUmZU2JmfWkkKWPdMlcp/0uxFnvqisJGum/YnSVNLxy2+2tlQ6KhKMrVuRF2LfezpyDEnsIQu3L87M6JcENhlGXNDVlbYRh3GRlqFmzXBkeM3Xkh3vTSEdWxe1D9OJy0bl6bopvXp2j83C/Utfd7tXl1TLlzg9zkOMreknBLFtTIhAnYprI4V+X5zOjOfnM+pYiZCbCRvut0sfcaJX/6U49ZpsXxLwbNqqd9qqm0netLwr502jJeroVngPVELlmyiS/3T9KONztJNrFz+X5trjwfb3+jg85/fRVg7u+6QrJXpT11GlkCJBAmPMPCk8ERqnxqP7tX+HE6ixgLJv3qlX6ueHwfH2s+R5ZF/PFbXWZtfhhzSYEvM6AmBGh68bD6e07R6MDP5BSYNw2SRf8yjEloIlSQt73aTmjh5YbSVrQeA6UBNeVEhfxsfz1O8EwO0huzYfa/9lqs5pkAWrKBMt9joM6qcgMc+/Qsckd9bT/oXGlIyV1Idlv7bFAbvJOWxKz1JUcwPw5lFMJY92gzdXw5pJN9Oj7GrtwDi0LhmZRUxj5YHaP3V0WpvlhHNGNIwZqNzx/i0NY+qnyyhdp3fceLQQFyiyAflXfy9NQsp2bneWY6xTO3UzQx8ivVFeq0zBm4TrgBKNqhkxNU/uAeju8e/B8UUSDMzWti3N1ynk/4LyLvfOevOZq88odVu1JXQQKidEMUgWhRvm0dpbcf3rs4VLxE3t6T/4rH9rHkn01lUU/4kgmGCPkNysaJu7nl5VY1fWuWbWHuBYX6jc8dZEkPD3SP65x/+Fpc1Rfo+90IUZbiouNuiii6sO8JFfVr8gO6sGOf9GvYcd8F05UTgLe/CesB++pV4PpI0tWZjjGyob2to1z+0FdsC4VDRFE+e2zBs+FTE1SdH5jf6GiDcF4btvA4yKux0dGuoZ17hs07t1MaOnQiQe8+0ULiqX4Y0sbHD1wwF2Bx5DaaecIyj6J8eDXgaZWEv/WVNoXbc2Psd+voZwO07pFmavt8wOqNXTYxhzDhmQ3775u4JGvQKTlNQigoh3JoLDukFa1ZEdZjWgDJmaz1LgILZR5He7CuMLRMoB4pqR7xYFz+Z1C0UosJlAbUtAXAHnsfGP8An71yIvslifEAAAAASUVORK5CYII=",
          "tracedSVG": "data:image/svg+xml,%3csvg xmlns='http://www.w3.org/2000/svg' width='400' height='400' viewBox='0 0 400 400' version='1'%3e%3cpath d='M173 1A201 201 0 0 0 23 294a200 200 0 0 0 377-78c1 1 1-7 1-17l-1-15-2-9A201 201 0 0 0 173 1m5 43A158 158 0 0 0 47 164c0 1 42 44 94 95l94 94 8-2a158 158 0 0 0 114-148v-3H257v28h34l34 1a127 127 0 0 1-72 87l-10 5-82-82-82-83a128 128 0 0 1 221-36l5 5 11-8 10-9c2-2-25-29-37-38-18-11-37-20-57-24-11-2-44-4-54-2M43 212a156 156 0 0 0 148 144h6l-76-76-77-77-1 9' fill='lightgray' fill-rule='evenodd'/%3e%3c/svg%3e",
          "sizes": "(max-width: 512px) 100vw, 512px",
          "originalImg": "/static/4a9773549091c227cd2eb82ccd9c5e3a/4d7ce/gatsby-icon.png",
          "originalName": "gatsby-icon.png"
        }
      }
    }
  }
}
13. Advanced Image Concepts in Gatsby / GraphQL Fragments
32. GraphQL Fragments for Easier Image Queries / Displaying Images with Gatsby Image
- Fragments are not going to be identified by
GraphiQLalthough we can use them inside the app.
Query using file and GatsbyImageSharpFluid.
{
  file(relativePath: { eq: "gatsby-icon.png" }) {
    childImageSharp {
      fluid(maxWidth: 590) {
        ...GatsbyImageSharpFluid
      }
    }
  }
}
Response
{
  "errors": [
    {
      "message": "Unknown fragment \"GatsbyImageSharpFluid\".",
      "locations": [
        {
          "line": 7,
          "column": 11
        }
      ]
    }
  ]
}
- We can modify the
components/image.jsdocument to use it, we can even execute two queries at the same time.
components/image.js
import React from "react";
import { StaticQuery, graphql } from "gatsby";
import Img from "gatsby-image";

/*
 * This component is built using `gatsby-image` to automatically serve optimized
 * images with lazy loading and reduced file sizes. The image is loaded using a
 * `StaticQuery`, which allows us to load the image from directly within this
 * component, rather than having to pass the image data down from pages.
 *
 * For more information, see the docs:
 * - `gatsby-image`: https://gatsby.app/gatsby-image
 * - `StaticQuery`: https://gatsby.app/staticquery
 */

const Image = () => (
  <StaticQuery
    query={graphql`
      query {
        placeholderImage: file(relativePath: { eq: "gatsby-astronaut.png" }) {
          childImageSharp {
            fluid(maxWidth: 300) {
              ...GatsbyImageSharpFluid
            }
          }
        }
        iconImage: file(relativePath: { eq: "gatsby-icon.png" }) {
          childImageSharp {
            fluid(maxWidth: 590) {
              ...GatsbyImageSharpFluid
            }
          }
        }
      }
    `}
    render={data => (
      <>
        <Img fluid={data.placeholderImage.childImageSharp.fluid} />
        <Img fluid={data.iconImage.childImageSharp.fluid} />
      </>
    )}
  />
);
export default Image;
33. Key Details about Images Served with Gatsby Image
- The images served by Gatsby as
Fluidimages, meaning they are responsive.
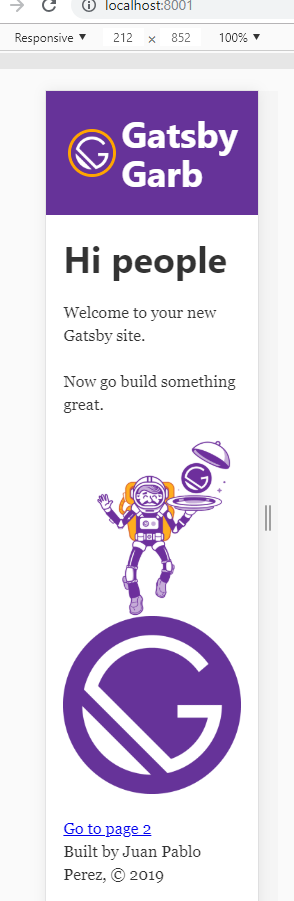
- The size of the logo is 300px x 300px.
- The reason is becuase it is set in
pages\index.jspages\index.js
import React from "react";
import { Link } from "gatsby";

import Layout from "../components/layout";
import Image from "../components/image";
import SEO from "../components/seo";

const IndexPage = () => (
  <Layout>
    <SEO title="Home" keywords={[`gatsby`, `application`, `react`]} />
    <h1>Hi people</h1>
    <p>Welcome to your new Gatsby site.</p>
    <p>Now go build something great.</p>
    <div style={{ maxWidth: `300px`, marginBottom: `1.45rem` }}>
      <Image />
    </div>
    <Link to="/page-2/">Go to page 2</Link>
  </Layout>
);

export default IndexPage;
- We can change it
pages\index.js

- We revert to the original size.
pages\index.js
import React from "react";
import { Link } from "gatsby";

import Layout from "../components/layout";
import Image from "../components/image";
import SEO from "../components/seo";

const IndexPage = () => (
  <Layout>
    <SEO title="Home" keywords={[`gatsby`, `application`, `react`]} />
    <h1>Hi people</h1>
    <p>Welcome to your new Gatsby site.</p>
    <p>Now go build something great.</p>
    <div style={{ maxWidth: `300px`, marginBottom: `1.45rem` }}>
      <Image />
    </div>
    <Link to="/page-2/">Go to page 2</Link>
  </Layout>
);

export default IndexPage;
- We can see there are some other attributes in the html related to the
Fluidimages
<picture>
  <source
    srcset="
      /static/4a9773549091c227cd2eb82ccd9c5e3a/57ddb/gatsby-icon.png 148w,
      /static/4a9773549091c227cd2eb82ccd9c5e3a/131ad/gatsby-icon.png 295w,
      /static/4a9773549091c227cd2eb82ccd9c5e3a/a19f4/gatsby-icon.png 512w
    "
    sizes="(max-width: 512px) 100vw, 512px"
  />
  <img
    alt=""
    src="/static/4a9773549091c227cd2eb82ccd9c5e3a/a19f4/gatsby-icon.png"
    style="position: absolute; top: 0px; left: 0px; width: 100%; height: 100%; object-fit: cover; object-position: center center; opacity: 1; transition: opacity 0.5s ease 0s;"
  />
</picture>
34. Embedding Images in Markdown Files with gatsby-remark-images
- We can include a video inside a MarkDown file using the
iframetag,
src\pages\post-two.md
---
title: "The Second Gatsby Garb Post"
date: "2019-02-10"
---

You're currently reading the second post made using Markdown!

<iframe src="https://youtube.com/embed/tgbNymZ7vqY"></iframe>
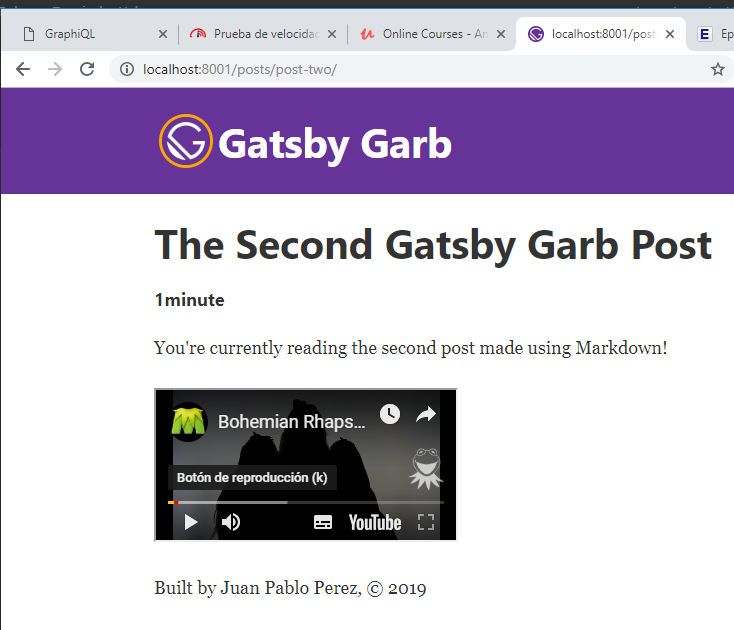
- But in order to include images we should install the new
gatsby-remark-images
Juan.Pablo.Perez@RIMDUB-0232 MINGW64 /c/Work/Training/Pre/Gatsby/gatsby-garb (master)
$ npm i gatsby-remark-images
npm WARN optional SKIPPING OPTIONAL DEPENDENCY: fsevents@1.2.4 (node_modules\fsevents):
npm WARN notsup SKIPPING OPTIONAL DEPENDENCY: Unsupported platform for fsevents@1.2.4: wanted {"os":"darwin","arch":"any"} (current: {"os":"win32","arch":"x64"})

+ gatsby-remark-images@3.0.4
added 3 packages from 3 contributors and audited 25555 packages in 52.557s
found 3 low severity vulnerabilities
  run `npm audit fix` to fix them, or `npm audit` for details
It have to be used in conjuction with the
gatsby-transformer-remarkplugin.We need to change the
gatsby-config.jsdocuemnt to change howgatsby-transformer-remarkis et up.
gatsby-config.js
module.exports = {
  siteMetadata: {
    title: `Gatsby Garb`,
    description: `Kick off your next, great Gatsby project with this default starter. This barebones starter ships with the main Gatsby configuration files you might need.`,
    author: `Juan Pablo Perez`,
    createdAt: 2019
  },
  plugins: [
    `gatsby-plugin-react-helmet`,
    {
      resolve: `gatsby-source-filesystem`,
      options: {
        name: `images`,
        path: `${__dirname}/src/images`
      }
    },
    {
      resolve: "gatsby-transformer-remark",
      options: {
        plugins: [
          {
            resolve: "gatsby-remark-images"
          }
        ]
      }
    },
    {
      resolve: `gatsby-source-filesystem`,
      options: {
        name: `posts`,
        path: `${__dirname}/src/posts`
      }
    },
    `gatsby-transformer-sharp`,
    `gatsby-plugin-sharp`,
    {
      resolve: `gatsby-plugin-manifest`,
      options: {
        name: `gatsby-starter-default`,
        short_name: `starter`,
        start_url: `/`,
        background_color: `#663399`,
        theme_color: `#663399`,
        display: `minimal-ui`,
        icon: `src/images/gatsby-icon.png` // This path is relative to the root of the site.
      }
    }
    // this (optional) plugin enables Progressive Web App + Offline functionality
    // To learn more, visit: https://gatsby.app/offline
    // 'gatsby-plugin-offline',
  ]
};
- We have to put the images we want to use in the same directory where the Markdown file is.
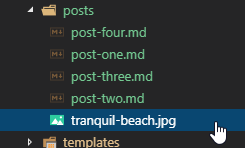
- We can include the image in the post:
src\pages\post-two.md
---
title: "The Second Gatsby Garb Post"
date: "2019-02-10"
---
You're currently reading the second post made using Markdown!

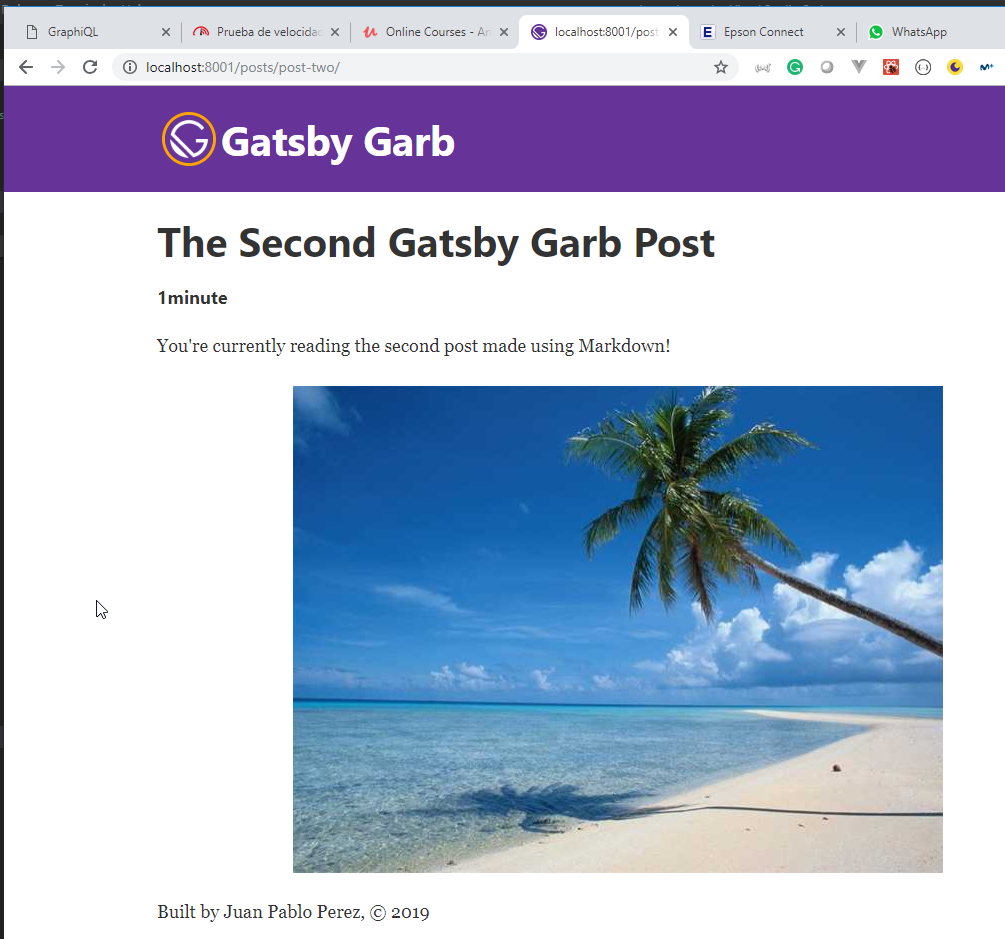
- The image is converted to a
Fluidimage.
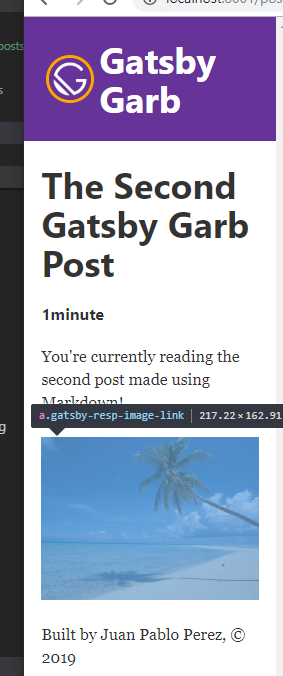
<a
  class="gatsby-resp-image-link"
  href="/static/f23bf22db2e727effaacecfeaf9be5de/db7d6/tranquil-beach.jpg"
  style="display: block"
  target="_blank"
  rel="noopener"
>
  <span
    class="gatsby-resp-image-wrapper"
    style="position: relative; display: block;  max-width: 650px; margin-left: auto; margin-right: auto;"
  >
    <span
      class="gatsby-resp-image-background-image"
      style='padding-bottom: 75%; position: relative; bottom: 0px; left: 0px; background-image: url("data:image/jpeg;base64,/9j/2wBDABALDA4MChAODQ4SERATGCgaGBYWGDEjJR0oOjM9PDkzODdASFxOQERXRTc4UG1RV19iZ2hnPk1xeXBkeFxlZ2P/2wBDARESEhgVGC8aGi9jQjhCY2NjY2NjY2NjY2NjY2NjY2NjY2NjY2NjY2NjY2NjY2NjY2NjY2NjY2NjY2NjY2NjY2P/wgARCAAPABQDASIAAhEBAxEB/8QAFwAAAwEAAAAAAAAAAAAAAAAAAAQFAv/EABYBAQEBAAAAAAAAAAAAAAAAAAMBAv/aAAwDAQACEAMQAAABU04ywTygTX//xAAZEAEBAQEBAQAAAAAAAAAAAAABAAITAxL/2gAIAQEAAQUC+WMaXiwR5tzzf//EABcRAAMBAAAAAAAAAAAAAAAAAAABAhP/2gAIAQMBAT8BUszP/8QAFxEAAwEAAAAAAAAAAAAAAAAAAAECE//aAAgBAgEBPwF2jQ//xAAYEAEAAwEAAAAAAAAAAAAAAAAAASExEP/aAAgBAQAGPwLmwqFsf//EAB0QAAIBBAMAAAAAAAAAAAAAAAABIRFBUWGBkfH/2gAIAQEAAT8hTiEqD0R7hj5KK3Q8rs//2gAMAwEAAgADAAAAEKw//8QAFREBAQAAAAAAAAAAAAAAAAAAABH/2gAIAQMBAT8QtU//xAAWEQEBAQAAAAAAAAAAAAAAAAAAARH/2gAIAQIBAT8QtjL/xAAdEAEAAgICAwAAAAAAAAAAAAABABEhQTFRgZGx/9oACAEBAAE/EFLq13KarTwS04HYkT3Munqh9jtfo3LuWY//2Q=="); background-size: cover; display: block; transition: opacity 0.5s ease 0.5s; opacity: 0;'
    ></span>
    <img
      class="gatsby-resp-image-image"
      style="width: 100%; height: 100%; margin: 0px; vertical-align: middle; position: absolute; top: 0px; left: 0px; box-shadow: white 0px 0px 0px 400px inset; opacity: 1; transition: opacity 0.5s ease 0s;"
      alt="Tranquil Beach"
      title=""
      src="/static/f23bf22db2e727effaacecfeaf9be5de/b80fa/tranquil-beach.jpg"
      srcset="
        /static/f23bf22db2e727effaacecfeaf9be5de/cf410/tranquil-beach.jpg  163w,
        /static/f23bf22db2e727effaacecfeaf9be5de/62f2a/tranquil-beach.jpg  325w,
        /static/f23bf22db2e727effaacecfeaf9be5de/b80fa/tranquil-beach.jpg  650w,
        /static/f23bf22db2e727effaacecfeaf9be5de/08cb4/tranquil-beach.jpg  975w,
        /static/f23bf22db2e727effaacecfeaf9be5de/db7d6/tranquil-beach.jpg 1024w
      "
      sizes="(max-width: 650px) 100vw, 650px"
    />
  </span>
</a>
- We can get more information about the plugin looking at gatsby-remark-images
14. Contentful as our Headless CMS / Creating and Managing Products with Contentful
35. Intro to Headless CMS and Contentful / Creating Content Model for our Products
- We need to sign up on Contenful

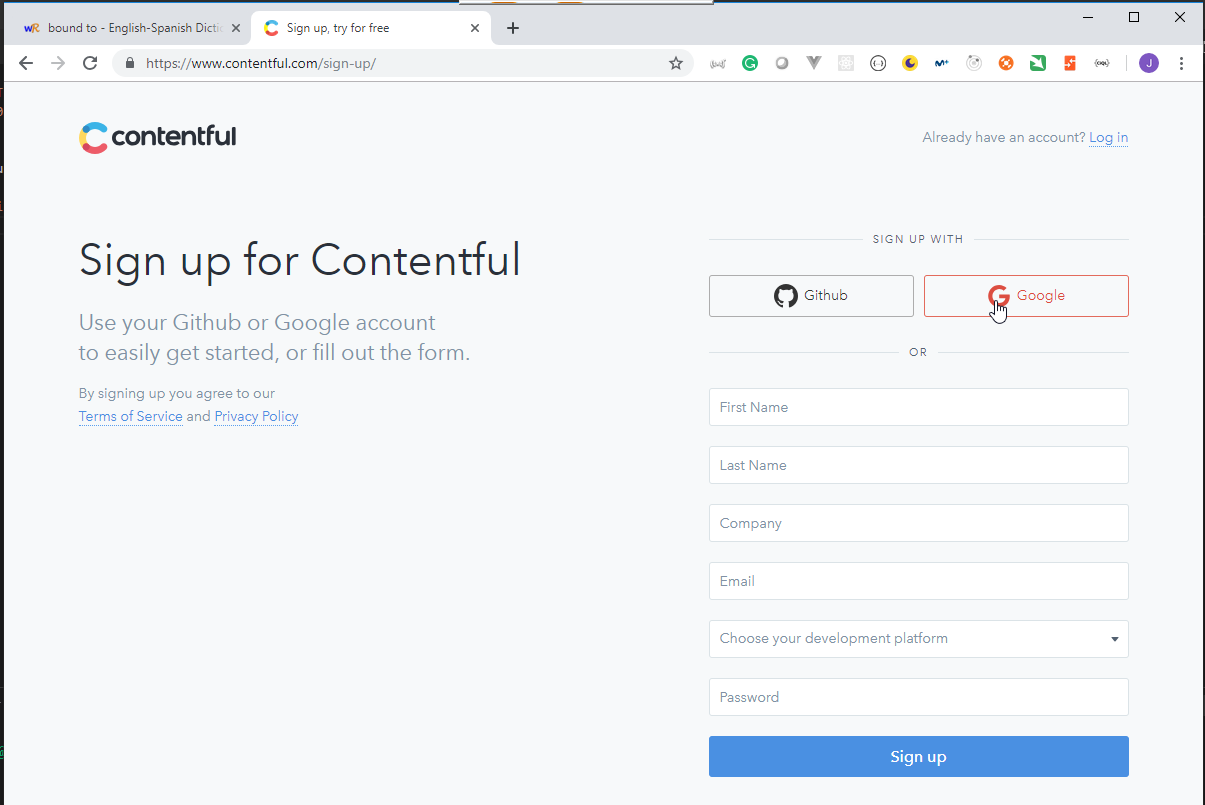


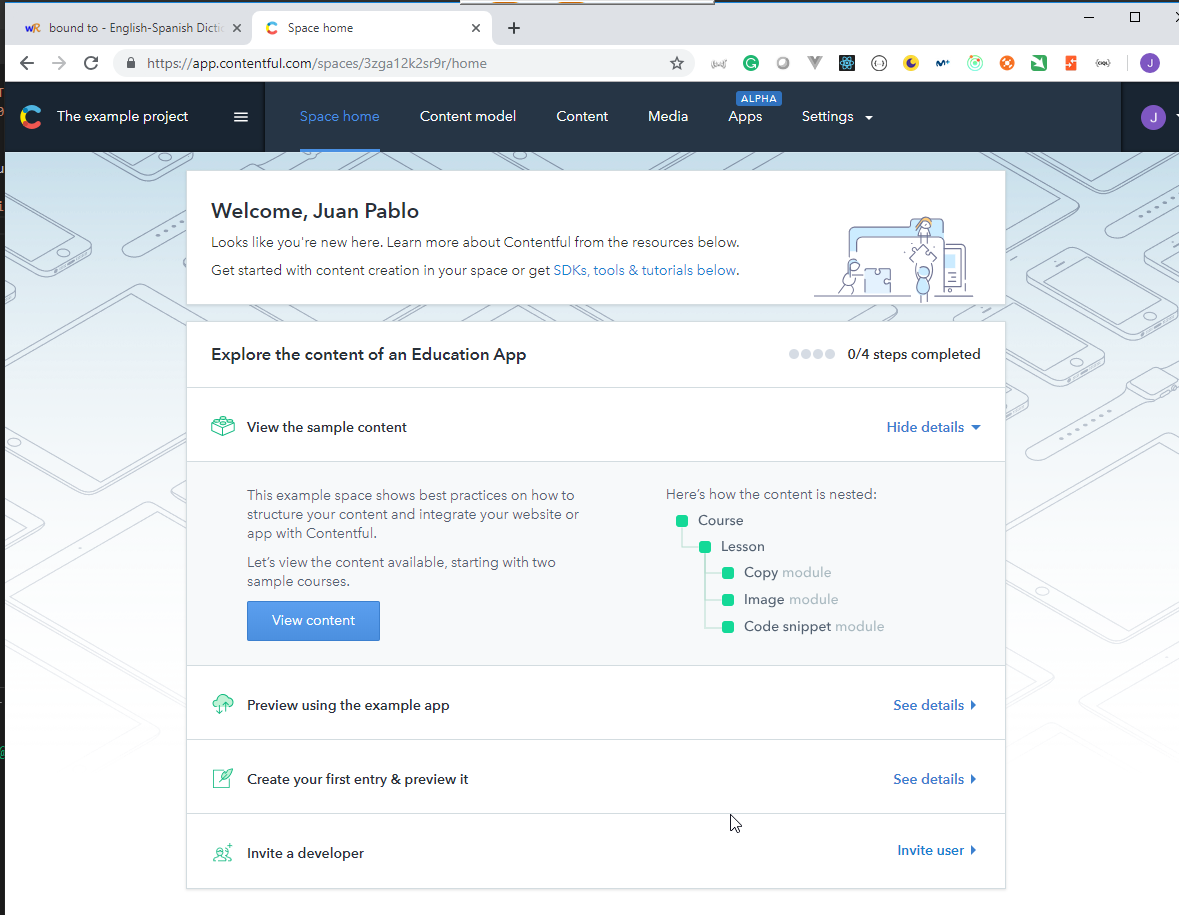
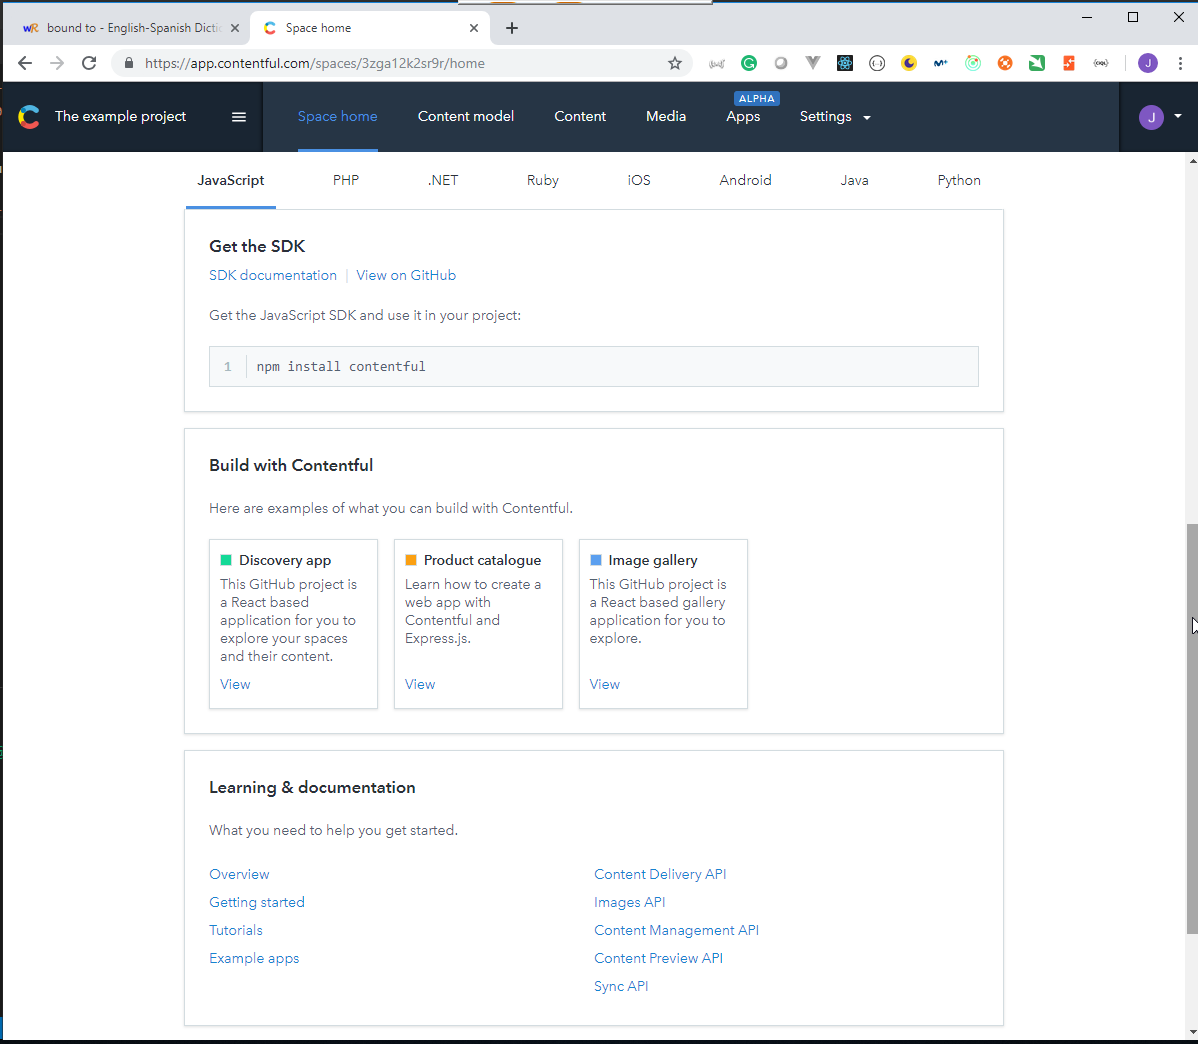
- Create a new project.
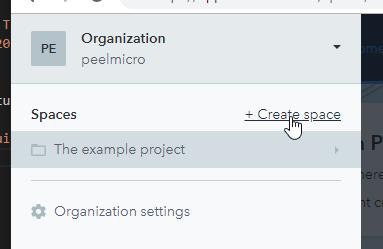

- Put the
Gatsby Garbname.
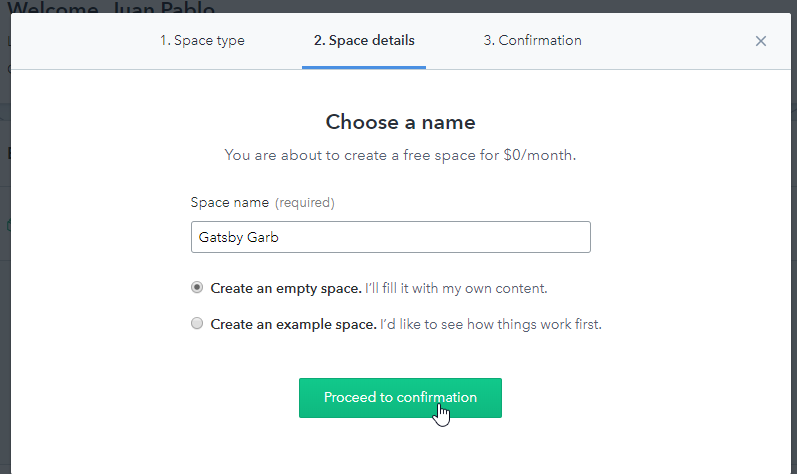
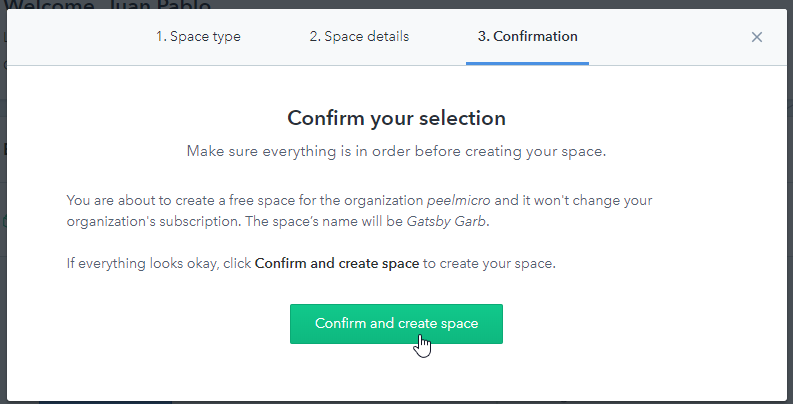

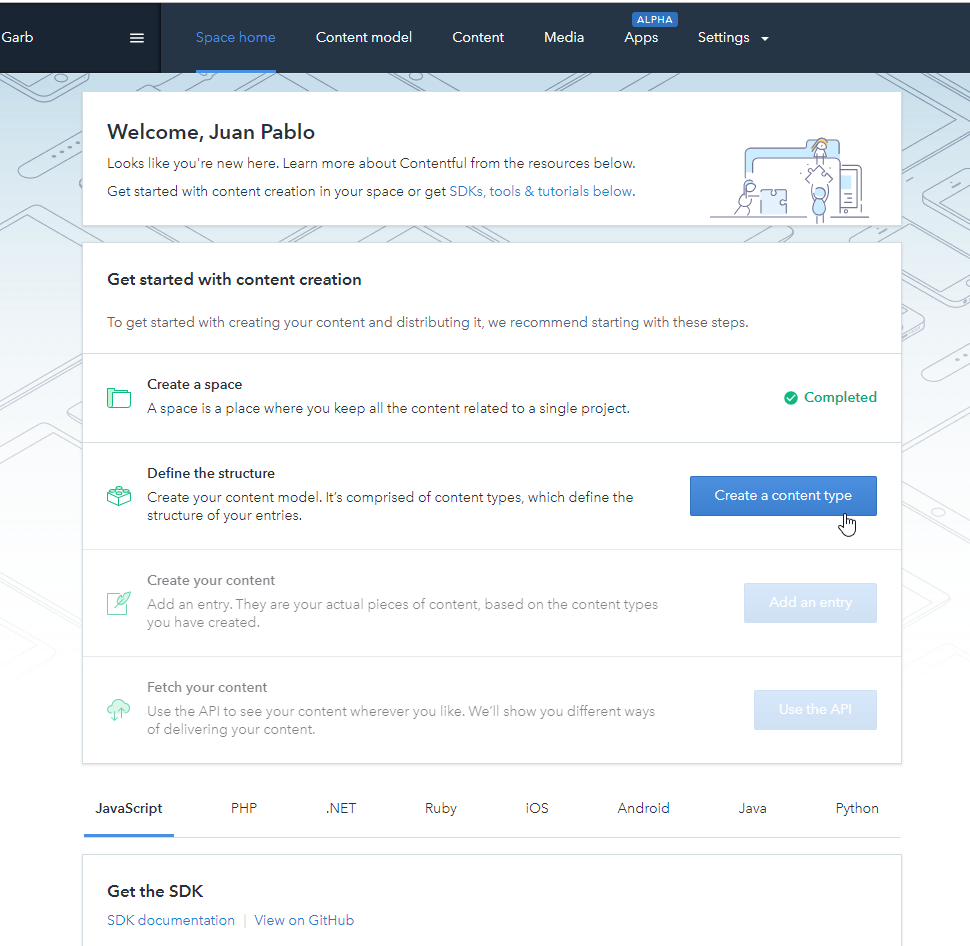
- Put
Productfor Name
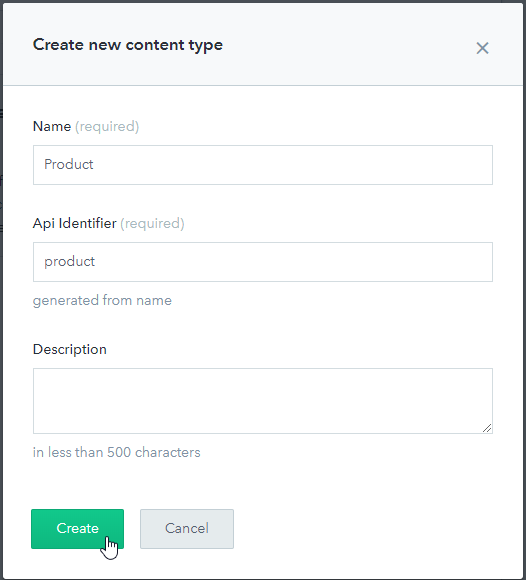

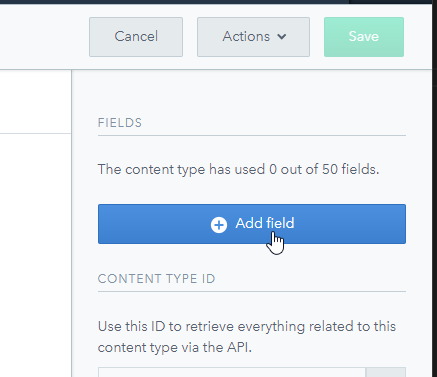
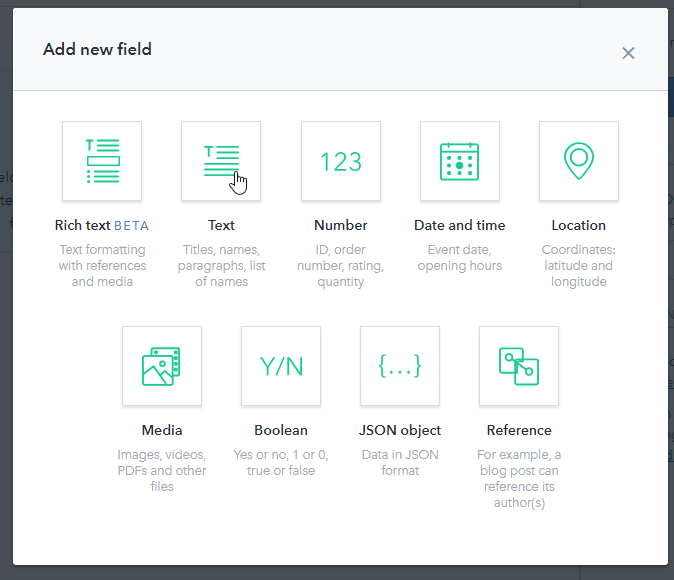
- Put
nameforNameandField IDand select(*)Short text, exact search
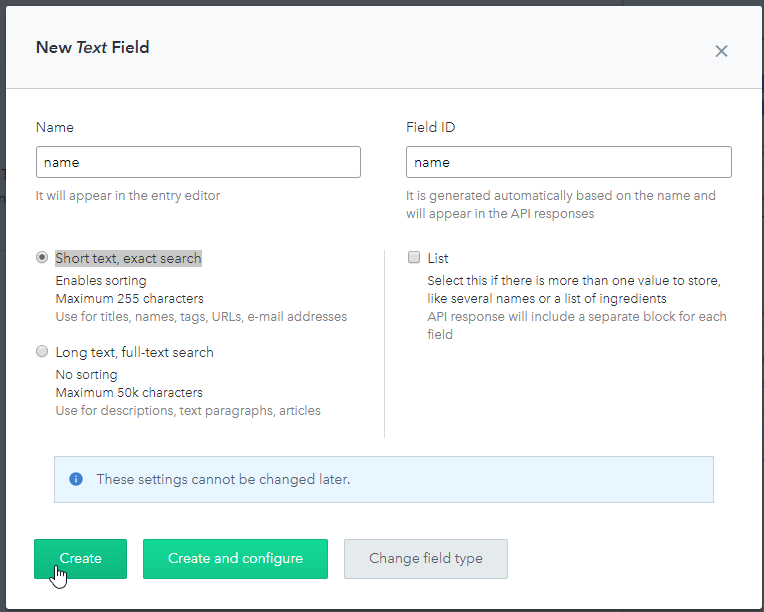
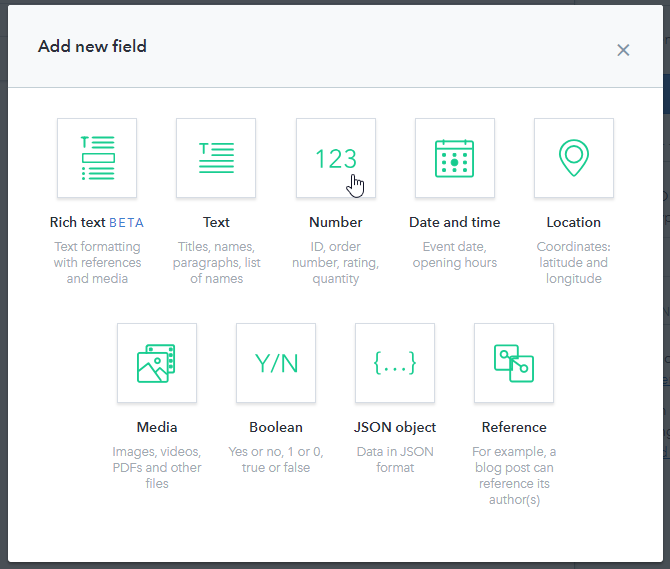
- Put
priceforNameandField IDand select(*)Decimal
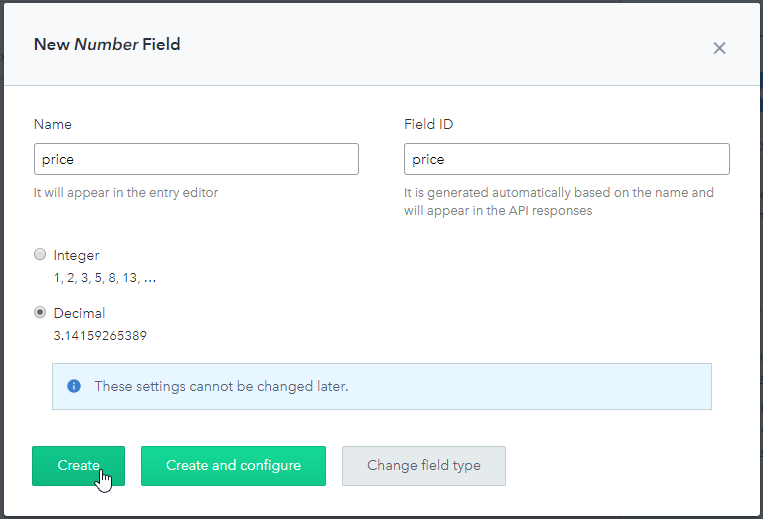
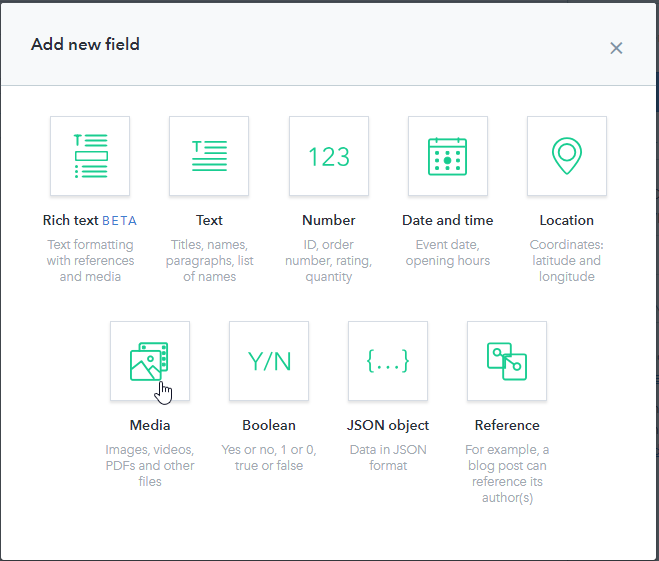
- Put
imageforNameandField IDand select(*)One file
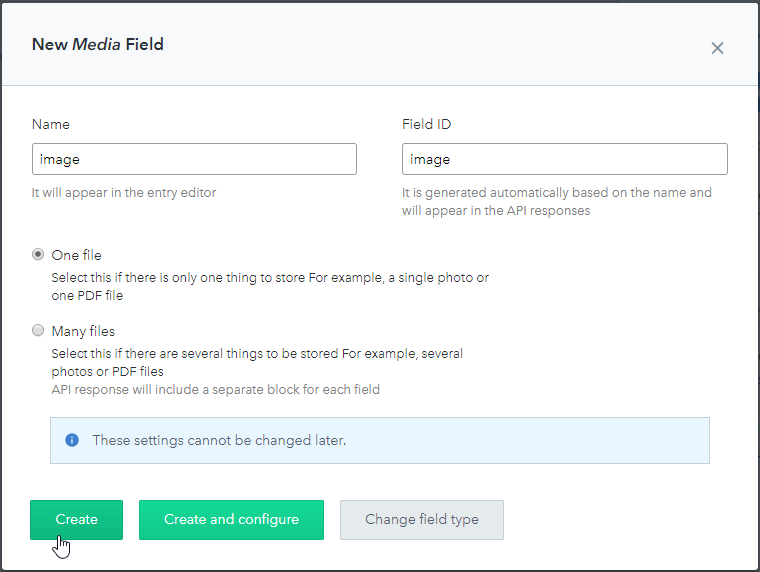
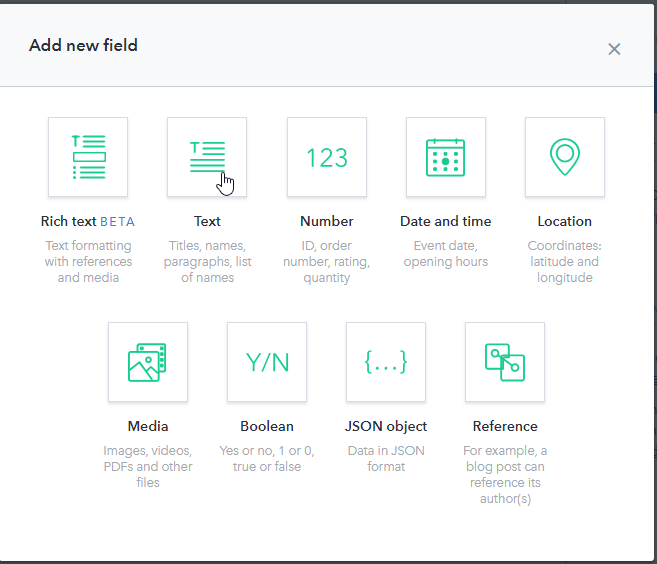
- Put
descriptionforNameandField IDand select(*)Short text, exact search
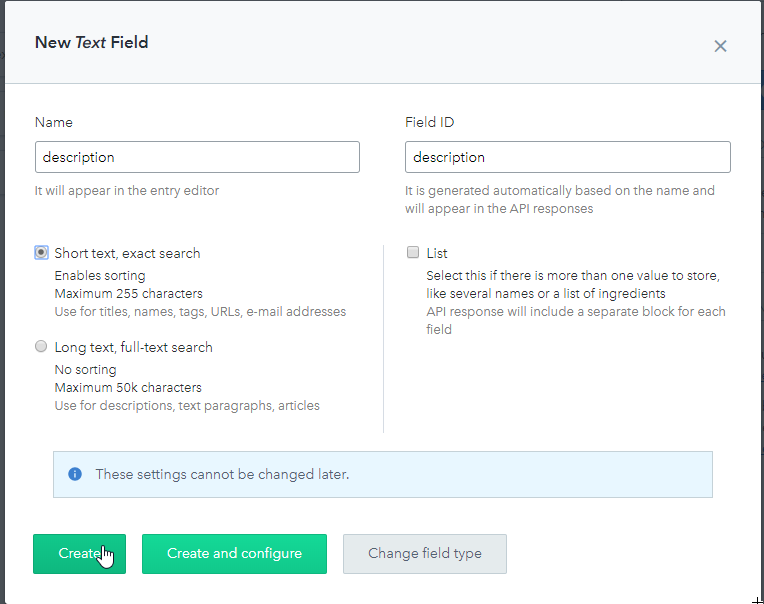
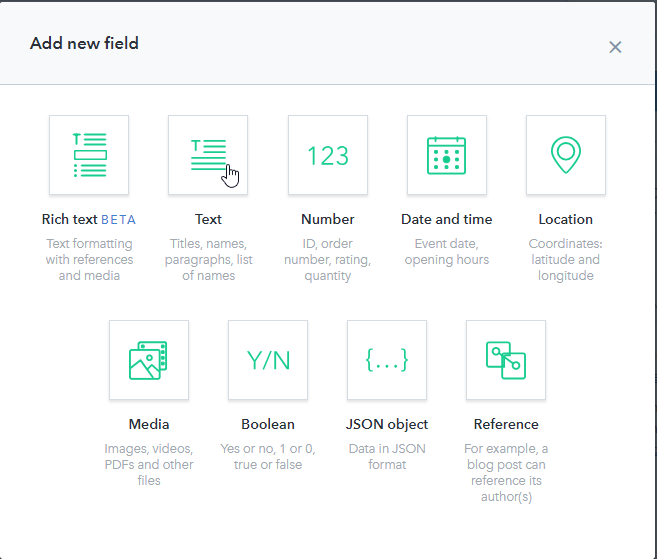
- Put
slutforNameandField IDand select(*)Short text, exact search
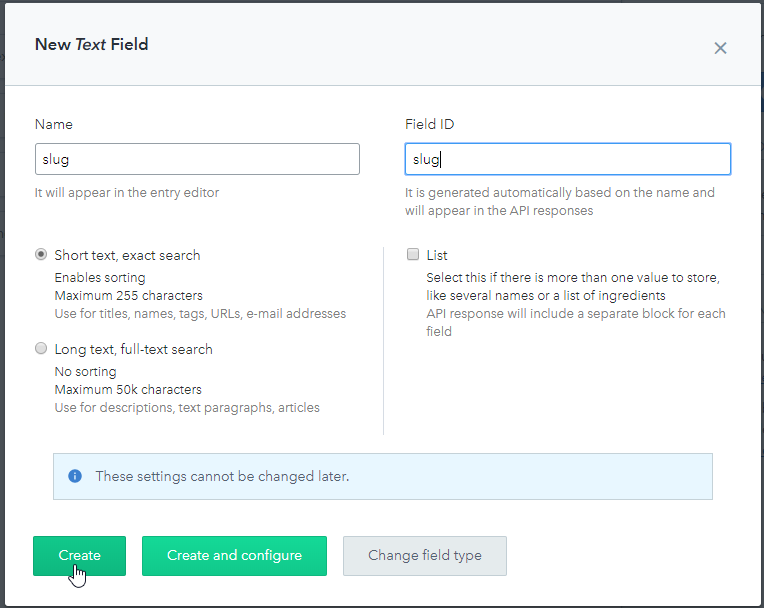
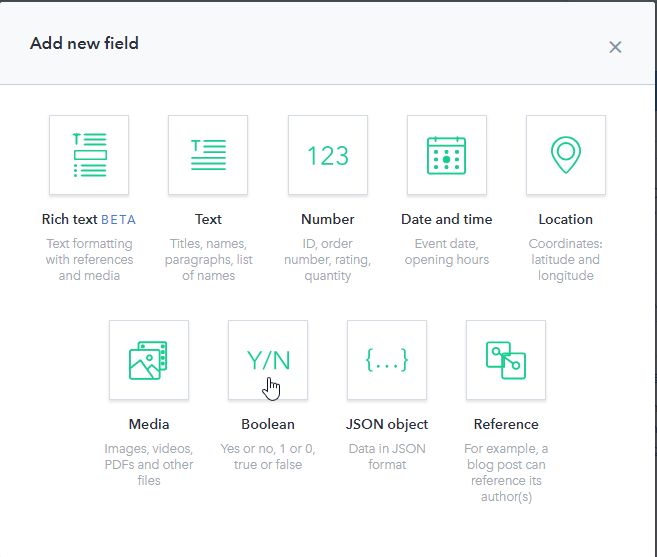
- Put
privateforNameandField ID

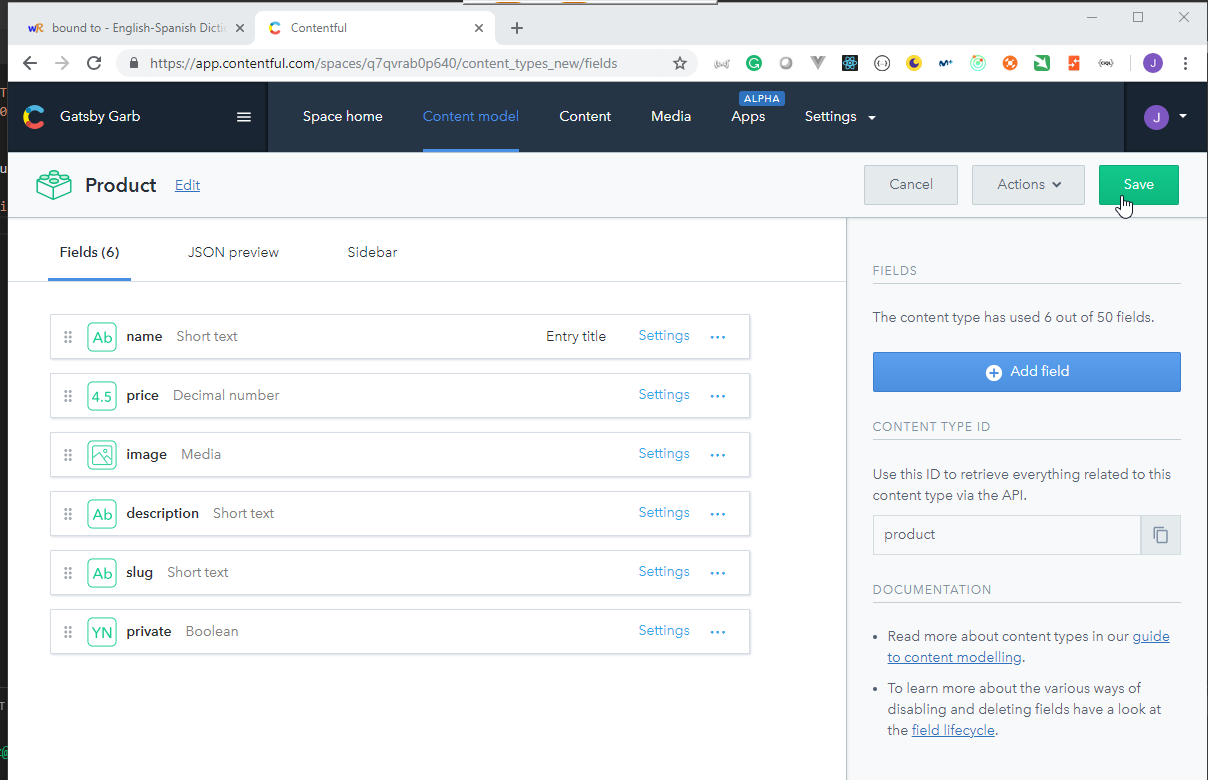


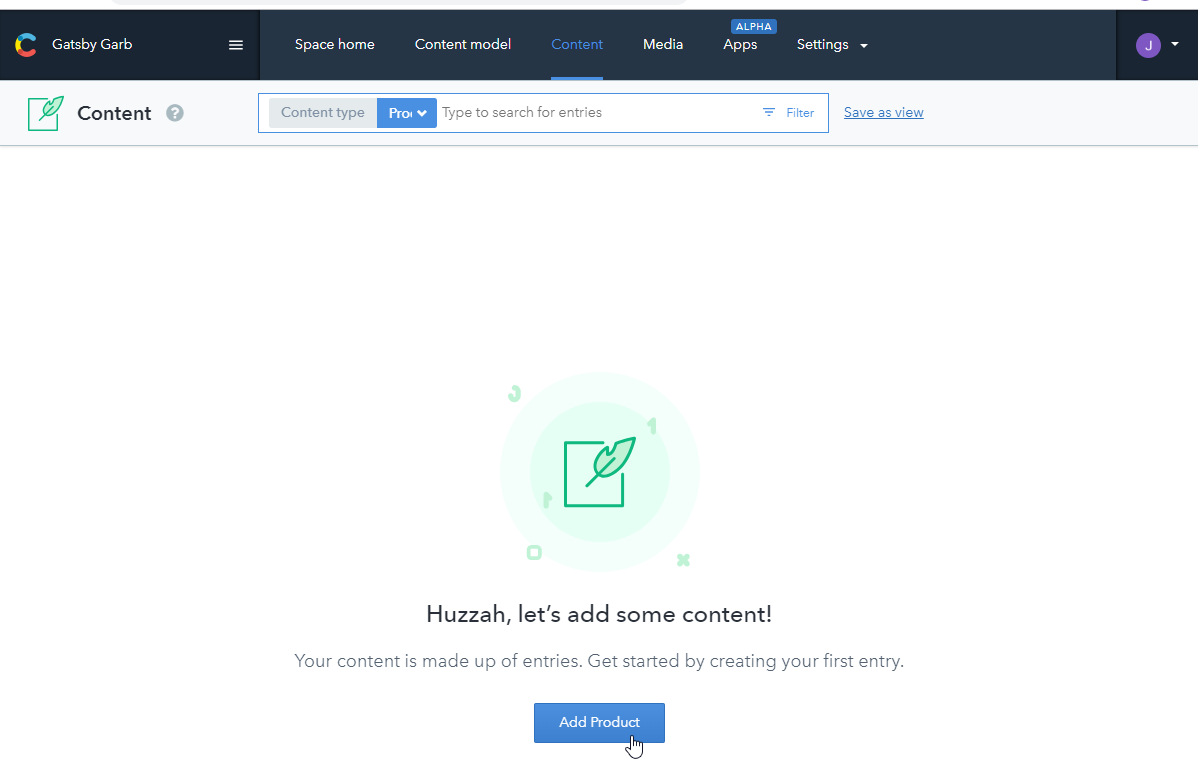
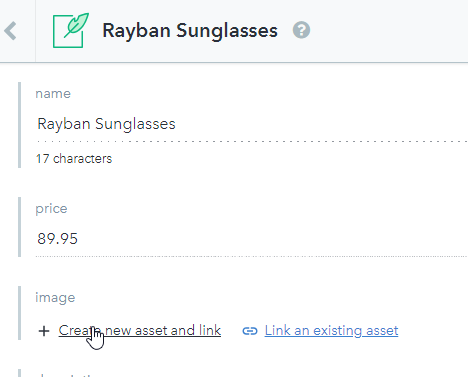
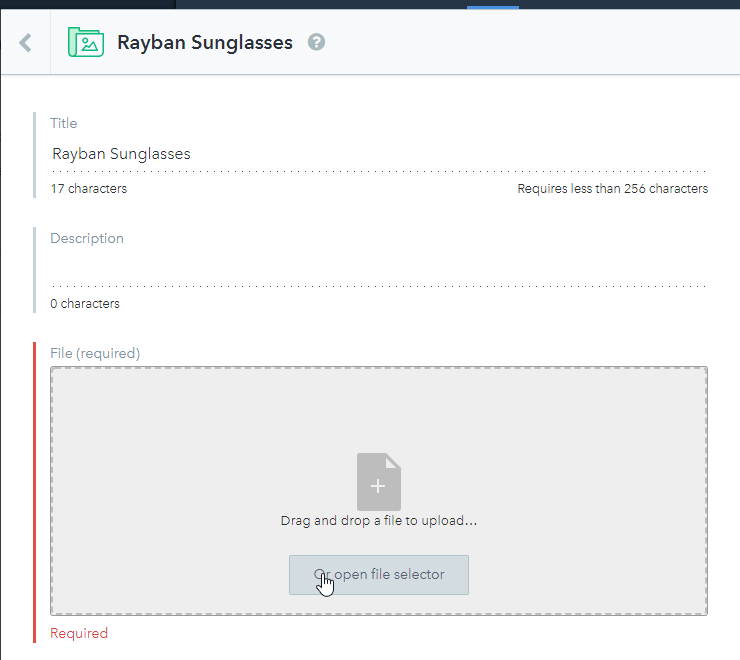
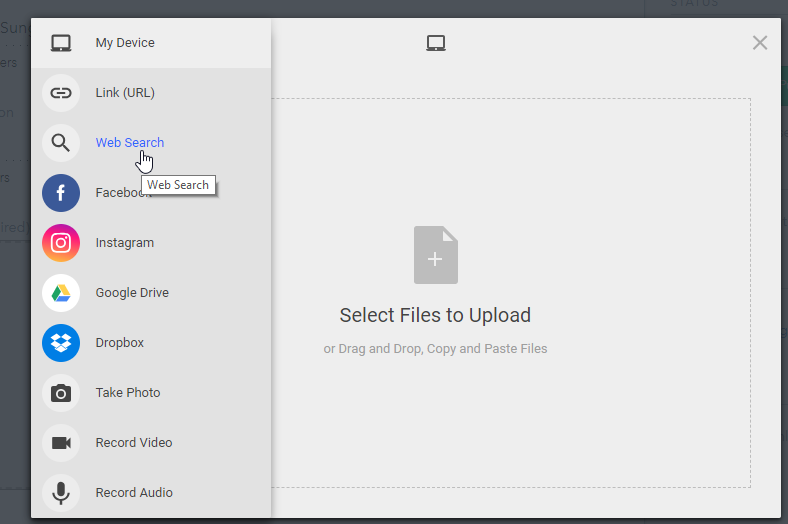

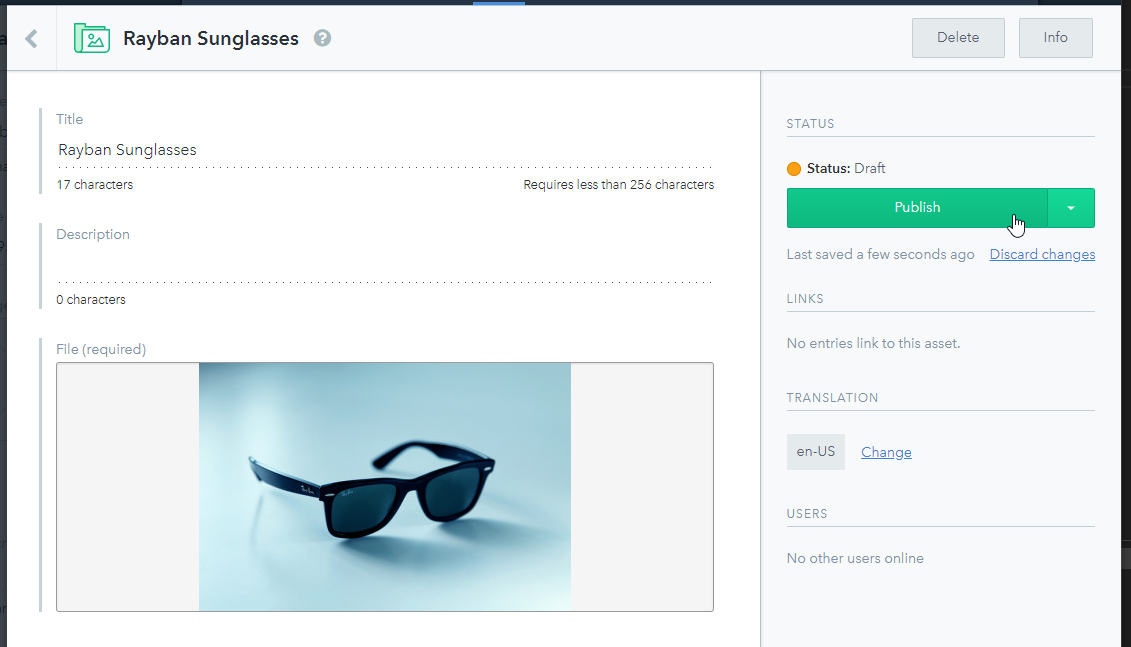

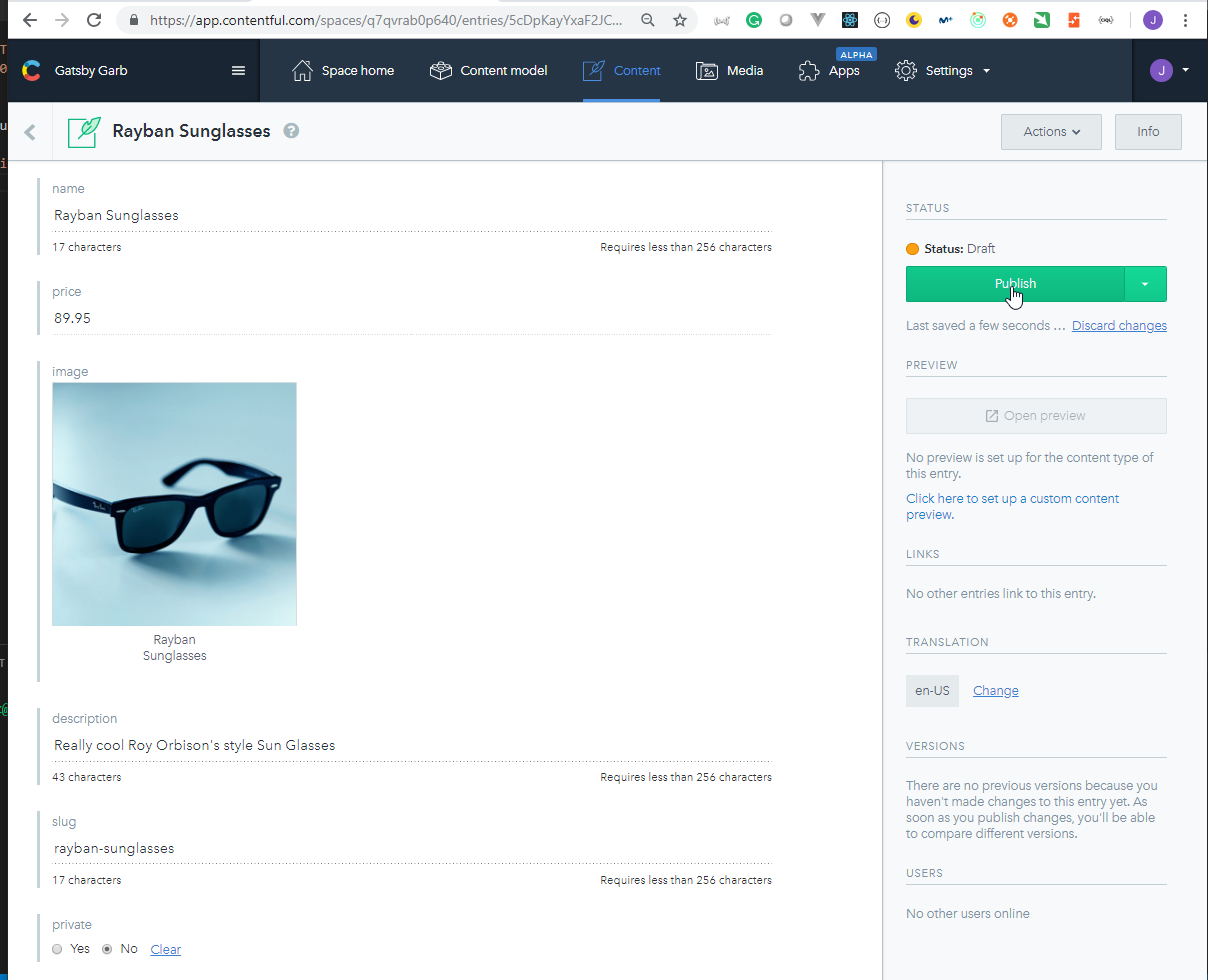


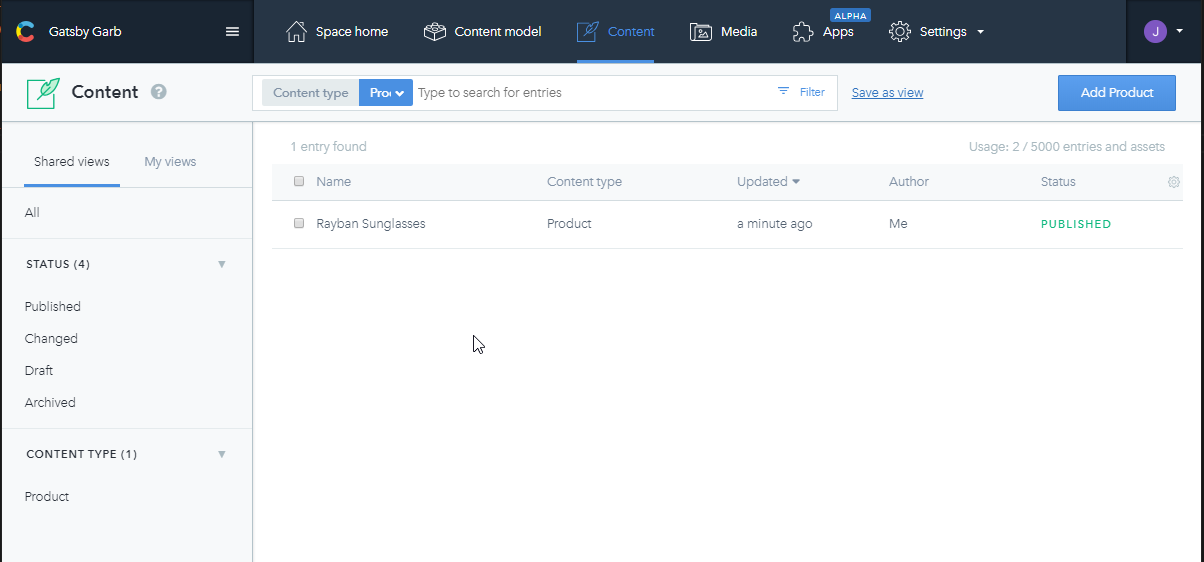
IntroToHeadlessCmsAndContentful47
36. Managing Environment Variables within Gatsby / Fetching Products from Contentful
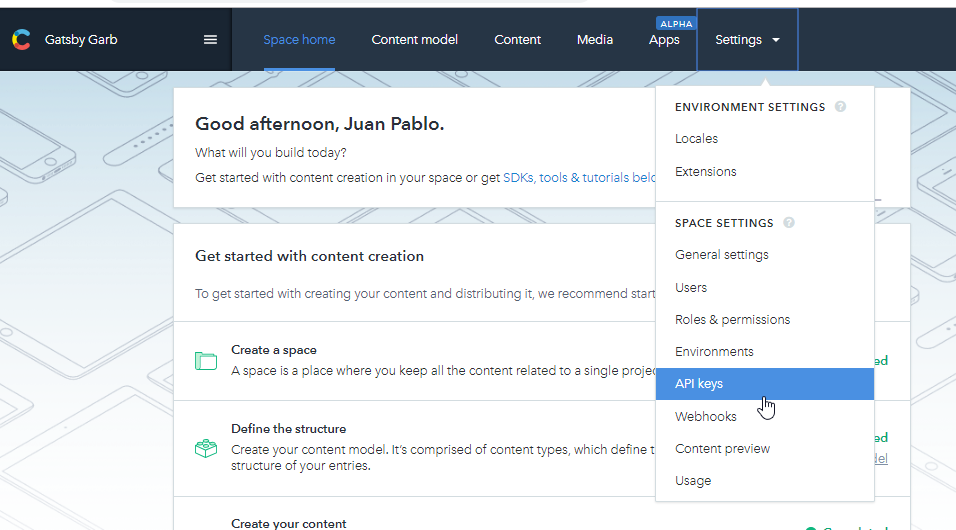
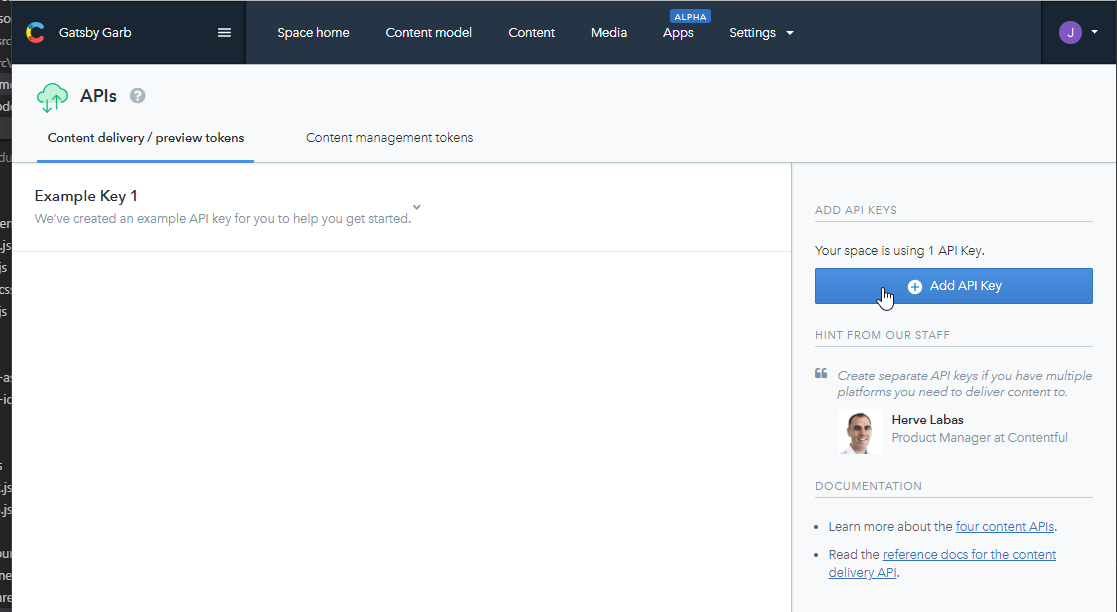

- We need to install the
gatsby-source-contentfulplugin and thedotenvpackage.
Juan.Pablo.Perez@RIMDUB-0232 MINGW64 /c/Work/Training/Pre/Gatsby/gatsby-garb (master)
$ npm i gatsby-source-contentful dotenv
npm WARN optional SKIPPING OPTIONAL DEPENDENCY: fsevents@1.2.4 (node_modules\fsevents):
npm WARN notsup SKIPPING OPTIONAL DEPENDENCY: Unsupported platform for fsevents@1.2.4: wanted {"os":"darwin","arch":"any"} (current: {"os":"win32","arch":"x64"})

+ dotenv@6.2.0
+ gatsby-source-contentful@2.0.30
added 43 packages from 28 contributors, updated 1 package and audited 29295 packages in 82.356s
found 3 low severity vulnerabilities
  run `npm audit fix` to fix them, or `npm audit` for details
- We need to create a new
.envdocument where we have to put theSpace IDandContent Delivery API - access tokenvalues copied from theContentFul API Page.
.env
CONTENTFUL_SPACE_ID=..
CONTENTFUL_ACCESS_TOKEN=..
- We need to modify the
gatsby-config.jsdocument to enable the new plugin using the new environment variables.
gatsby-config.js
const dotenv = require("dotenv");

if (process.env.NODE_ENV !== "production") {
  dotenv.config();
}

module.exports = {
  siteMetadata: {
    title: `Gatsby Garb`,
    description: `Kick off your next, great Gatsby project with this default starter. This barebones starter ships with the main Gatsby configuration files you might need.`,
    author: `Juan Pablo Perez`,
    createdAt: 2019
  },
  plugins: [
    `gatsby-plugin-react-helmet`,
    {
      resolve: `gatsby-source-filesystem`,
      options: {
        name: `images`,
        path: `${__dirname}/src/images`
      }
    },
    {
      resolve: "gatsby-transformer-remark",
      options: {
        plugins: [
          {
            resolve: "gatsby-remark-images"
          }
        ]
      }
    },
    {
      resolve: `gatsby-source-filesystem`,
      options: {
        name: `posts`,
        path: `${__dirname}/src/posts`
      }
    },
    `gatsby-transformer-sharp`,
    `gatsby-plugin-sharp`,
    {
      resolve: `gatsby-plugin-manifest`,
      options: {
        name: `gatsby-starter-default`,
        short_name: `starter`,
        start_url: `/`,
        background_color: `#663399`,
        theme_color: `#663399`,
        display: `minimal-ui`,
        icon: `src/images/gatsby-icon.png` // This path is relative to the root of the site.
      }
    },
    {
      resolve: "gatsby-source-contentful",
      options: {
        spaceId: process.env.CONTENTFUL_SPACE_ID,
        accessToken: process.env.CONTENTFUL_ACCESS_TOKEN
      }
    }
    // this (optional) plugin enables Progressive Web App + Offline functionality
    // To learn more, visit: https://gatsby.app/offline
    // 'gatsby-plugin-offline',
  ]
};
request
{
  allContentfulProduct {
    totalCount
    edges {
      node {
        name
        price
        description
        slug
        image {
          fluid {
            src
          }
        }
      }
    }
  }
}
response
{
  "data": {
    "allContentfulProduct": {
      "totalCount": 1,
      "edges": [
        {
          "node": {
            "name": "Rayban Sunglasses",
            "price": 89.95,
            "description": "Really cool Roy Orbison's style Sun Glasses",
            "slug": "rayban-sunglasses",
            "image": {
              "fluid": {
                "src": "//images.ctfassets.net/q7qvrab0p640/4UguCYRX2jXlUjnfT8QIXi/332a3bd43f422ec3870241721bd86087/Rayban_sunglasses.jpg?w=800&q=50"
              }
            }
          }
        }
      ]
    }
  }
}
37. Creating our Individual Product Pages / Displaying Contentful Images
We need to create a new query that is going to be used for the creation of the Product pages on the fly.
For one product:
request
{
  contentfulProduct(slug: { eq: "rayban-sunglasses" }) {
    name
    price
    description
    slug
    image {
      fluid {
        src
      }
    }
  }
}
response
{
  "data": {
    "contentfulProduct": {
      "name": "Rayban Sunglasses",
      "price": 89.95,
      "description": "Really cool Roy Orbison's style Sun Glasses",
      "slug": "rayban-sunglasses",
      "image": {
        "fluid": {
          "src": "//images.ctfassets.net/q7qvrab0p640/4UguCYRX2jXlUjnfT8QIXi/332a3bd43f422ec3870241721bd86087/Rayban_sunglasses.jpg?w=800&q=50"
        }
      }
    }
  }
}
- We need to make it variable:
Request
query($slug: String) {
  contentfulProduct(slug: { eq: $slug }) {
    name
    price
    description
    createdAt(formatString: "MMM Do, YYYY, h:mm:ss a")
    image {
      fluid {
        src
      }
    }
  }
}
Quey variables
{
  "slug": "rayban-sunglasses"
}
Response
{
  "data": {
    "contentfulProduct": {
      "name": "Rayban Sunglasses",
      "price": 89.95,
      "description": "Really cool Roy Orbison's style Sun Glasses",
      "createdAt": "Feb 20th, 2019, 5:44:24 am",
      "image": {
        "fluid": {
          "src": "//images.ctfassets.net/q7qvrab0p640/4UguCYRX2jXlUjnfT8QIXi/332a3bd43f422ec3870241721bd86087/Rayban_sunglasses.jpg?w=800&q=50"
        }
      }
    }
  }
}
- We need to create the new
templates\product-template.jsdocument used to generate the product pages on the fly.
templates\product-template.js
import React from "react";
import { graphql } from "gatsby";
import Img from "gatsby-image";

import Layout from "../components/layout";

const ProductTemplate = ({ data: { contentfulProduct } }) => (
  <Layout>
    <div
      style={{
        marginLeft: "0 auto",
        width: "100%",
        textAlign: "center"
      }}
    >
      {/* Product Info */}
      <h2>
        {contentfulProduct.name} -{" "}
        <span style={{ color: "#ccc" }}>
          Added on {contentfulProduct.createdAt}
        </span>
      </h2>
      <p>{contentfulProduct.description}</p>
    </div>
    <Img
      style={{ margin: "0 auto", maxWidth: 600 }}
      fluid={contentfulProduct.image.fluid}
    />
  </Layout>
);

export const query = graphql`
  query($slug: String!) {
    contentfulProduct(slug: { eq: $slug }) {
      slug
      name
      price
      description
      createdAt(formatString: "MMMM Do, YYYY, h:mm:ss a")
      image {
        fluid(maxWidth: 800) {
          ...GatsbyContentfulFluid
        }
      }
    }
  }
`;

export default ProductTemplate;
- Modify the
gatsby-node.jsdocument to include the content product query and the use of the newProductTemplateto generate the page for each product..
gatsby-node.js
const path = require("path");
const { createFilePath } = require("gatsby-source-filesystem");

const PostTemplate = path.resolve("./src/templates/post-template.js");
const BlogTemplate = path.resolve("./src/templates/blog-template.js");
const ProductTemplate = path.resolve("./src/templates/product-template.js");

exports.onCreateNode = ({ node, getNode, actions }) => {
  const { createNodeField } = actions;

  if (node.internal.type === "MarkdownRemark") {
    const slug = createFilePath({ node, getNode, basepath: "posts" });
    createNodeField({
      node,
      name: "slug",
      value: slug
    });
  }
};

exports.createPages = async ({ graphql, actions }) => {
  const { createPage } = actions;
  const result = await graphql(`
    {
      allMarkdownRemark(limit: 1000) {
        edges {
          node {
            fields {
              slug
            }
          }
        }
      }

      allContentfulProduct {
        edges {
          node {
            slug
          }
        }
      }
    }
  `);
  const posts = result.data.allMarkdownRemark.edges;

  posts.forEach(({ node: post }) => {
    createPage({
      path: `posts${post.fields.slug}`,
      component: PostTemplate,
      context: {
        slug: post.fields.slug
      }
    });
  });

  const postsPerPage = 2;
  const totalPages = Math.ceil(posts.length / postsPerPage);

  Array.from({ length: totalPages }).forEach((_, index) => {
    const currentPage = index + 1;
    const isFirstPage = index === 0;
    const isLastPage = currentPage === totalPages;
    createPage({
      path: isFirstPage ? "/blog/" : `blog/${currentPage}`,
      component: BlogTemplate,
      context: {
        limit: postsPerPage,
        skip: index * postsPerPage,
        isFirstPage,
        isLastPage,
        currentPage,
        totalPages
      }
    });
  });

  const products = result.data.allContentfulProduct.edges;
  products.forEach(({ node: product }) => {
    createPage({
      path: `/products/${product.slug}`,
      component: ProductTemplate,
      context: {
        slug: product.slug
      }
    });
  });
};
- Go to an invalid path to check if the link to the products is created on the fly.
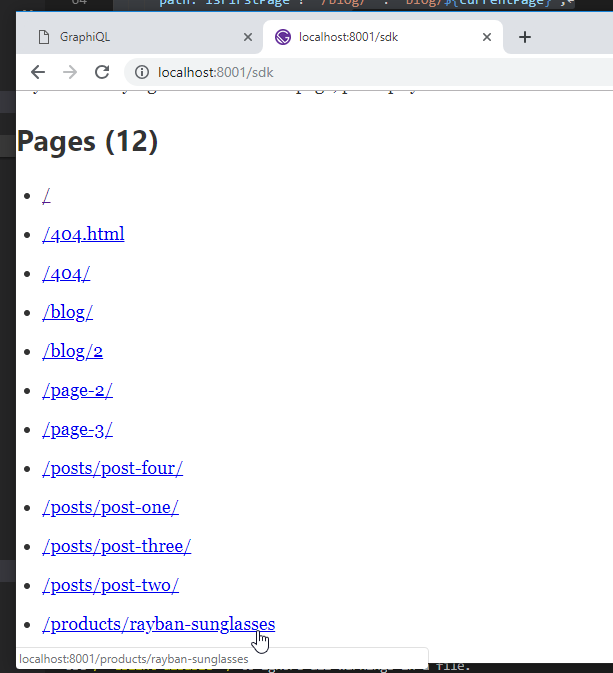

38. Querying / Previewing all Products on Products Page
- Create the new
pages/products.jspage where we can see all the products.
pages/products.js
import React from "react";
import { graphql, Link } from "gatsby";
import Img from "gatsby-image";

import Layout from "../components/layout";

const Products = ({ data: { allContentfulProduct } }) => (
  <Layout>
    <div>
      {/* Products List */}
      {allContentfulProduct.edges.map(({ node: product }) => (
        <div key={product.id}>
          <h2>Garb Products</h2>
          <Link to={`/products/${product.slug}`}>
            <h3>{product.name}</h3>
          </Link>
          <Img style={{ maxWidth: 400 }} fluid={product.image.fluid} />
        </div>
      ))}
    </div>
  </Layout>
);

export const query = graphql`
  {
    allContentfulProduct {
      edges {
        node {
          id
          slug
          name
          image {
            fluid(maxWidth: 400) {
              ...GatsbyContentfulFluid
            }
          }
        }
      }
    }
  }
`;

export default Products;
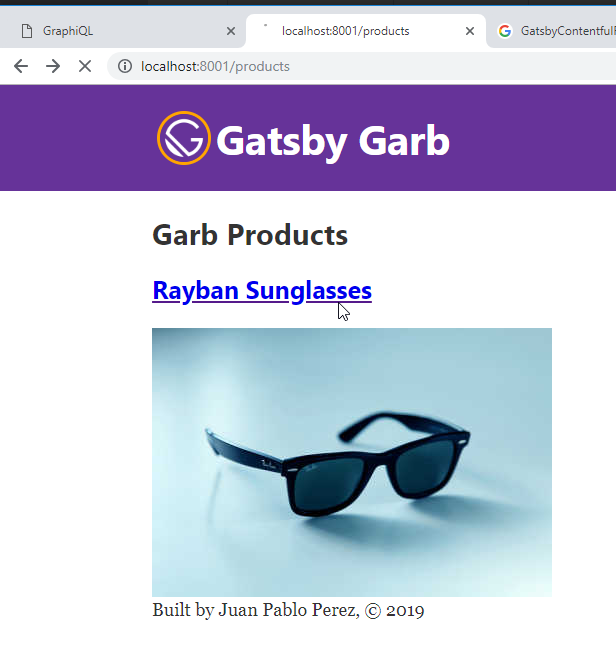
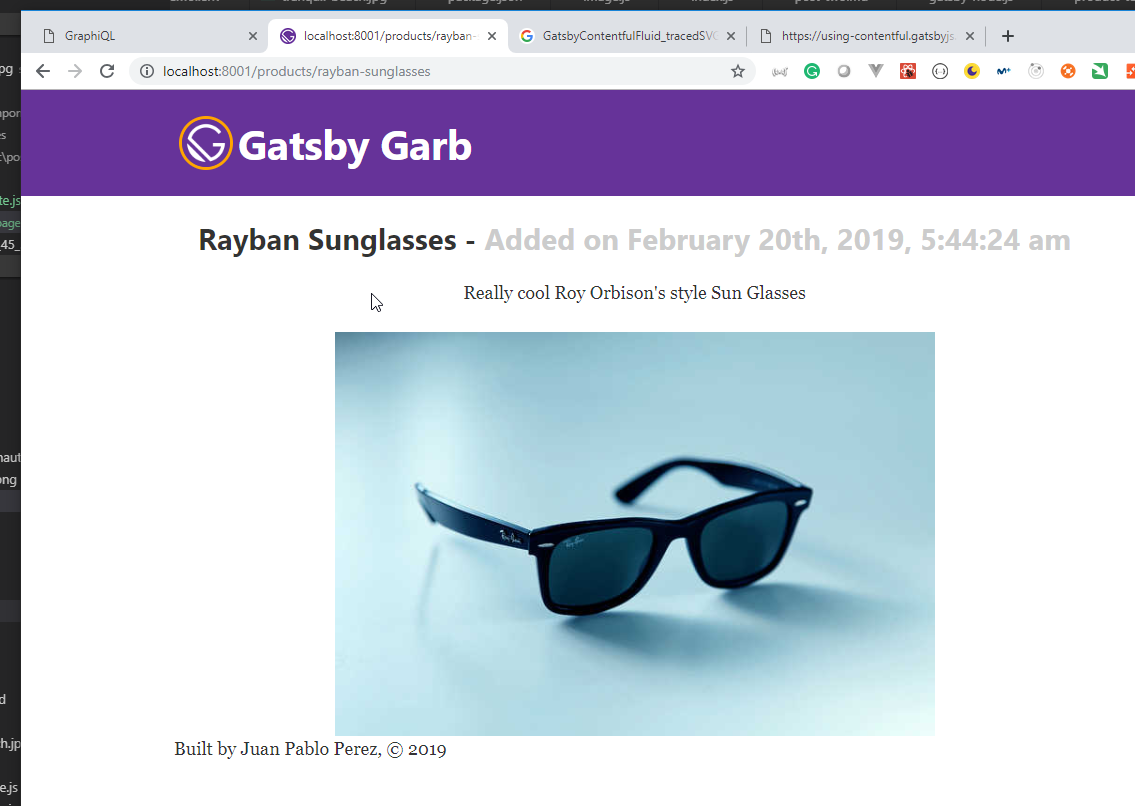
If we use GatsbyContentfulFluid_tracedSVG there is an error when compiling.
i 「wdm」: Compiling...
error UNHANDLED EXCEPTION


  TypeError: Cannot read property 'bitmap' of undefined

  - Potrace.js:1000 Potrace._processLoadedImage
    [gatsby-garb]/[potrace]/lib/Potrace.js:1000:35

  - Potrace.js:1046 Jimp.<anonymous>
    [gatsby-garb]/[potrace]/lib/Potrace.js:1046:14

  - index.js:85 Jimp.throwError
    [gatsby-garb]/[jimp]/index.js:85:44

  - index.js:201 ReadFileContext.callback
    [gatsby-garb]/[jimp]/index.js:201:44


npm ERR! code ELIFECYCLE
npm ERR! errno 1
npm ERR! gatsby-starter-default@0.1.0 develop: `gatsby develop -p 8001`
npm ERR! Exit status 1
npm ERR!
npm ERR! Failed at the gatsby-starter-default@0.1.0 develop script.
npm ERR! This is probably not a problem with npm. There is likely additional logging output above.

npm ERR! A complete log of this run can be found in:
npm ERR!     C:\Users\juan.pablo.perez\AppData\Roaming\npm-cache\_logs\2019-02-21T07_30_56_720Z-debug.log
npm ERR! code ELIFECYCLE
npm ERR! errno 1
npm ERR! gatsby-starter-default@0.1.0 start: `npm run develop`
npm ERR! Exit status 1
npm ERR!
npm ERR! Failed at the gatsby-starter-default@0.1.0 start script.
npm ERR! This is probably not a problem with npm. There is likely additional logging output above.

npm ERR! A complete log of this run can be found in:
npm ERR!     C:\Users\juan.pablo.perez\AppData\Roaming\npm-cache\_logs\2019-02-21T07_30_56_823Z-debug.log
15. Creating a Shopping Cart / Checkout Functionality with Snipcart
39. Add Ability to Purchase Products with Snipcart
- We need to modify the
pages/product.jsandtemplate/product-template.jsdocuments to include the price of the product.
pages/product.js
import React from "react";
import { graphql, Link } from "gatsby";
import Img from "gatsby-image";

import Layout from "../components/layout";

const Products = ({ data: { allContentfulProduct } }) => (
  <Layout>
    <div>
      {/* Products List */}
      {allContentfulProduct.edges.map(({ node: product }) => (
        <div key={product.id}>
          <h2>Garb Products</h2>
          <Link
            to={`/products/${product.slug}`}
            style={{ textDecoration: "none", color: "#551a8b" }}
          >
            <h3>
              {product.name} ·{" "}
              <span
                style={{
                  fontSize: "1.2rem",
                  fontWeight: 300,
                  color: "#f60"
                }}
              >
                ${product.price}
              </span>
            </h3>
          </Link>
          <Img style={{ maxWidth: 400 }} fluid={product.image.fluid} />
        </div>
      ))}
    </div>
  </Layout>
);

export const query = graphql`
  {
    allContentfulProduct {
      edges {
        node {
          id
          slug
          name
          price
          image {
            fluid(maxWidth: 400) {
              ...GatsbyContentfulFluid
            }
          }
        }
      }
    }
  }
`;

export default Products;
template/product-template.js
import React from "react";
import { graphql } from "gatsby";
import Img from "gatsby-image";

import Layout from "../components/layout";

const ProductTemplate = ({ data: { contentfulProduct } }) => (
  <Layout>
    <div
      style={{
        marginLeft: "0 auto",
        width: "100%",
        textAlign: "center"
      }}
    >
      {/* Product Info */}
      <h2>
        {contentfulProduct.name} -{" "}
        <span style={{ color: "#ccc" }}>
          Added on {contentfulProduct.createdAt}
        </span>
      </h2>
      <h4>${contentfulProduct.price}</h4>
      <p>{contentfulProduct.description}</p>
    </div>
    <Img
      style={{ margin: "0 auto", maxWidth: 600 }}
      fluid={contentfulProduct.image.fluid}
    />
  </Layout>
);

export const query = graphql`
  query($slug: String!) {
    contentfulProduct(slug: { eq: $slug }) {
      slug
      name
      price
      description
      createdAt(formatString: "MMMM Do, YYYY, h:mm:ss a")
      image {
        fluid(maxWidth: 800) {
          ...GatsbyContentfulFluid
        }
      }
    }
  }
`;

export default ProductTemplate;

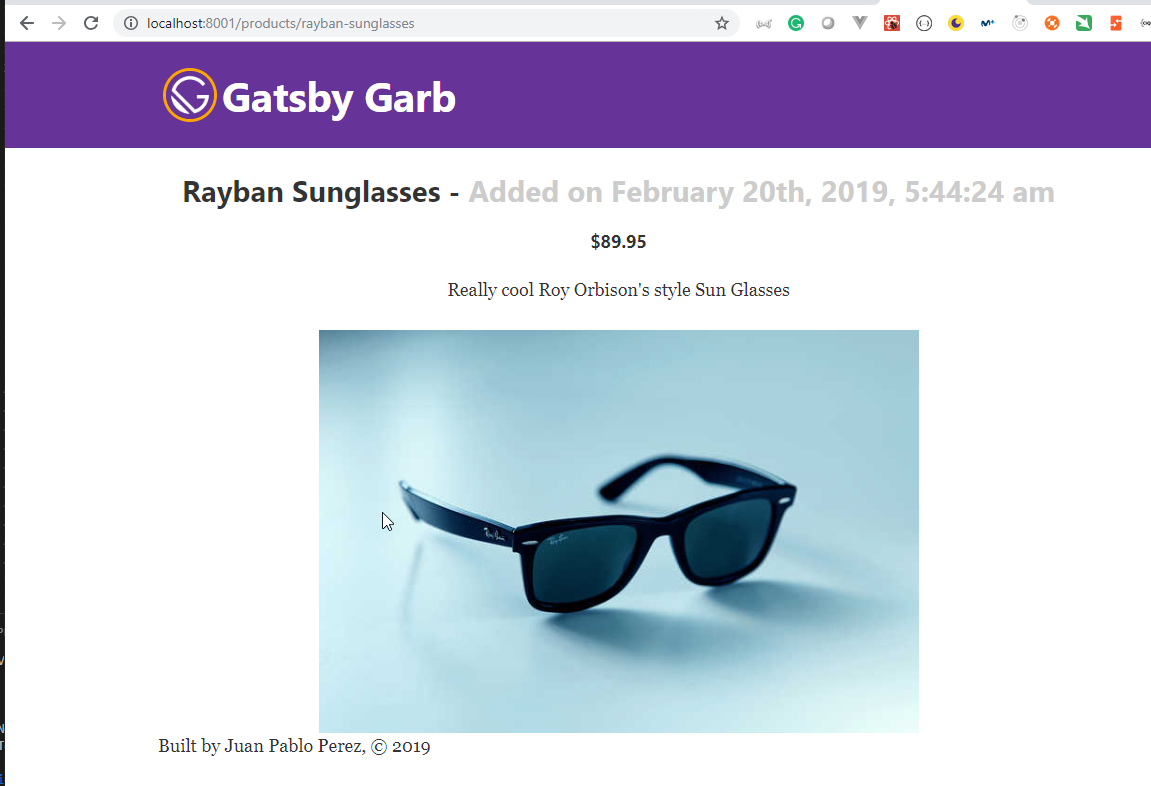
- We need to sign up on SNIPCART

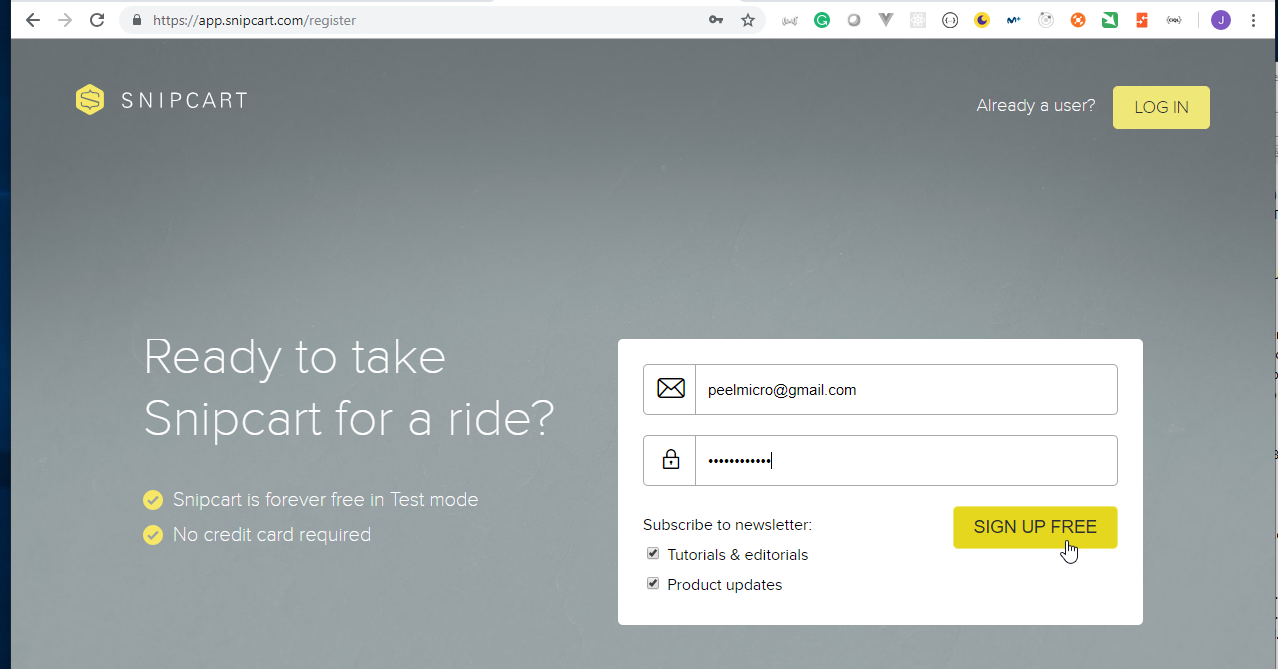
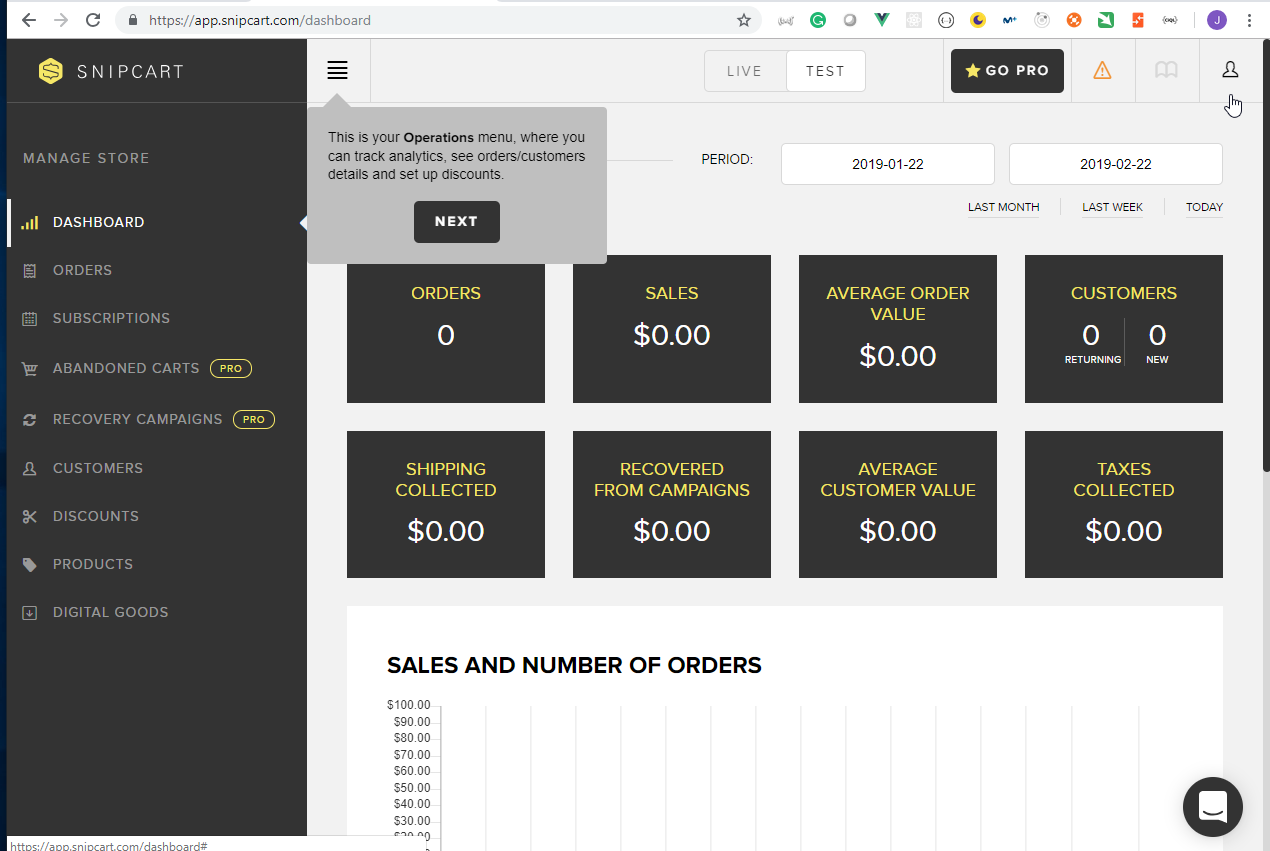

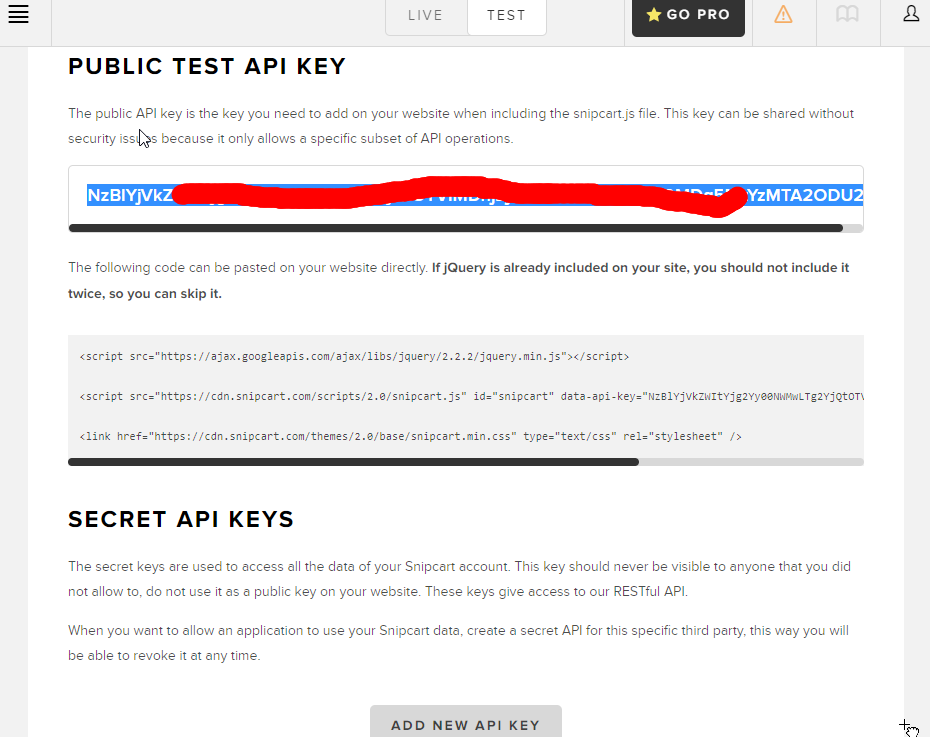
- Copy the API key to the
.envdocument.
.env
CONTENTFUL_SPACE_ID=q7XXXXXXp640
CONTENTFUL_ACCESS_TOKEN=caXXXXXXd2c940334XXXXXXf6ce75XXXXXX72a019XXXXXXa3fcb9XXXXXX05b73
SNIPCART_API_KEY=NzBlYjVXXXXXXjg2Yy0XXXXXXTg2YjQXXXXXXDhjZjcXXXXXXjM2ODYXXXXXXzYzMTA2ODU2
- We need to install the
gatsby-pluig-snipcart
Juan.Pablo.Perez@RIMDUB-0232 MINGW64 /c/Work/Training/Pre/Gatsby/gatsby-garb (master)
$ npm i gatsby-plugin-snipcart
npm WARN optional SKIPPING OPTIONAL DEPENDENCY: fsevents@1.2.4 (node_modules\fsevents):
npm WARN notsup SKIPPING OPTIONAL DEPENDENCY: Unsupported platform for fsevents@1.2.4: wanted {"os":"darwin","arch":"any"} (current: {"os":"win32","arch":"x64"})

+ gatsby-plugin-snipcart@1.0.6
added 1 package from 1 contributor and audited 29296 packages in 47.555s
found 3 low severity vulnerabilities
  run `npm audit fix` to fix them, or `npm audit` for details
- Modify the
gatsby-config.jsdocument to include the new plugin
gatsby-config.js
const dotenv = require("dotenv");

if (process.env.NODE_ENV !== "production") {
  dotenv.config();
}

module.exports = {
  siteMetadata: {
    title: `Gatsby Garb`,
    description: `Kick off your next, great Gatsby project with this default starter. This barebones starter ships with the main Gatsby configuration files you might need.`,
    author: `Juan Pablo Perez`,
    createdAt: 2019
  },
  plugins: [
    `gatsby-plugin-react-helmet`,
    {
      resolve: `gatsby-source-filesystem`,
      options: {
        name: `images`,
        path: `${__dirname}/src/images`
      }
    },
    {
      resolve: "gatsby-transformer-remark",
      options: {
        plugins: [
          {
            resolve: "gatsby-remark-images"
          }
        ]
      }
    },
    {
      resolve: `gatsby-source-filesystem`,
      options: {
        name: `posts`,
        path: `${__dirname}/src/posts`
      }
    },
    `gatsby-transformer-sharp`,
    `gatsby-plugin-sharp`,
    {
      resolve: `gatsby-plugin-manifest`,
      options: {
        name: `gatsby-starter-default`,
        short_name: `starter`,
        start_url: `/`,
        background_color: `#663399`,
        theme_color: `#663399`,
        display: `minimal-ui`,
        icon: `src/images/gatsby-icon.png` // This path is relative to the root of the site.
      }
    },
    {
      resolve: "gatsby-source-contentful",
      options: {
        spaceId: process.env.CONTENTFUL_SPACE_ID,
        accessToken: process.env.CONTENTFUL_ACCESS_TOKEN
      }
    },
    {
      resolve: "gatsby-plugin-snipcart",
      options: {
        apiKey: process.env.SNIPCART_API_KEY,
        autopop: true
      }
    }
    // this (optional) plugin enables Progressive Web App + Offline functionality
    // To learn more, visit: https://gatsby.app/offline
    // 'gatsby-plugin-offline',
  ]
};
- We need to modify the
templates\product-template.jsdocument to include a button to add the product to thesnipcartcart.
templates\product-template.js
import React from "react";
import { graphql } from "gatsby";
import Img from "gatsby-image";

import Layout from "../components/layout";

const ProductTemplate = ({ data: { contentfulProduct }, location }) => (
  <Layout>
    <div
      style={{
        marginLeft: "0 auto",
        width: "100%",
        textAlign: "center"
      }}
    >
      {/* Product Info */}
      <h2>
        {contentfulProduct.name} -{" "}
        <span style={{ color: "#ccc" }}>
          Added on {contentfulProduct.createdAt}
        </span>
      </h2>
      <h4>${contentfulProduct.price}</h4>
      <p>{contentfulProduct.description}</p>
      <button
        className="snipcart-add-item"
        data-item-id={contentfulProduct.slug}
        data-item-price={contentfulProduct.price}
        data-item-image={contentfulProduct.image.file.url}
        data-item-name={contentfulProduct.name}
        data-item-url={location.pathname}
      >
        Add to Cart
      </button>
    </div>
    <Img
      style={{ margin: "0 auto", maxWidth: 600 }}
      fluid={contentfulProduct.image.fluid}
    />
  </Layout>
);

export const query = graphql`
  query($slug: String!) {
    contentfulProduct(slug: { eq: $slug }) {
      slug
      name
      price
      description
      createdAt(formatString: "MMMM Do, YYYY, h:mm:ss a")
      image {
        fluid(maxWidth: 800) {
          ...GatsbyContentfulFluid
        }
        file {
          url
        }
      }
    }
  }
`;

export default ProductTemplate;
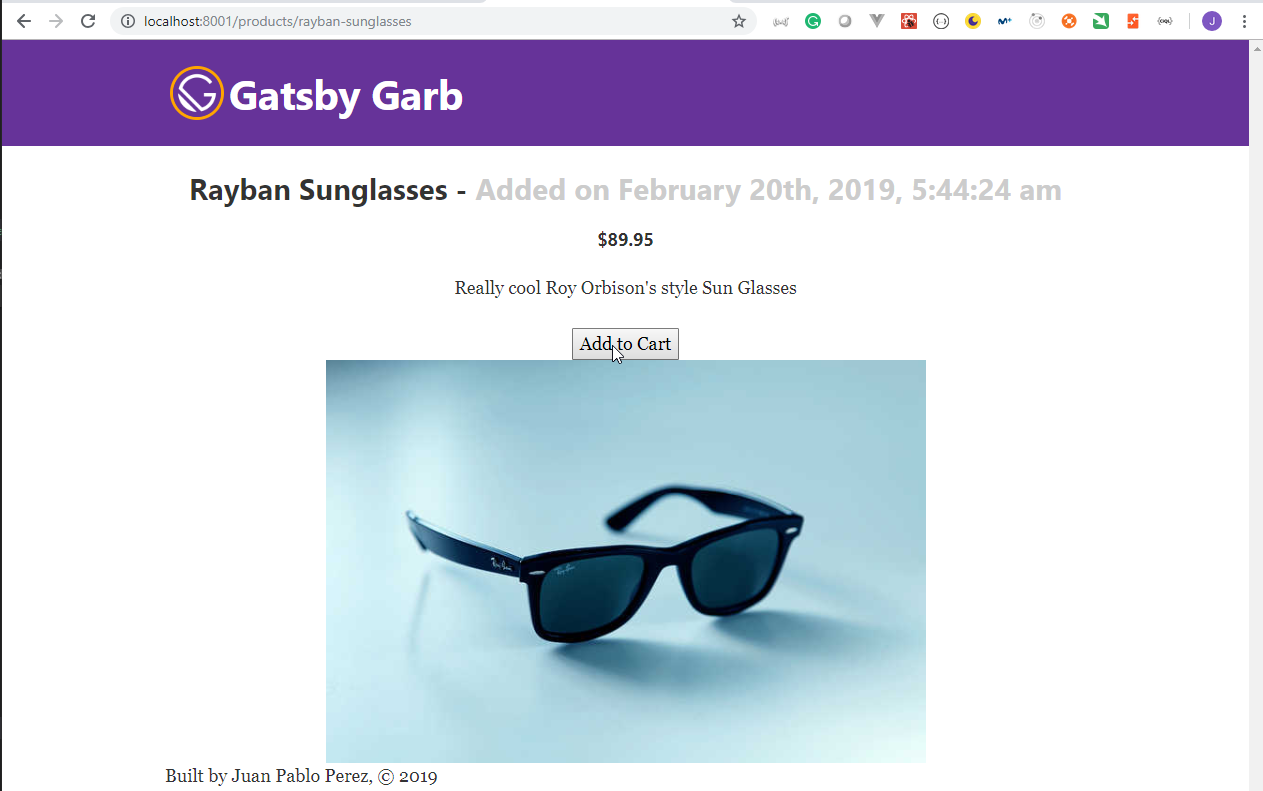
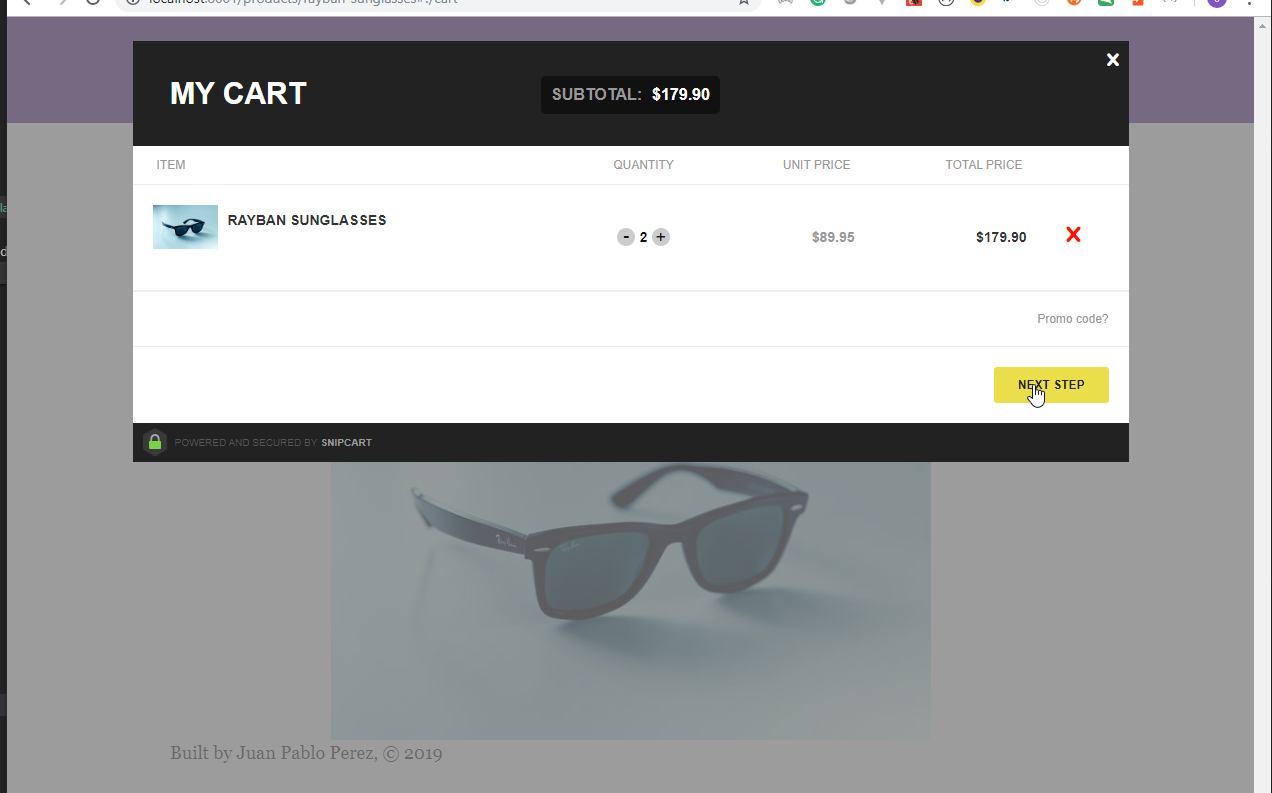
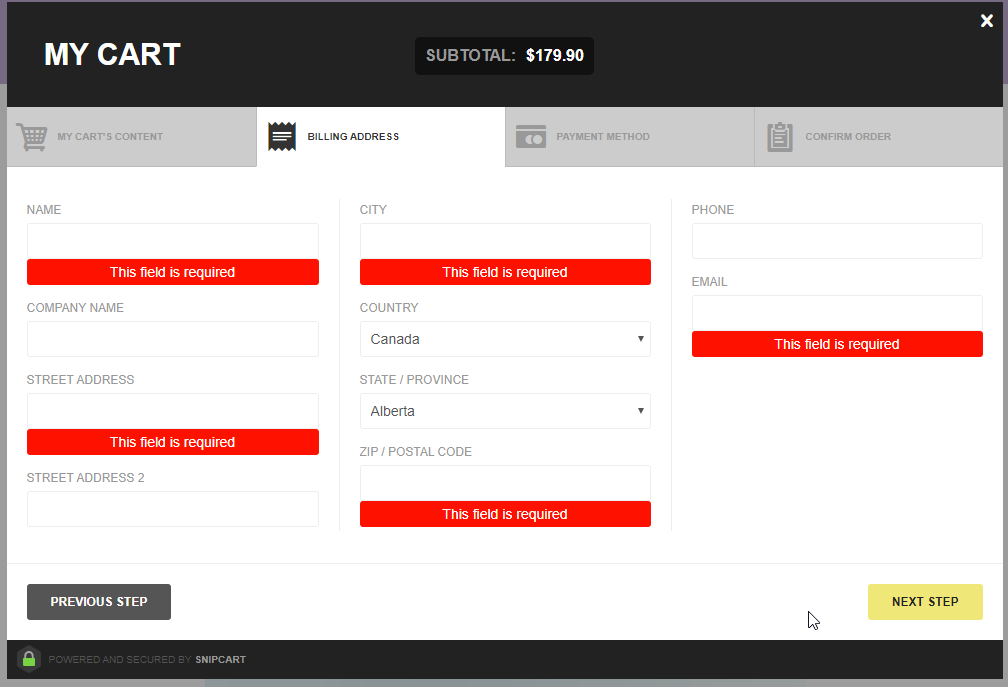
40. Display Shopping Cart Summary in Header
- Modify the
templates\product-template.jsdocument to better style theAdd to cartbutton..
templates\product-template.js
import React from "react";
import { graphql } from "gatsby";
import Img from "gatsby-image";

import Layout from "../components/layout";

const ProductTemplate = ({ data: { contentfulProduct }, location }) => (
  <Layout>
    <div
      style={{
        marginLeft: "0 auto",
        width: "100%",
        textAlign: "center"
      }}
    >
      {/* Product Info */}
      <h2>
        {contentfulProduct.name} -{" "}
        <span style={{ color: "#ccc" }}>
          Added on {contentfulProduct.createdAt}
        </span>
      </h2>
      <h4>${contentfulProduct.price}</h4>
      <p>{contentfulProduct.description}</p>
      <button
        style={{
          background: "darkorange",
          color: "white",
          padding: "0.3em",
          borderRadius: "5px",
          cursor: "pointer"
        }}
        className="snipcart-add-item"
        data-item-id={contentfulProduct.slug}
        data-item-price={contentfulProduct.price}
        data-item-image={contentfulProduct.image.file.url}
        data-item-name={contentfulProduct.name}
        data-item-url={location.pathname}
      >
        Add to Cart
      </button>
    </div>
    <Img
      style={{ margin: "0 auto", maxWidth: 600 }}
      fluid={contentfulProduct.image.fluid}
    />
  </Layout>
);

export const query = graphql`
  query($slug: String!) {
    contentfulProduct(slug: { eq: $slug }) {
      slug
      name
      price
      description
      createdAt(formatString: "MMMM Do, YYYY, h:mm:ss a")
      image {
        fluid(maxWidth: 800) {
          ...GatsbyContentfulFluid
        }
        file {
          url
        }
      }
    }
  }
`;

export default ProductTemplate;
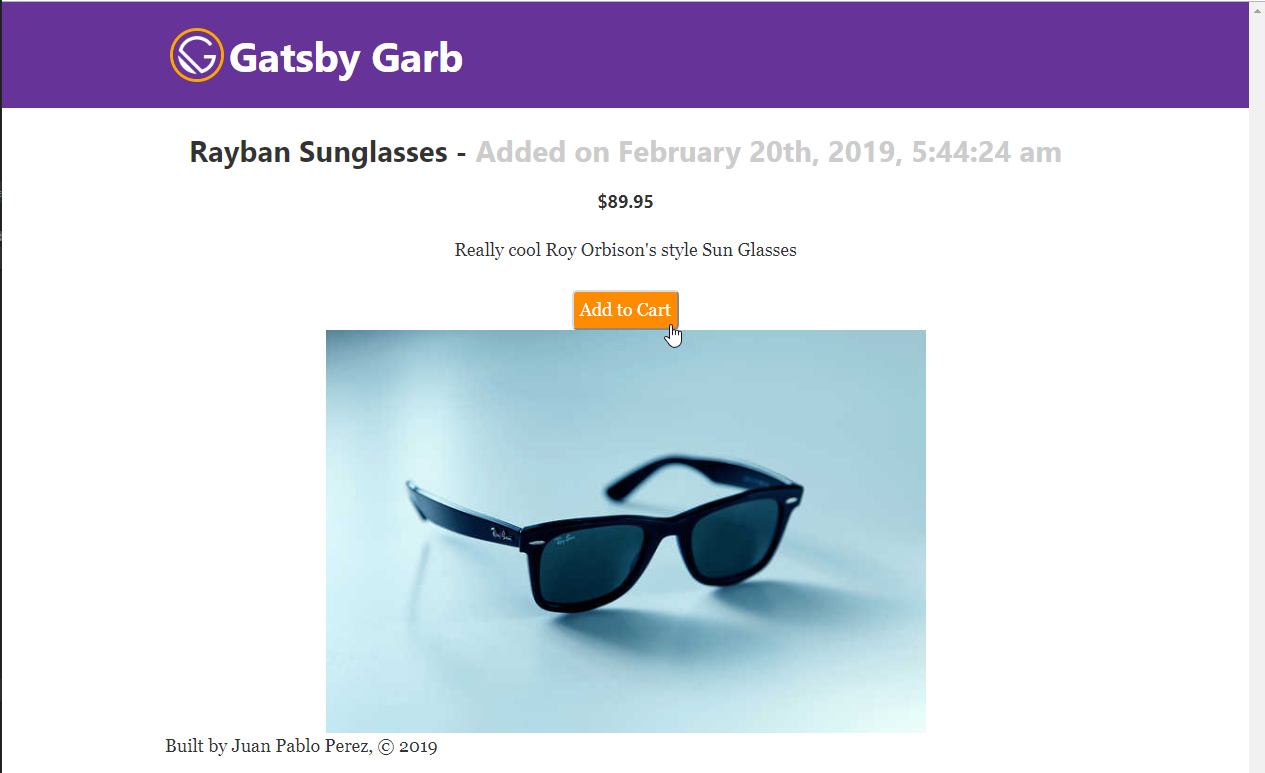
- We need to modify the
components/header.jsdocument to include theCart summary.
components/header.js
import { Link } from "gatsby";
import PropTypes from "prop-types";
import React from "react";

import gatsbyLogo from "../images/gatsby-icon.png";

const Header = ({ siteTitle }) => (
  <div
    style={{
      background: `rebeccapurple`,
      marginBottom: `1.45rem`
    }}
  >
    <div
      style={{
        display: "flex",
        alignItems: "center",
        justifyContent: "space-between",
        margin: `0 auto`,
        maxWidth: 960,
        padding: `1.45rem 1.0875rem`
      }}
    >
      {/* Title / Logo */}
      <span
        style={{
          display: "flex",
          alignItems: "center"
        }}
      >
        <img
          src={gatsbyLogo}
          alt="Gastby Garb Logo"
          style={{
            borderRadius: "50%",
            border: "3px solid orange",
            margin: "0 5px",
            width: `3rem`
          }}
        />
        <h1 style={{ margin: 0 }}>
          <Link
            to="/"
            style={{
              color: `white`,
              textDecoration: `none`
            }}
          >
            {siteTitle}
          </Link>
        </h1>
      </span>
      {/* Shopping Cart Summary */}
      <div
        style={{ color: "white", cursor: "pointer" }}
        className="snipcart-summary snipcart-checkout"
      >
        <div>
          <strong>My Cart</strong>
        </div>
        <div>
          <span
            style={{ fontWeight: "bold" }}
            className="snipcart-total-items"
          />{" "}
          Items in Cart
        </div>
        <div>
          Total price{" "}
          <span
            style={{ fontWeight: "bold" }}
            className="snipcart-total-price"
          />
        </div>
      </div>
    </div>
  </div>
);

Header.propTypes = {
  siteTitle: PropTypes.string
};

Header.defaultProps = {
  siteTitle: ``
};

export default Header;
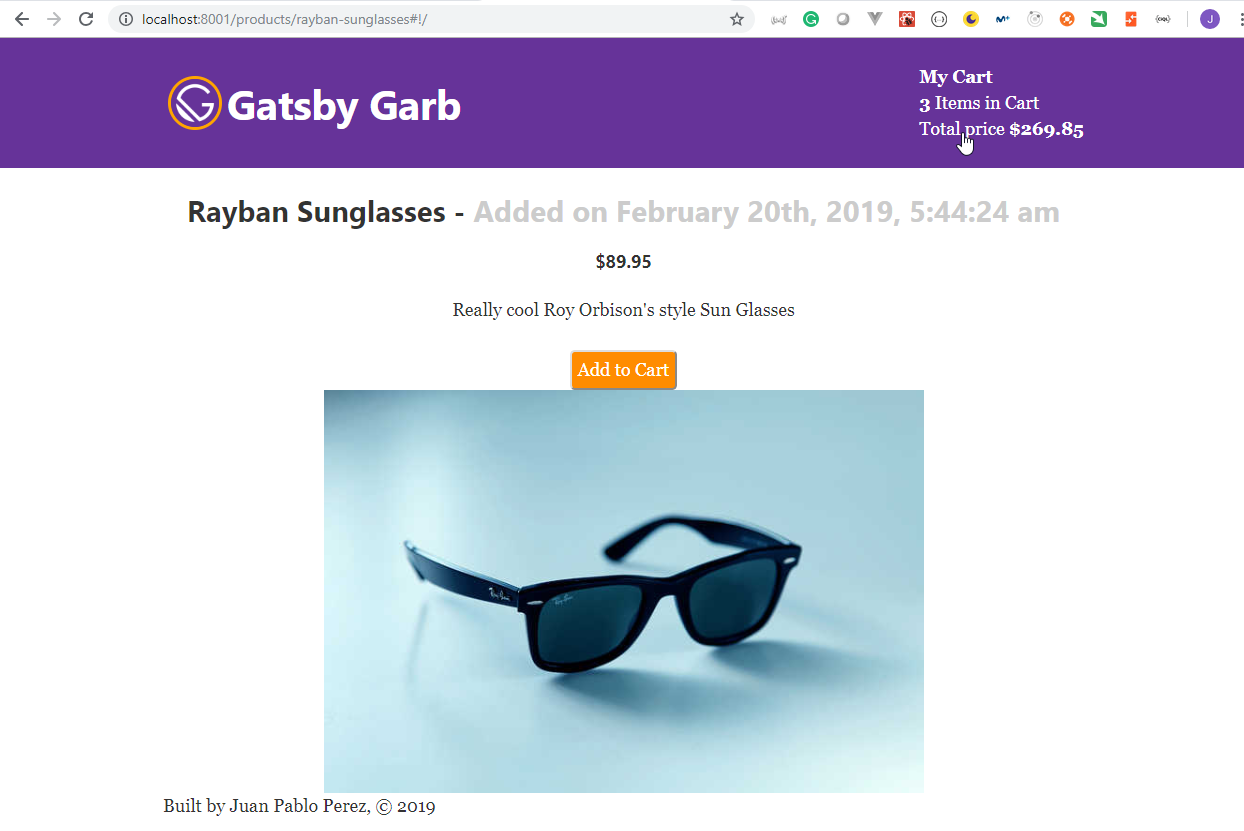
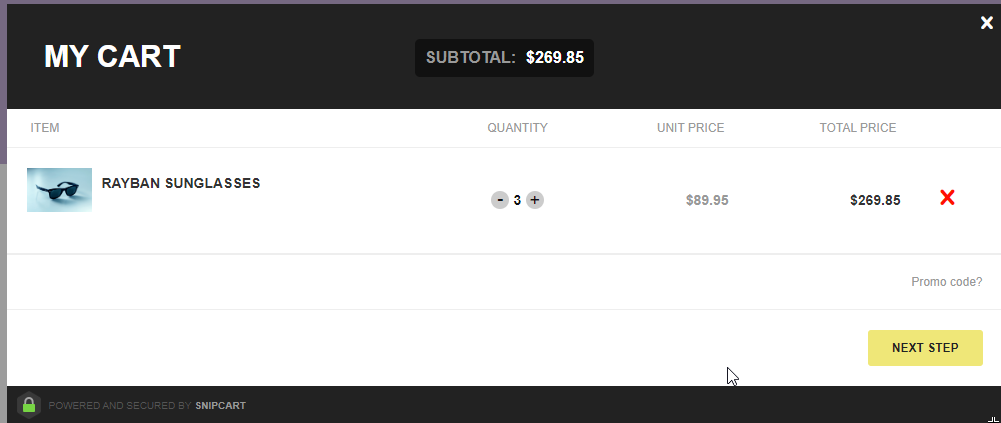
41. Adding Custom NavLinks in Header Component
- We need to modify the
components/layout.cssdocument to add the styles for the header links.components/layout.css
.
.
.
/* Navlink */
.active {
  color: orange;
  text-decoration: none;
}

.active:hover,
.navlink:hover {
  text-decoration: underline;
}

.navlink {
  color: white;
  text-decoration: none;
}
- We need to modify the
components/header.jsdocument to include the links to the blog and the products.
components/header.js
import { Link } from "gatsby";
import PropTypes from "prop-types";
import React from "react";

import gatsbyLogo from "../images/gatsby-icon.png";

const isActive = ({ isCurrent }) => {
  return { className: isCurrent ? "active" : "navlink" };
};

const NavLink = props => <Link getProps={isActive} {...props} />;

const Header = ({ siteTitle }) => (
  <div
    style={{
      background: `rebeccapurple`,
      marginBottom: `1.45rem`
    }}
  >
    <div
      style={{
        display: "flex",
        alignItems: "center",
        justifyContent: "space-between",
        margin: `0 auto`,
        maxWidth: 960,
        padding: `1.45rem 1.0875rem`
      }}
    >
      {/* Title / Logo */}
      <span
        style={{
          display: "flex",
          alignItems: "center"
        }}
      >
        <img
          src={gatsbyLogo}
          alt="Gastby Garb Logo"
          style={{
            borderRadius: "50%",
            border: "3px solid orange",
            margin: "0 5px",
            width: `3rem`
          }}
        />
        <h1 style={{ margin: 0 }}>
          <NavLink to="/">{siteTitle}</NavLink>
        </h1>
      </span>

      <NavLink to="/blog">Blog</NavLink>

      <NavLink to="/products">Store</NavLink>

      {/* Shopping Cart Summary */}
      <div
        style={{ color: "white", cursor: "pointer" }}
        className="snipcart-summary snipcart-checkout"
      >
        <div>
          <strong>My Cart</strong>
        </div>
        <div>
          <span
            style={{ fontWeight: "bold" }}
            className="snipcart-total-items"
          />{" "}
          Items in Cart
        </div>
        <div>
          Total price{" "}
          <span
            style={{ fontWeight: "bold" }}
            className="snipcart-total-price"
          />
        </div>
      </div>
    </div>
  </div>
);

Header.propTypes = {
  siteTitle: PropTypes.string
};

Header.defaultProps = {
  siteTitle: ``
};

export default Header;


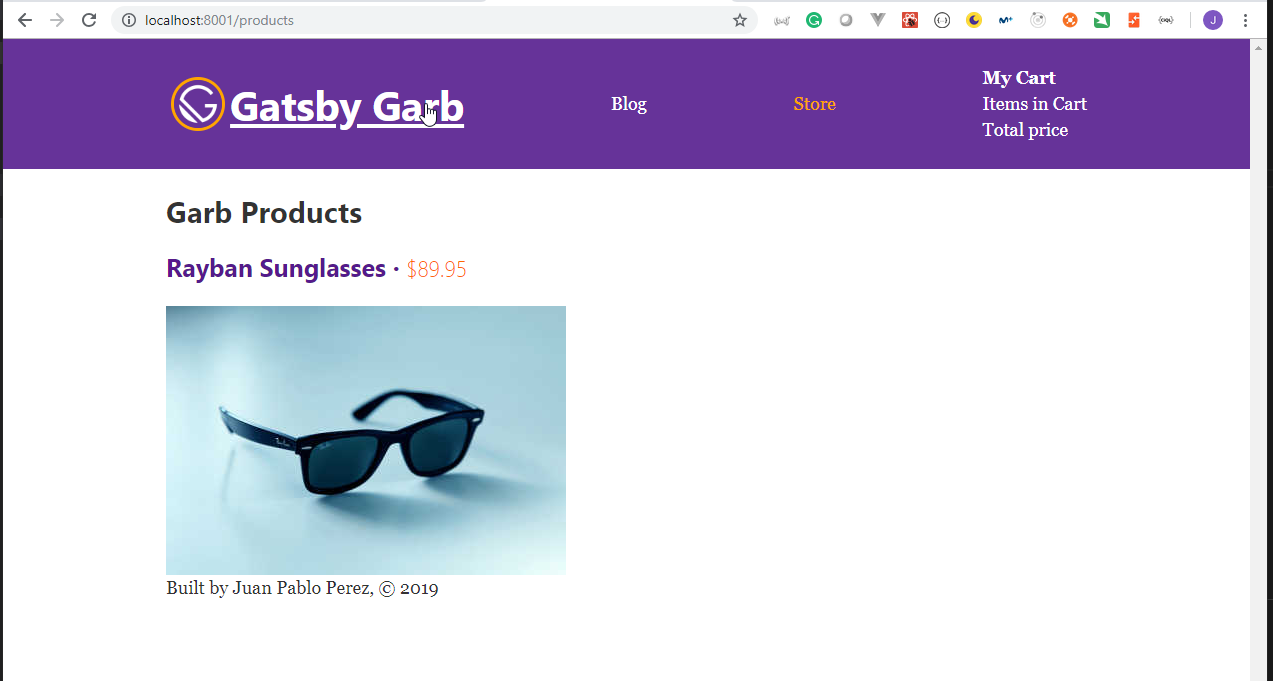
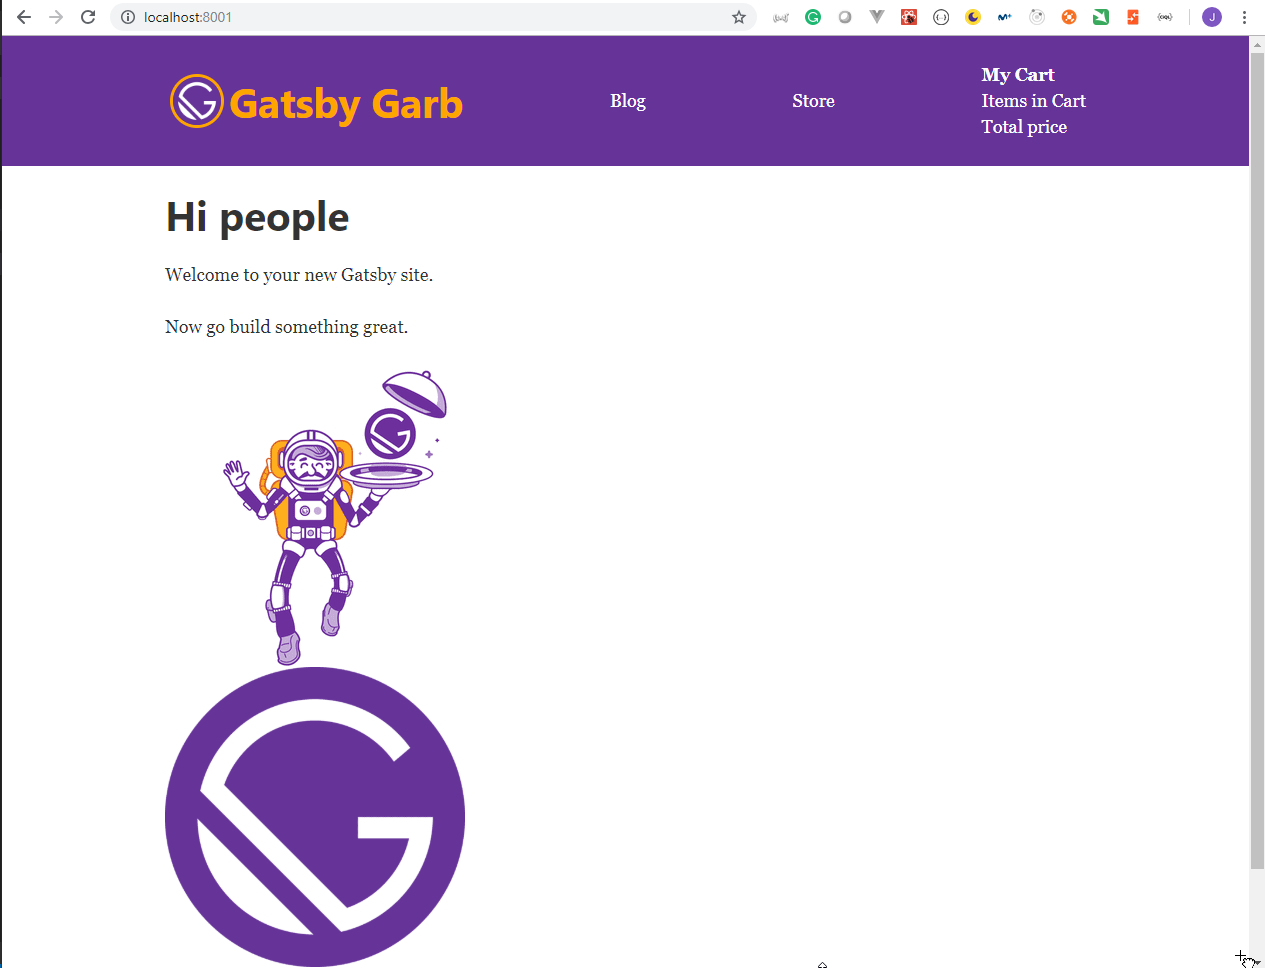
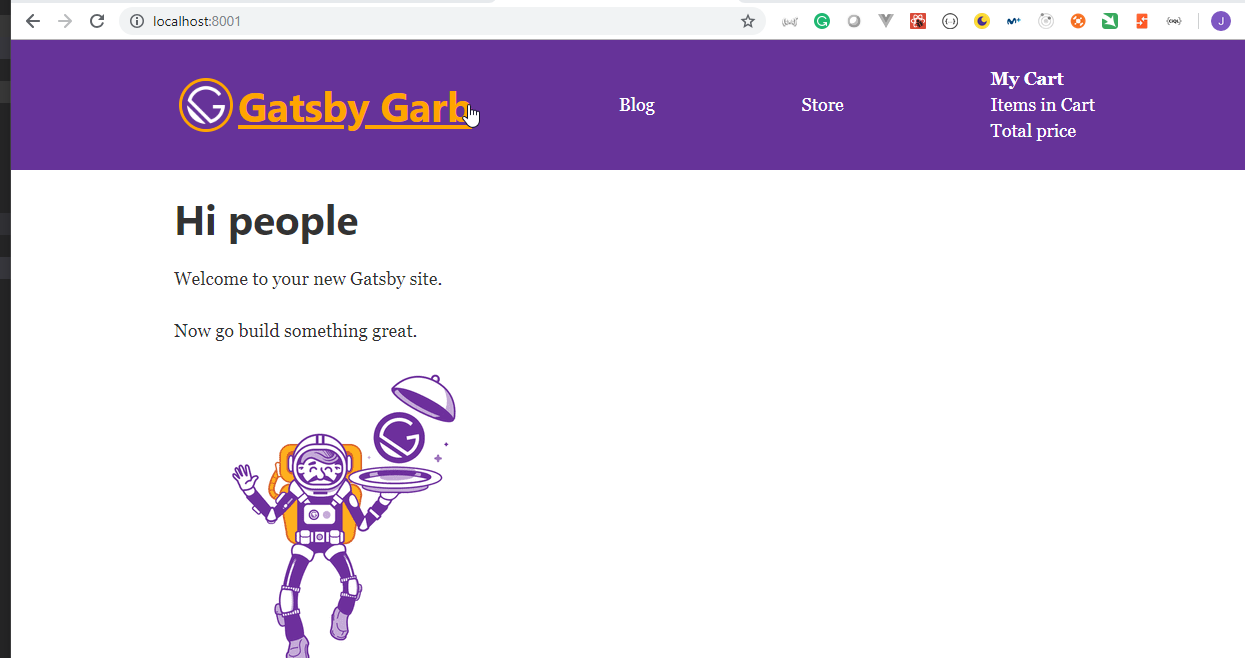
16. Deploying our Gatsby Sites with Netlify / Setting up Continuous Integration
42. Using Netlify for Deployment / Continuous Deployment with Github
- We need to create a new
Githubrepository.
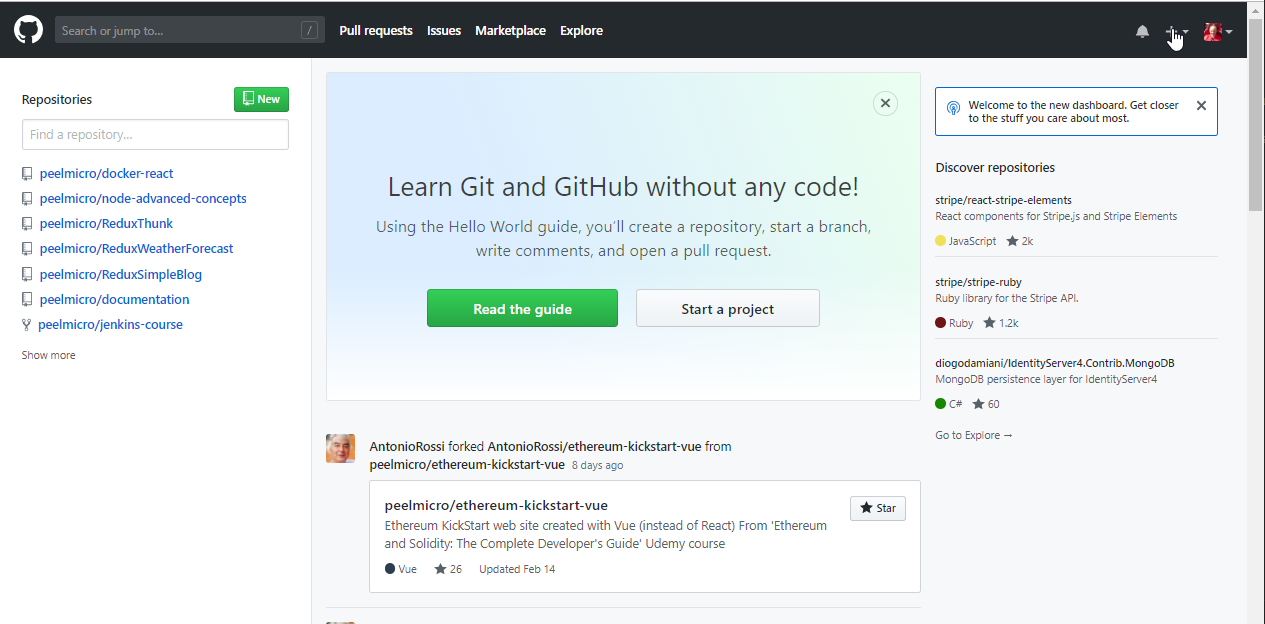
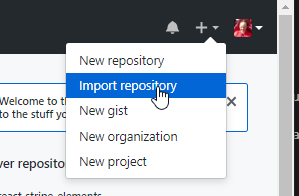
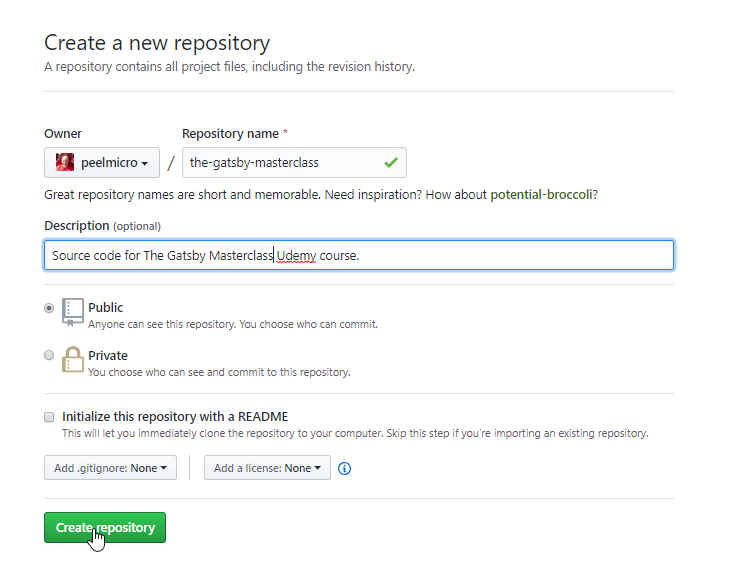
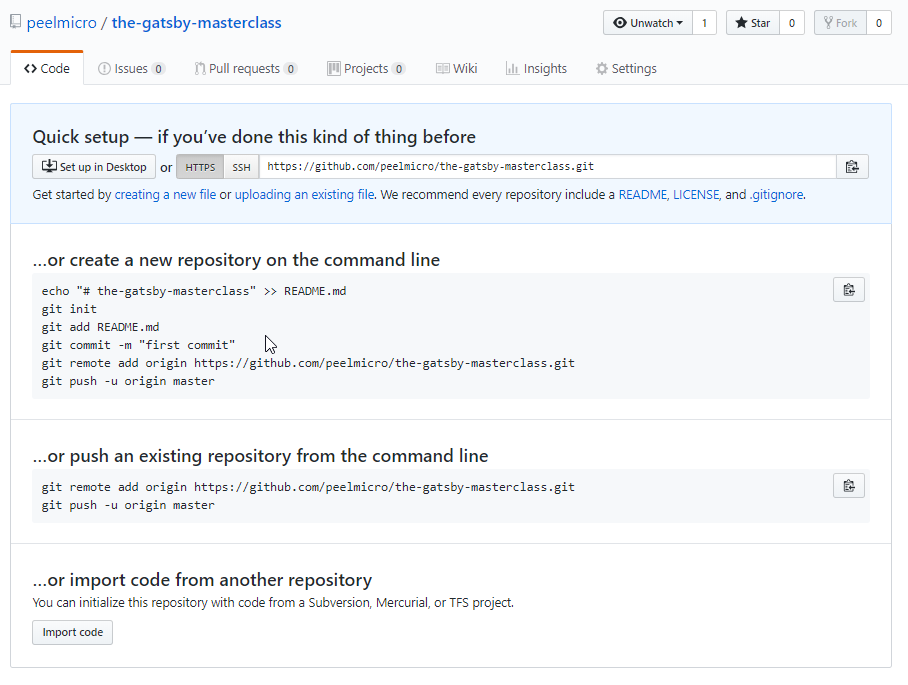
- We need to push this repository from the command line:
Juan.Pablo.Perez@RIMDUB-0232 MINGW64 /c/Work/Training/Pre/Gatsby/gatsby-garb (master)
$ git remote add origin https://github.com/peelmicro/the-gatsby-masterclass.git

Juan.Pablo.Perez@RIMDUB-0232 MINGW64 /c/Work/Training/Pre/Gatsby/gatsby-garb (master)
$ git push -u origin master
Enumerating objects: 98, done.
Counting objects: 100% (98/98), done.
Delta compression using up to 4 threads
Compressing objects: 100% (94/94), done.
Writing objects: 100% (98/98), 656.45 KiB | 4.94 MiB/s, done.
Total 98 (delta 38), reused 0 (delta 0)
remote: Resolving deltas: 100% (38/38), done.
To https://github.com/peelmicro/the-gatsby-masterclass.git
 * [new branch]      master -> master
Branch 'master' set up to track remote branch 'master' from 'origin'.
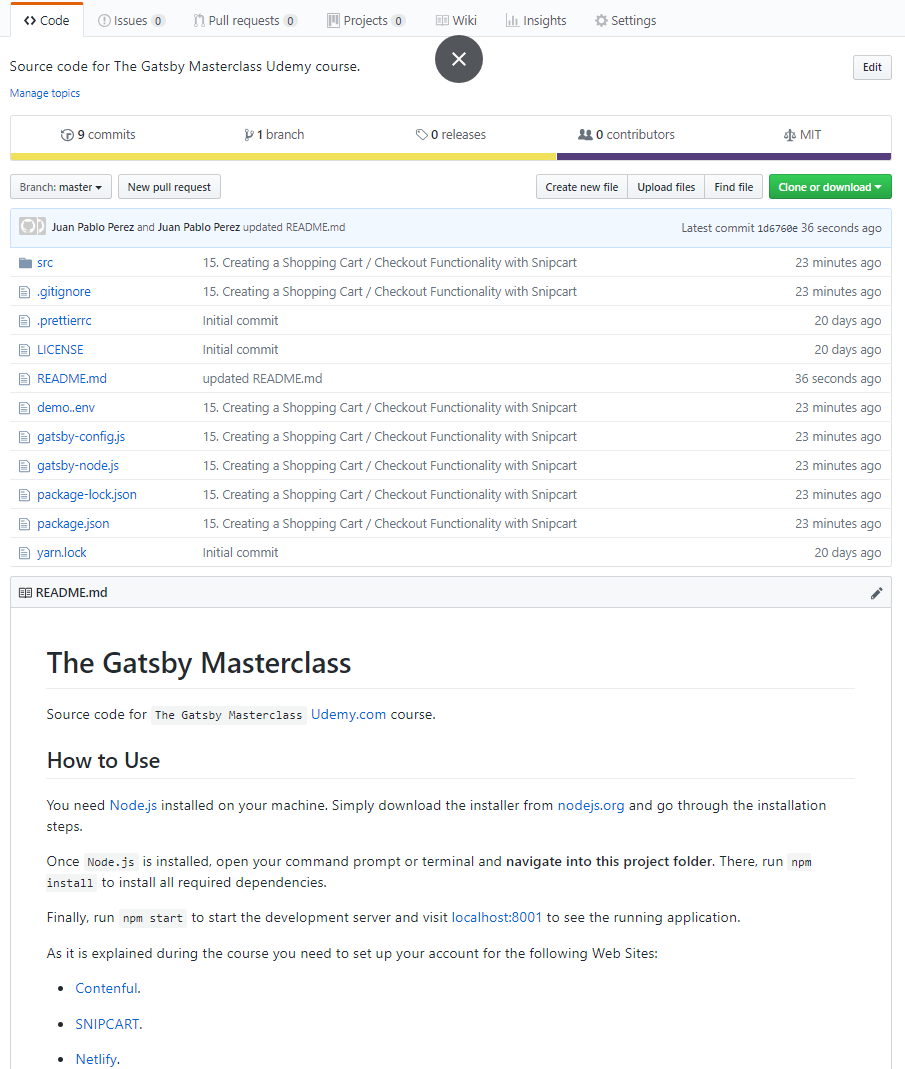
- We need to sign up on Netlify.

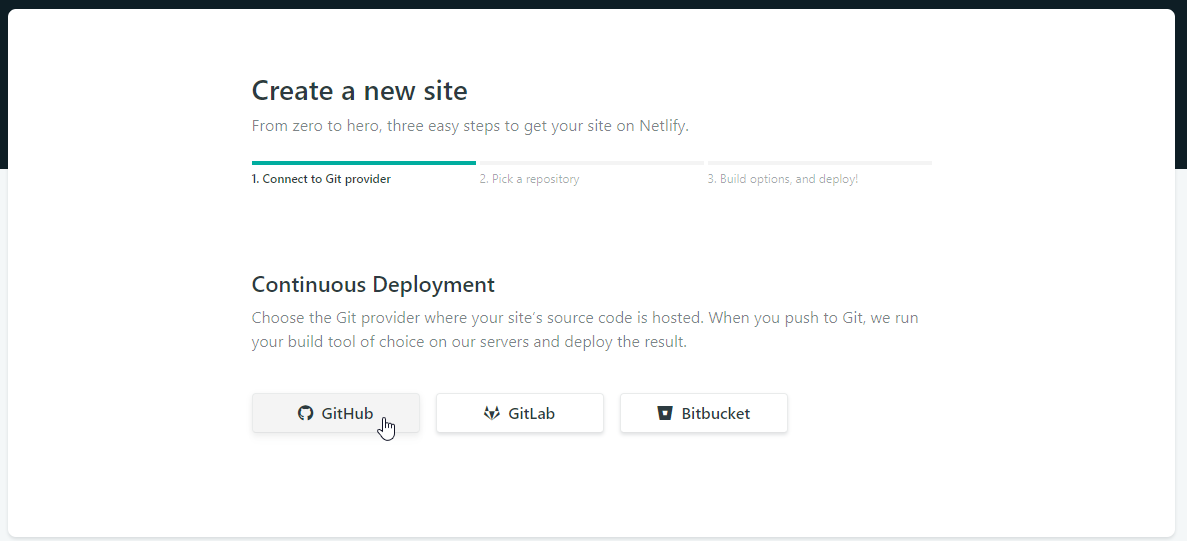
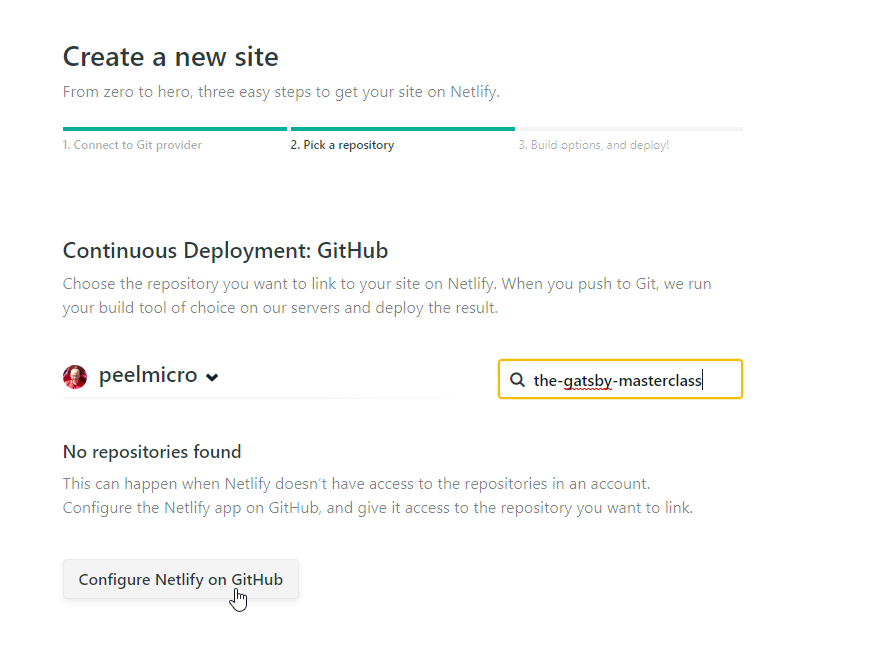

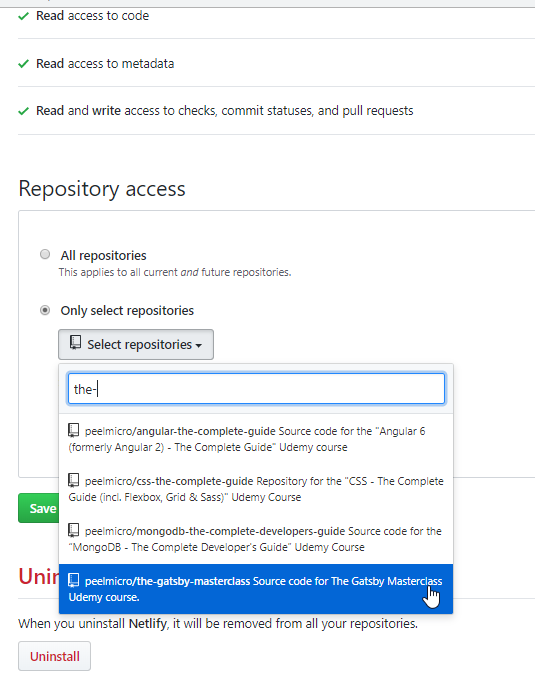
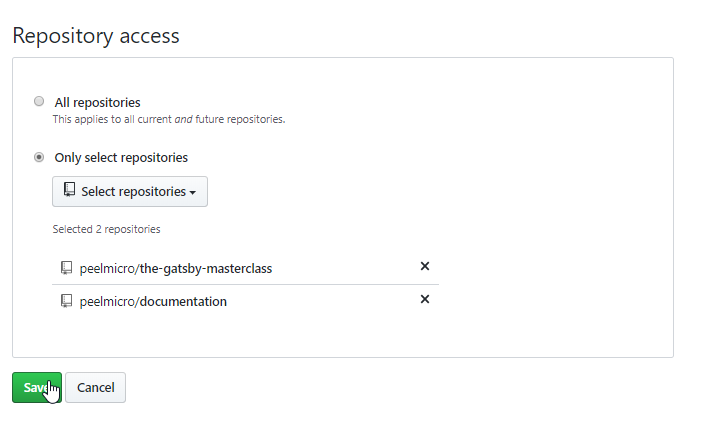
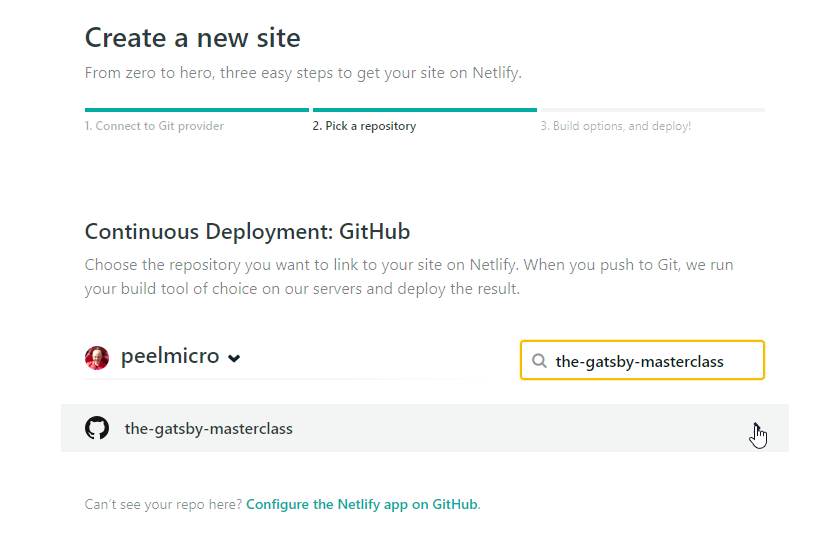
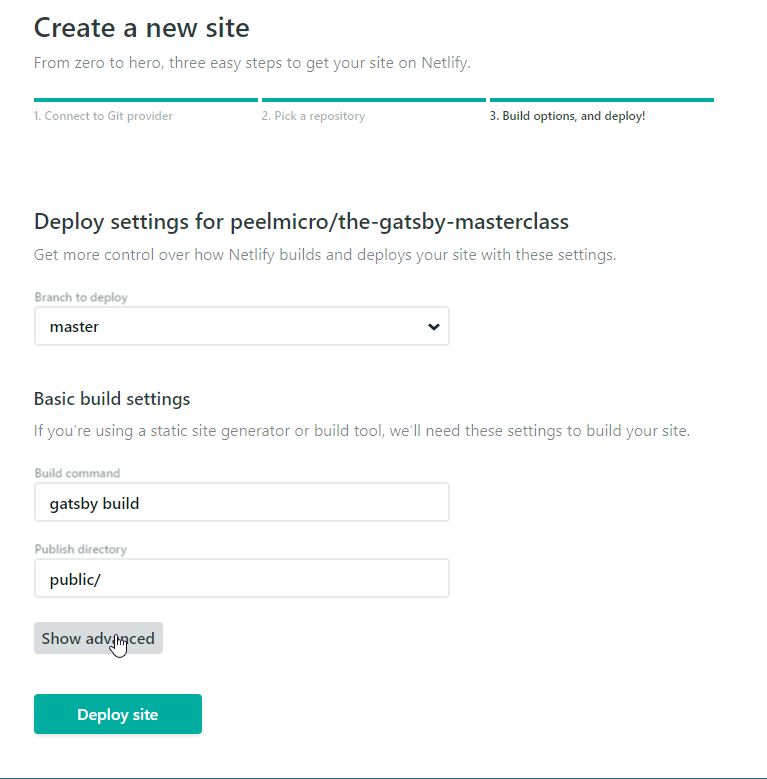
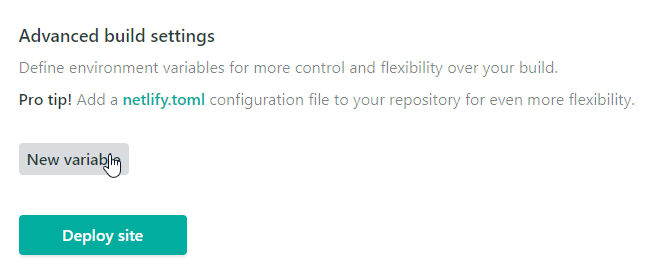
- We need to add our Environment variables:
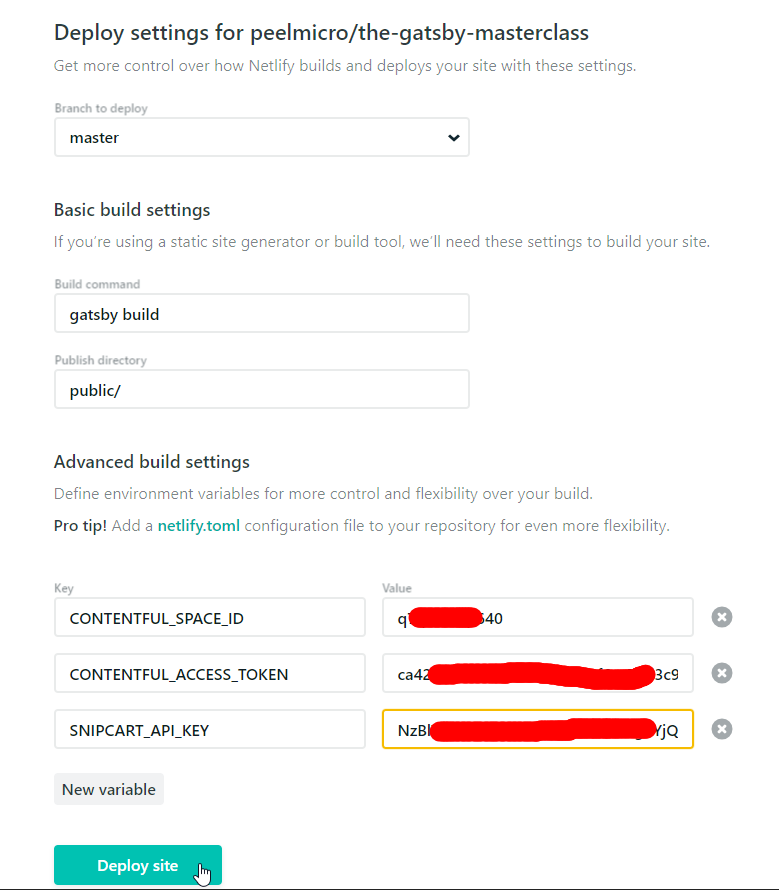

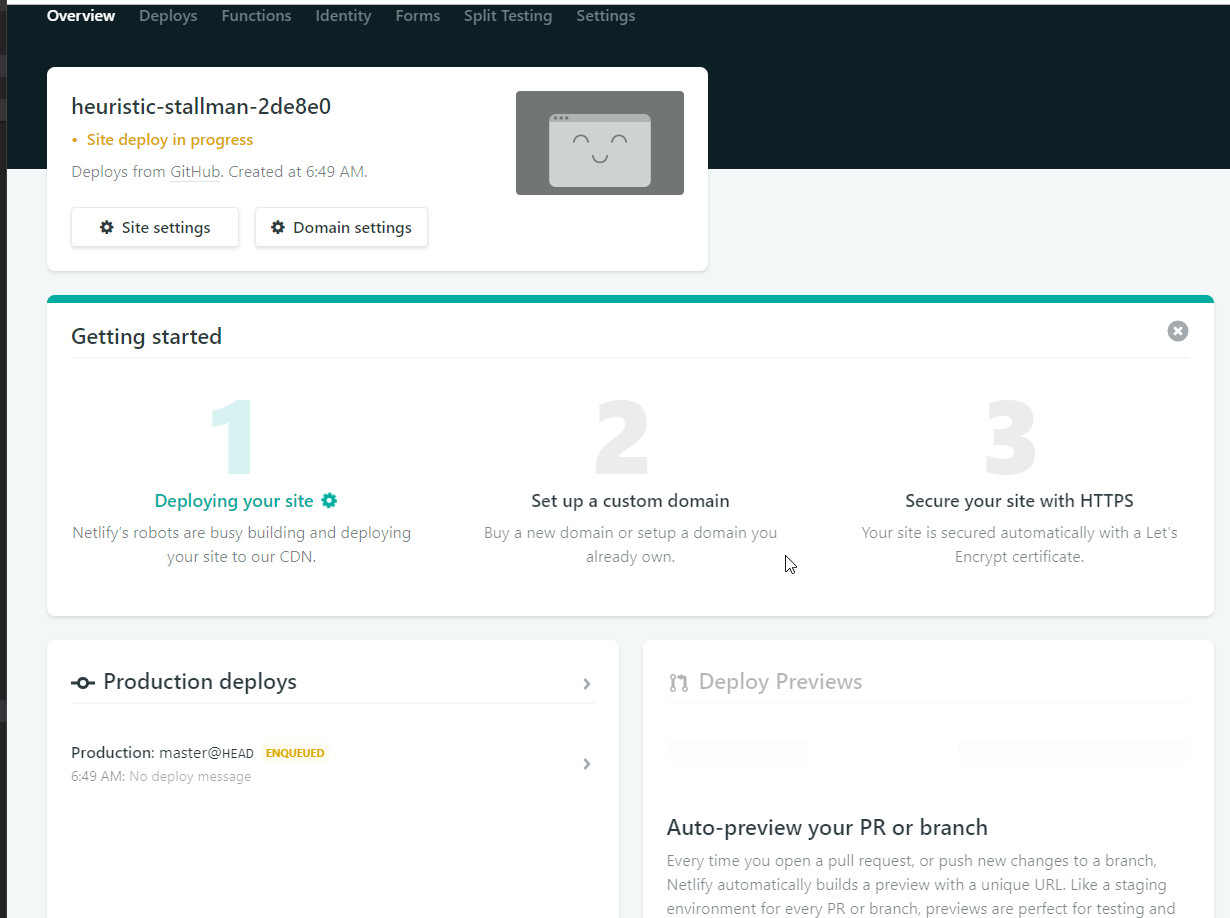
6:49:03 AM: Build ready to start
6:49:29 AM: build-image version: 84aca9ba39e0ee86ba194760fbfc51a808f62543
6:49:29 AM: buildbot version: 1ac64ca11e029436ed45ac81a38b9839778ec314
6:49:29 AM: Fetching cached dependencies
6:49:30 AM: Failed to fetch cache, continuing with build
6:49:30 AM: Starting to prepare the repo for build
6:49:30 AM: No cached dependencies found. Cloning fresh repo
6:49:30 AM: git clone https://github.com/peelmicro/the-gatsby-masterclass
6:49:31 AM: Preparing Git Reference refs/heads/master
6:49:31 AM: Starting build script
.
.
.
6:50:42 AM: Starting to deploy site from 'public/'
6:50:44 AM: Starting post processing
6:50:46 AM: Post processing done
6:50:46 AM: Site is live
6:50:59 AM: Finished processing build request in 1m29.470138198s
6:50:59 AM: Shutting down logging, 0 messages pending
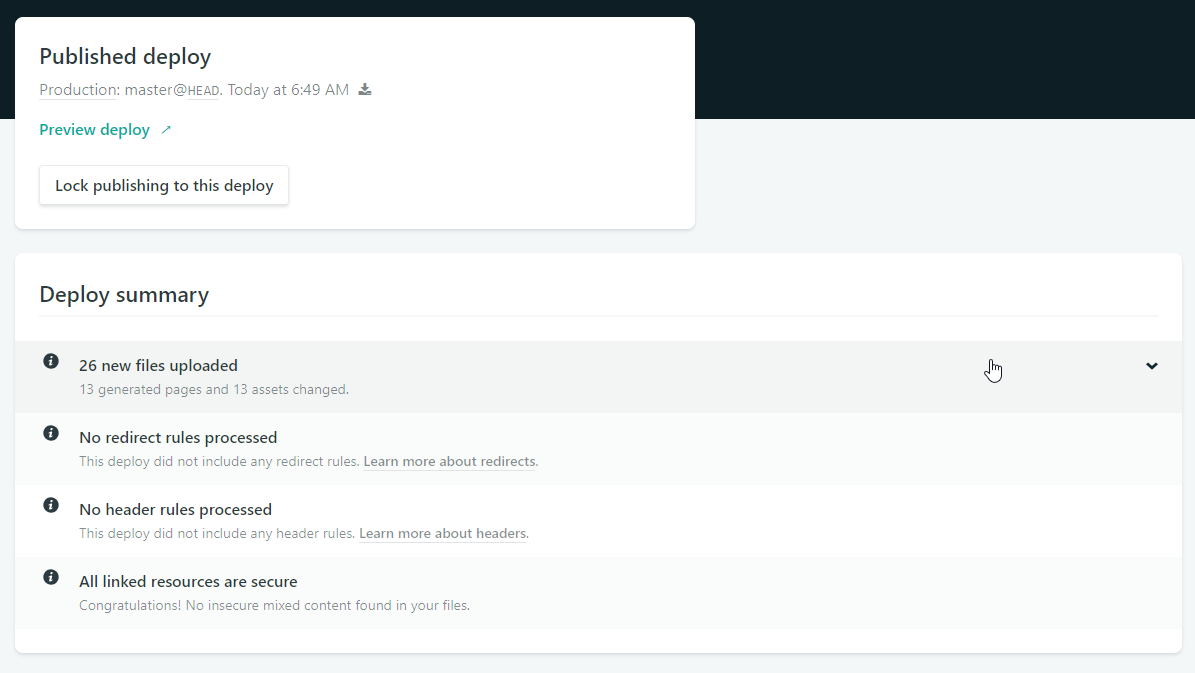
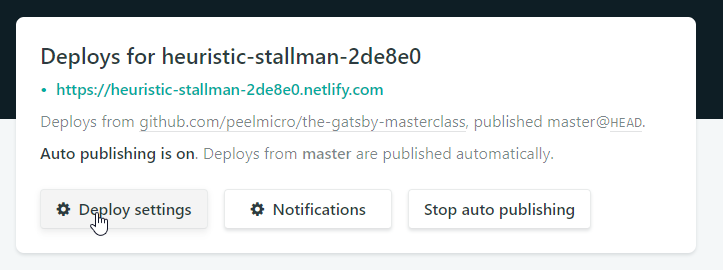
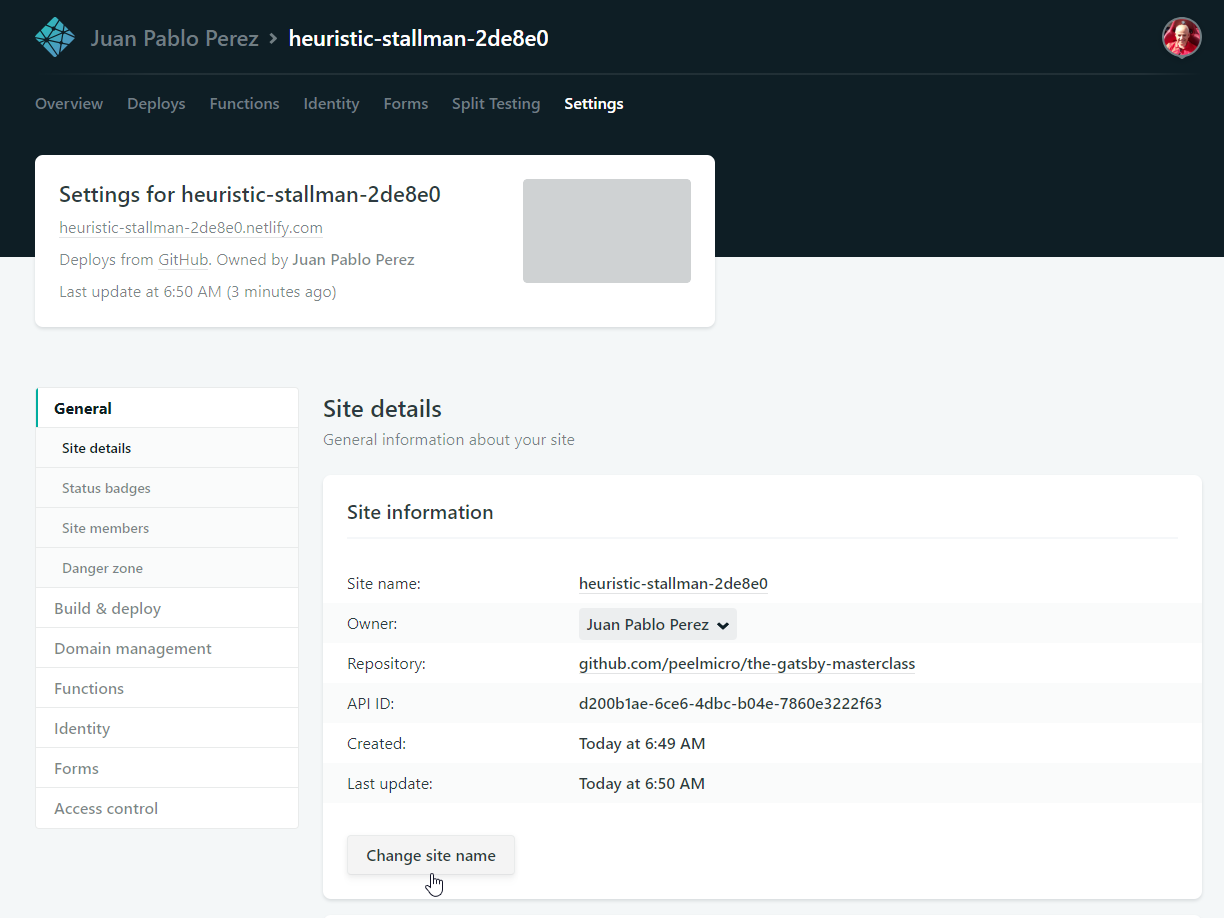

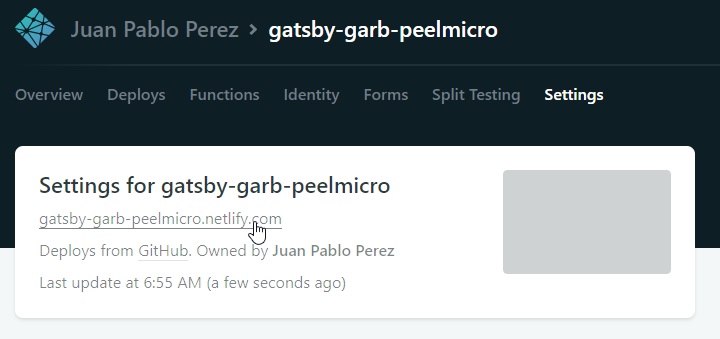
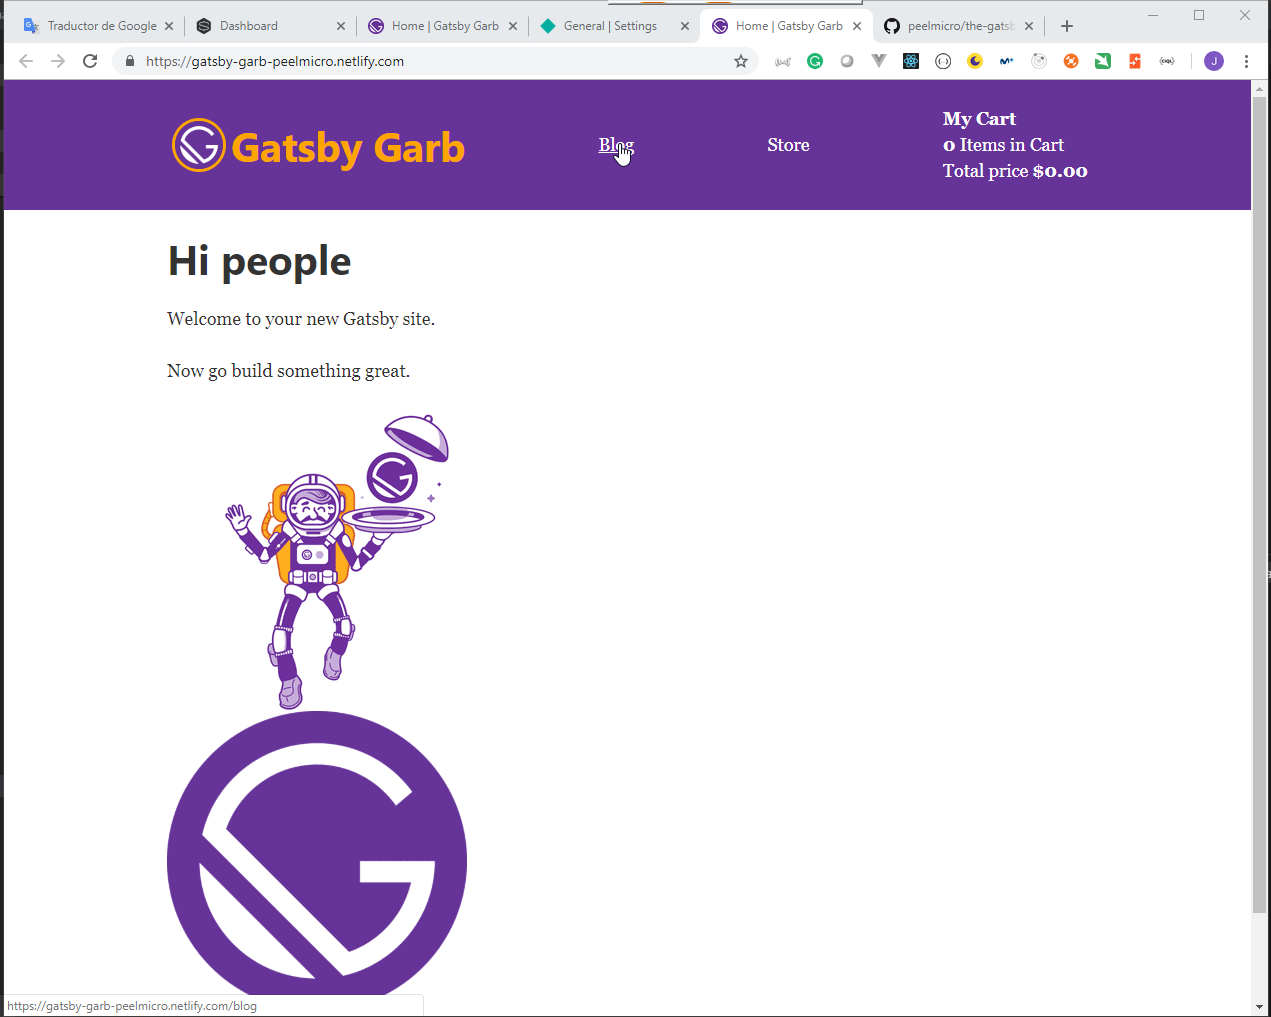
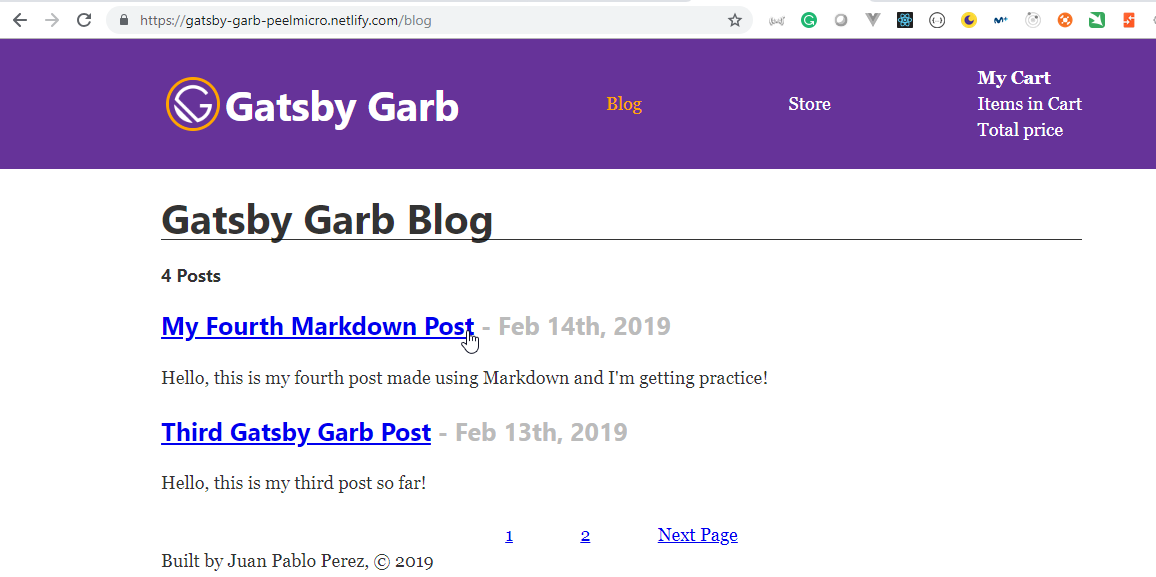
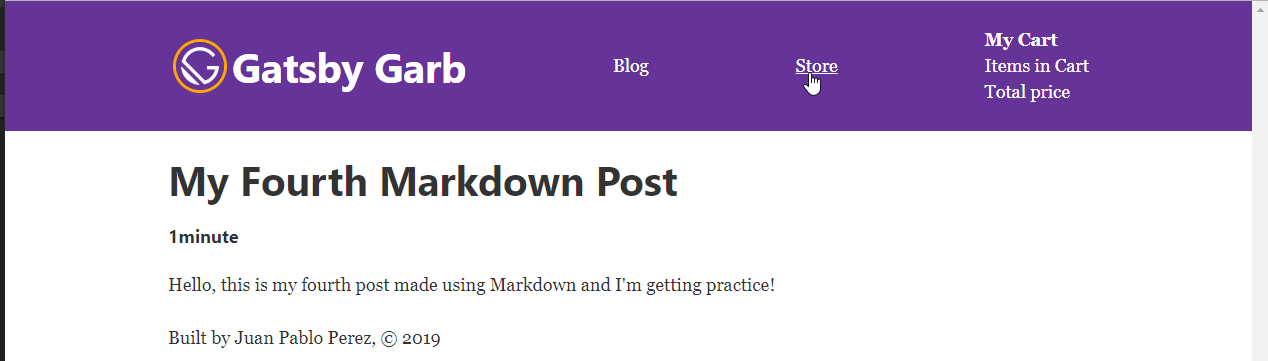
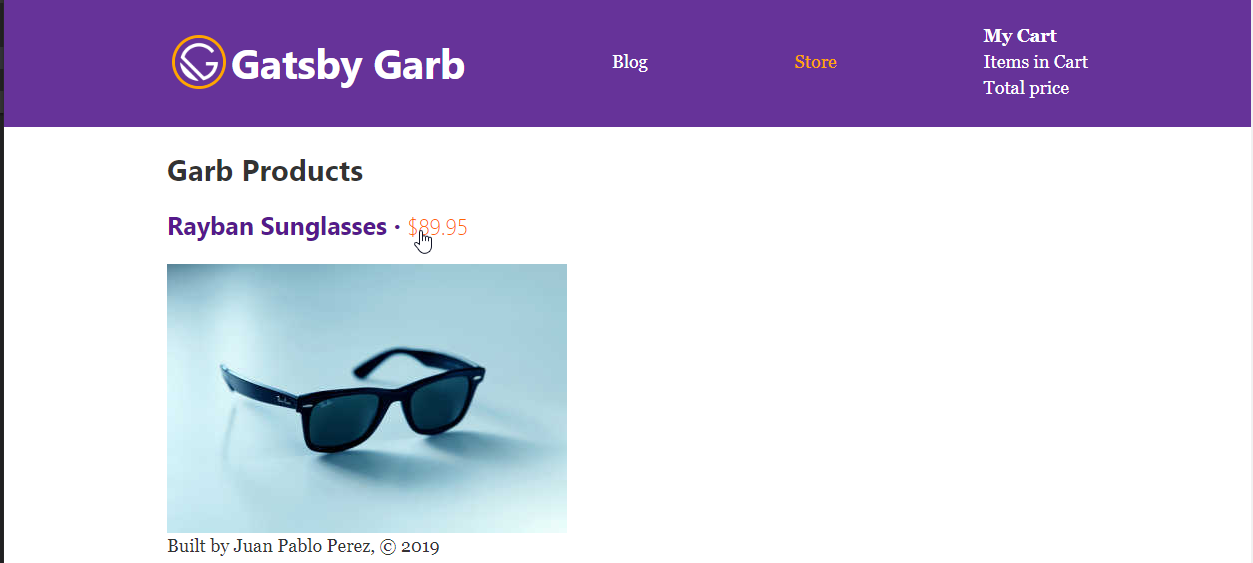

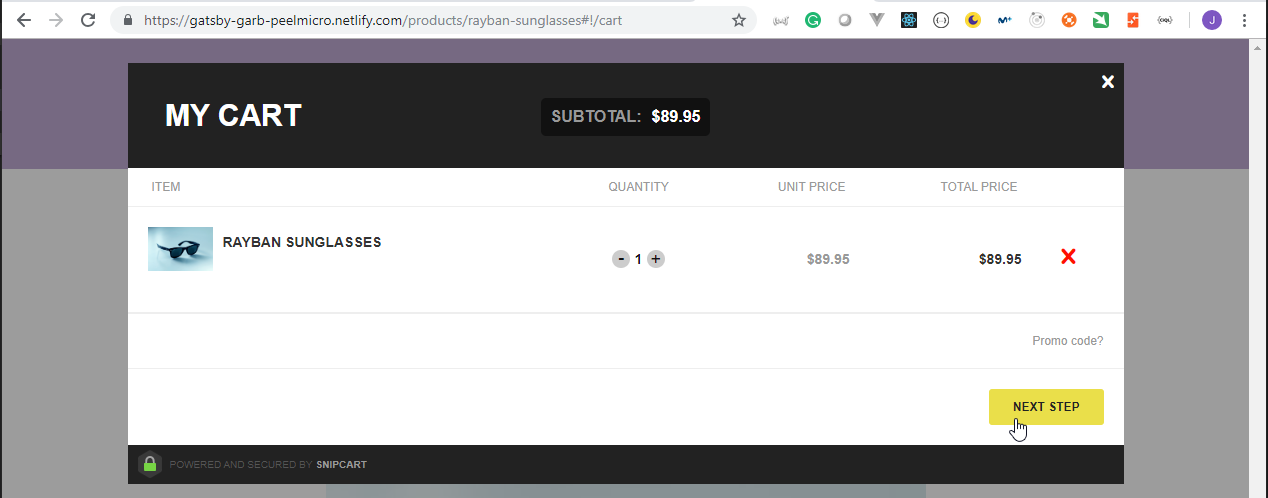
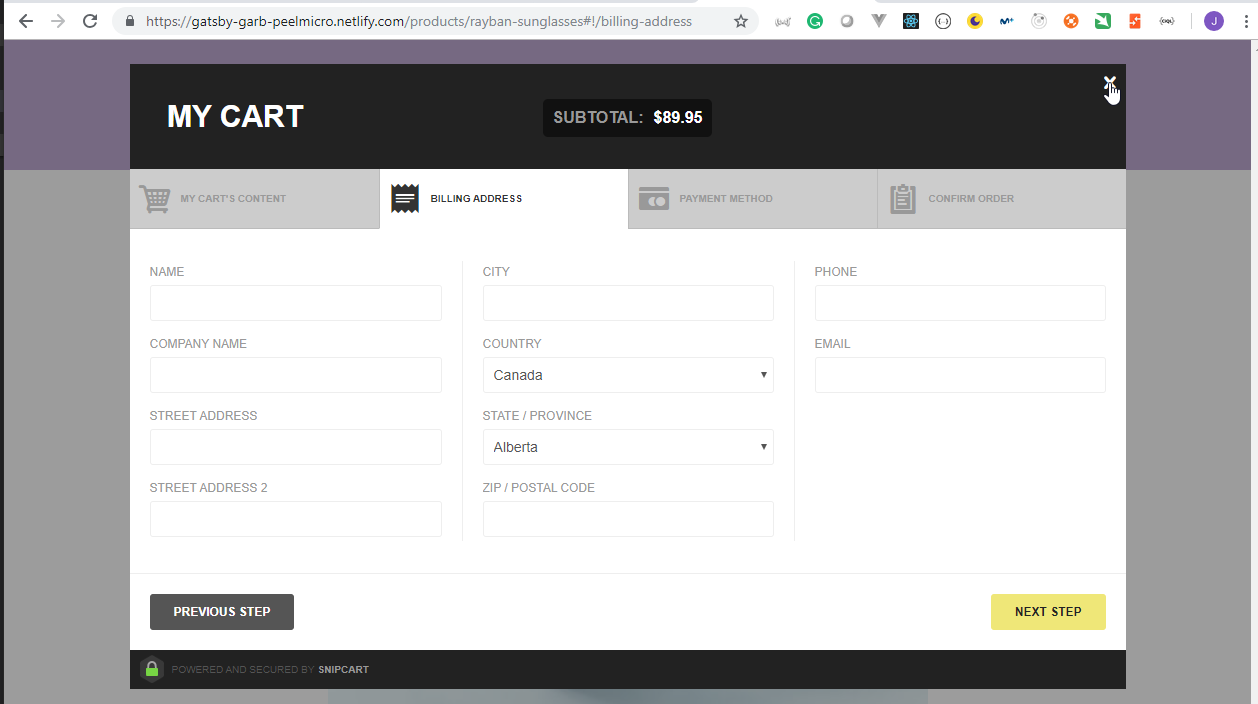
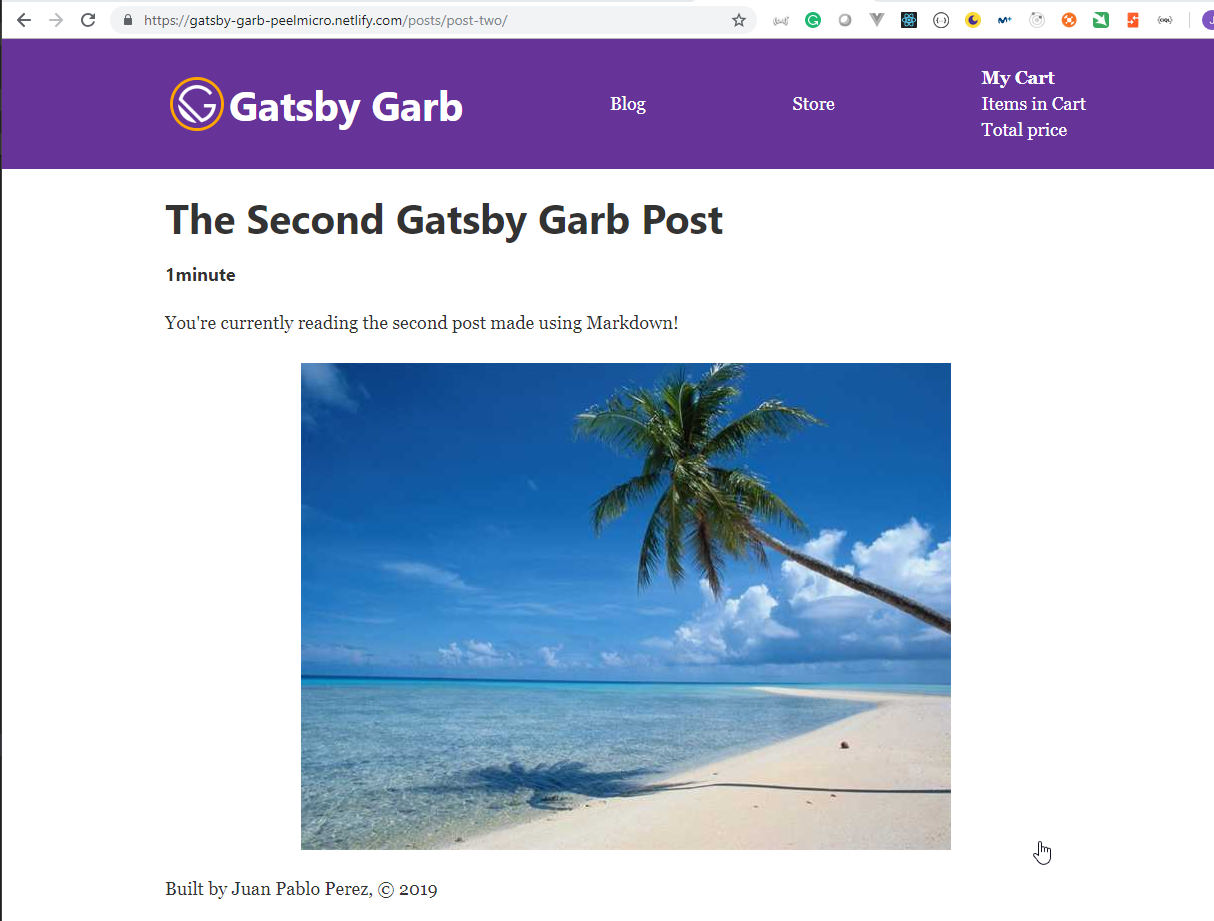
17. User Authentication in Gatsby / Netlify Identity
43. Using Netlify Identity for Multi-Factor Authentication in our Site
- Go to Netlify Identity

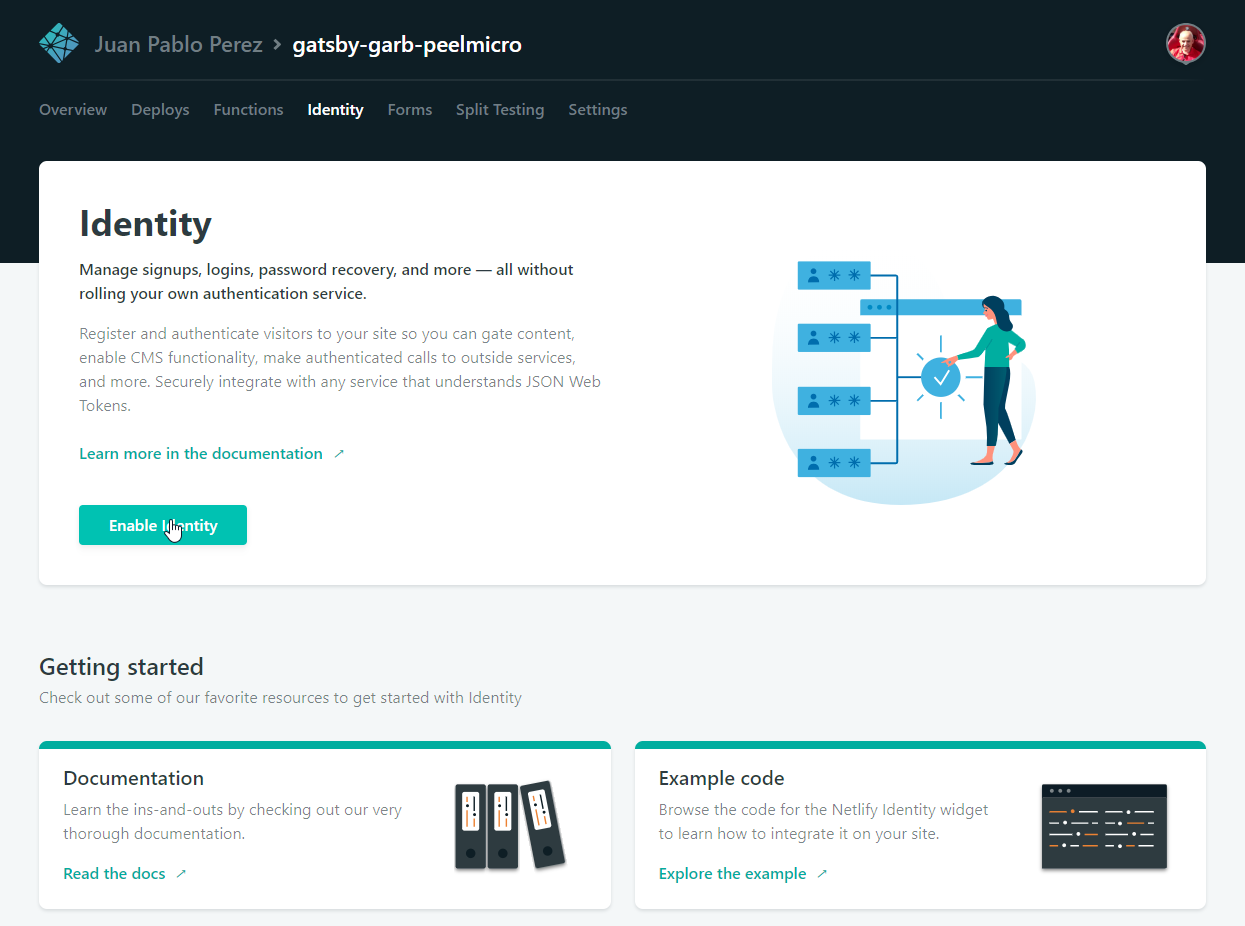

- We can see how the widget works on Netlify Identity Widget
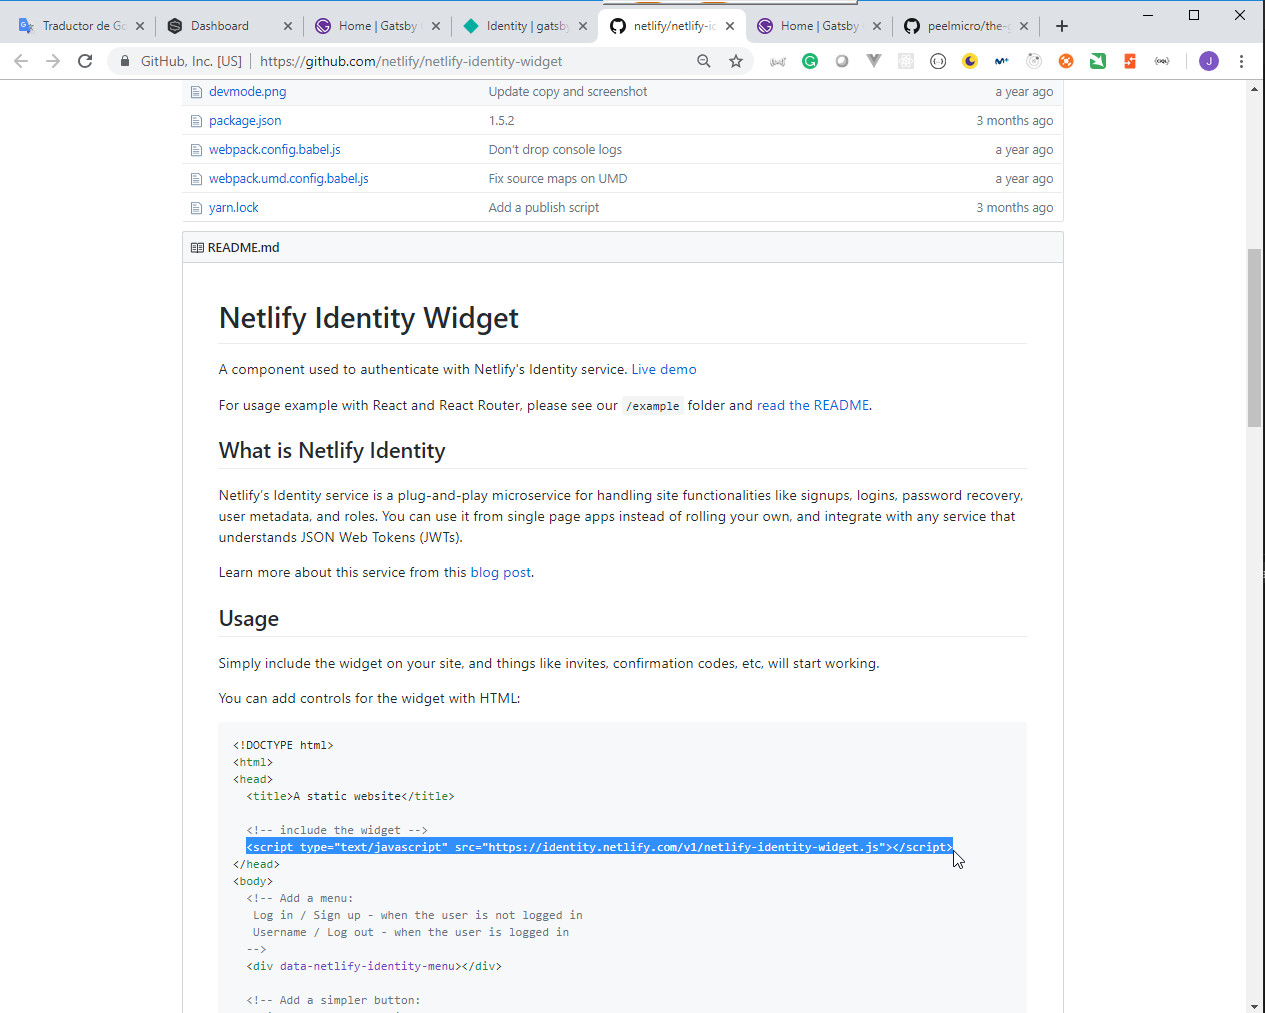
- We need to install the Widget.
Juan.Pablo.Perez@RIMDUB-0232 MINGW64 /c/Work/Training/Pre/Gatsby/gatsby-garb (master)
$ npm i netlify-identity-widget
npm WARN optional SKIPPING OPTIONAL DEPENDENCY: fsevents@1.2.4 (node_modules\fsevents):
npm WARN notsup SKIPPING OPTIONAL DEPENDENCY: Unsupported platform for fsevents@1.2.4: wanted {"os":"darwin","arch":"any"} (current: {"os":"win32","arch":"x64"})

+ netlify-identity-widget@1.5.2
added 1 package from 1 contributor and audited 29297 packages in 81.074s
found 3 low severity vulnerabilities
  run `npm audit fix` to fix them, or `npm audit` for details
- We need to modify the
components/header.jsdocuments to add the links to authenticate.
components/header.js
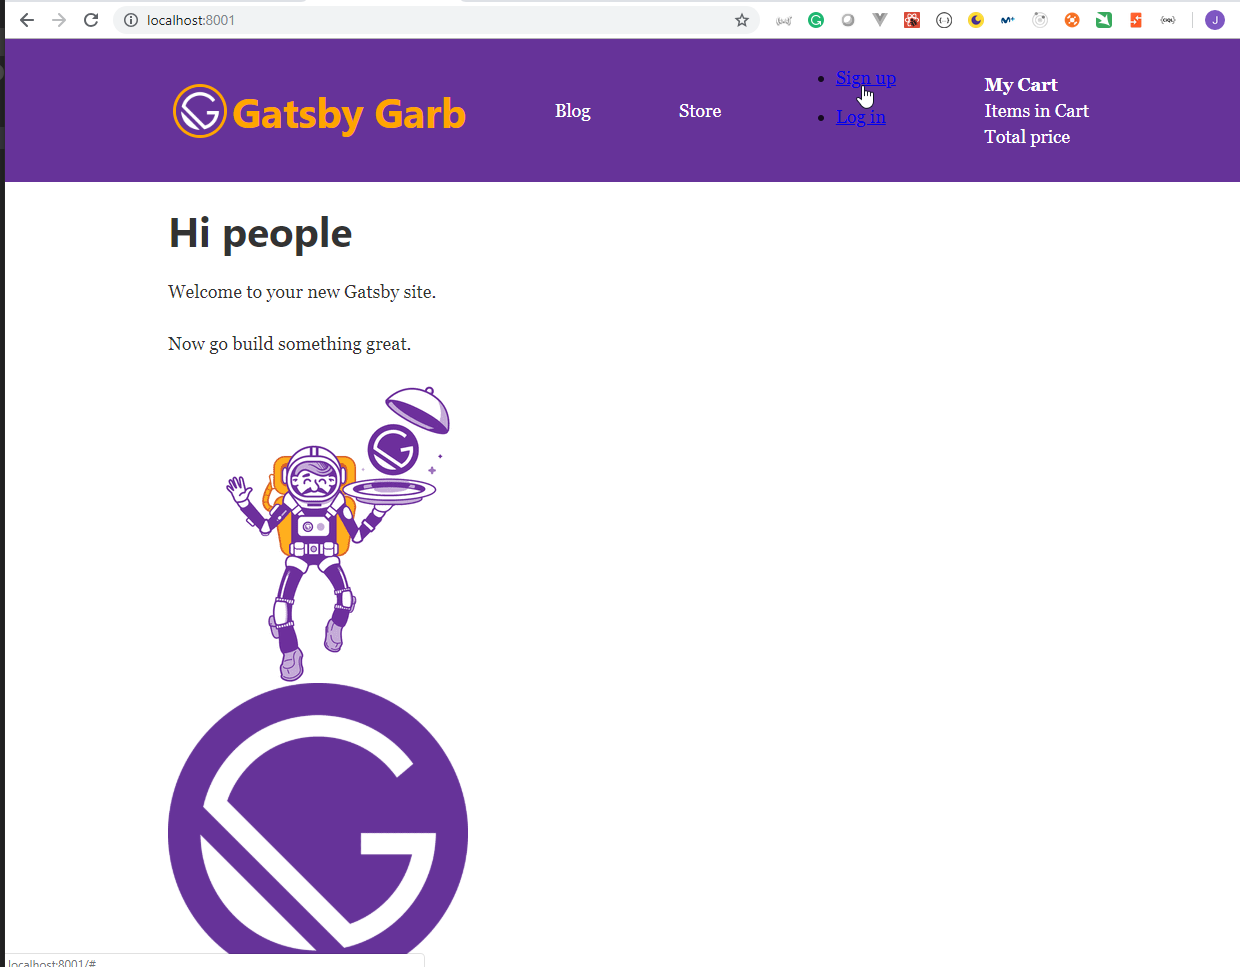
- We can improve the style changing the the
components/layout.cssdocument.components/layout.css
.
.
.
/* Navlink */
.active {
  color: orange;
  text-decoration: none;
}

.active:hover,
.navlink:hover {
  text-decoration: underline;
}

.navlink {
  color: white;
  text-decoration: none;
}

/* Netlify Identity */
.netlify-identity-menu {
  list-style: none;
  color: white;
  margin: 0;
}

.netlify-identity-signup {
  color: white;
}

.netlify-identity-login {
  color: white;
}

.netlify-identity-logout {
  color: white;
}
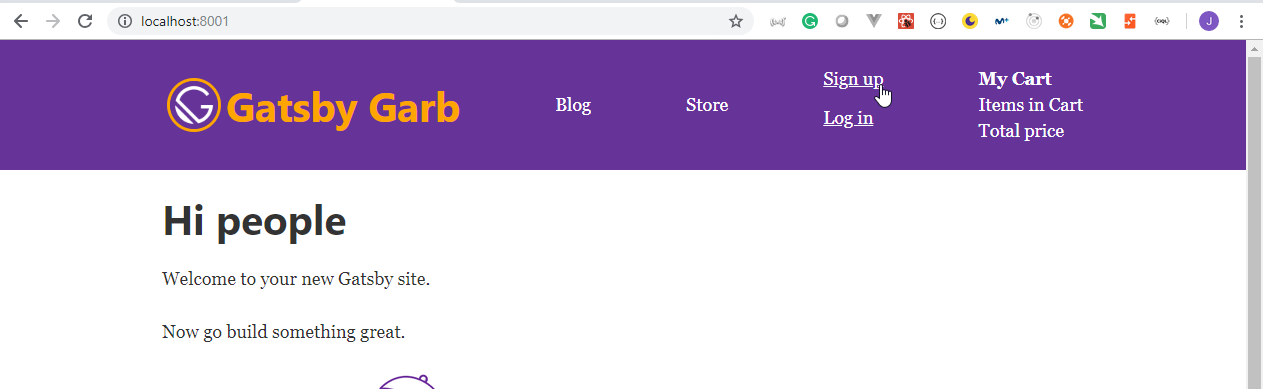
- Netlify Identity only works on production, so we need to commit and push the changes.
Juan.Pablo.Perez@RIMDUB-0232 MINGW64 /c/Work/Training/Pre/Gatsby/gatsby-garb (master)
$ git add .

Juan.Pablo.Perez@RIMDUB-0232 MINGW64 /c/Work/Training/Pre/Gatsby/gatsby-garb (master)
$ git commit "Added Netlify Identity"
error: pathspec 'Added Netlify Identity' did not match any file(s) known to git

Juan.Pablo.Perez@RIMDUB-0232 MINGW64 /c/Work/Training/Pre/Gatsby/gatsby-garb (master)
$ git commit -m "Added Netlify Identity Widget to header"
[master 3a1eefc] Added Netlify Identity Widget to header
 4 files changed, 124 insertions(+), 91 deletions(-)
 rewrite src/components/header.js (77%)

Juan.Pablo.Perez@RIMDUB-0232 MINGW64 /c/Work/Training/Pre/Gatsby/gatsby-garb (master)
$ git push origin HEAD
Enumerating objects: 15, done.
Counting objects: 100% (15/15), done.
Delta compression using up to 4 threads
Compressing objects: 100% (8/8), done.
Writing objects: 100% (8/8), 1.67 KiB | 285.00 KiB/s, done.
Total 8 (delta 5), reused 0 (delta 0)
remote: Resolving deltas: 100% (5/5), completed with 5 local objects.
To https://github.com/peelmicro/the-gatsby-masterclass.git
   1d6760e..3a1eefc  HEAD -> master
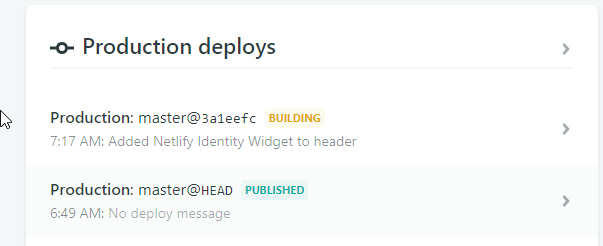

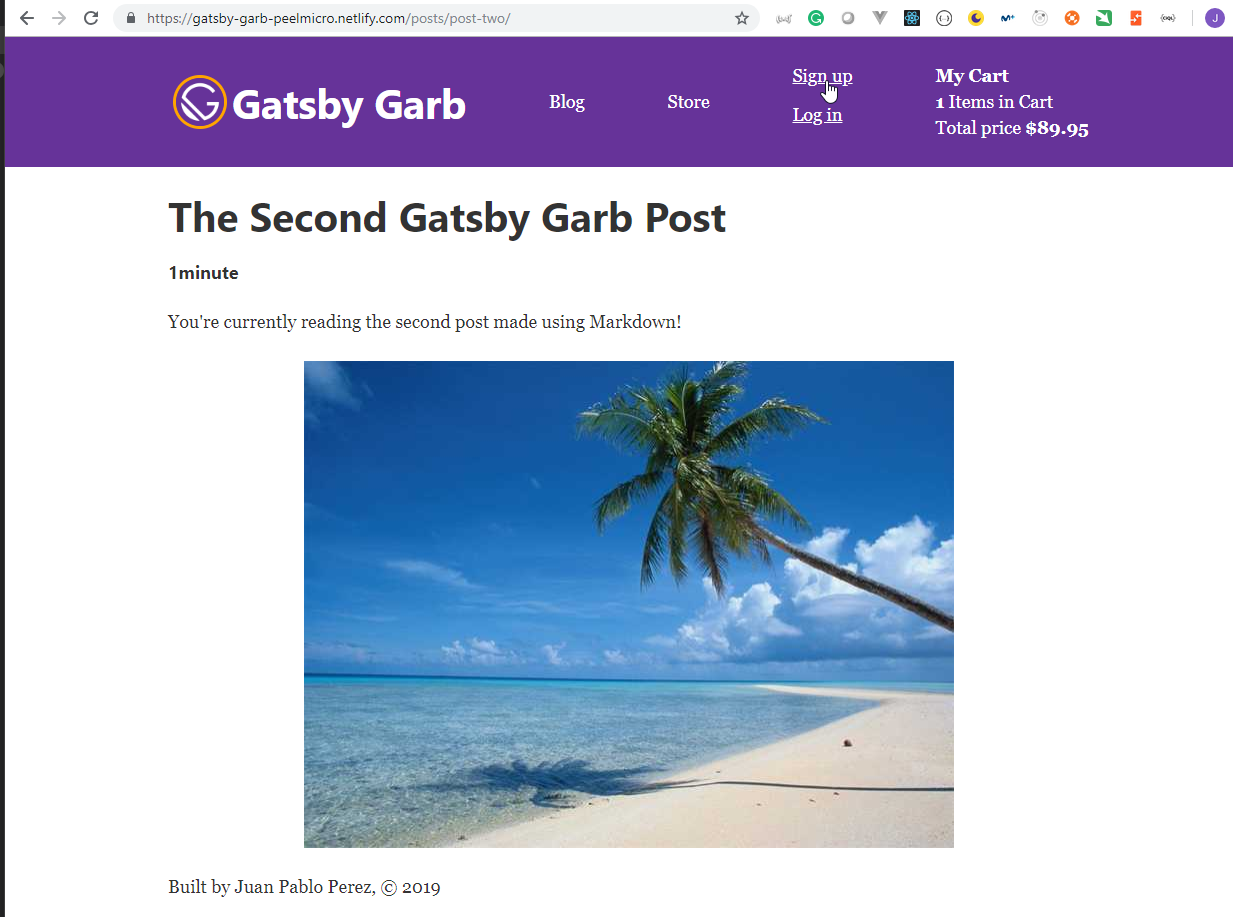

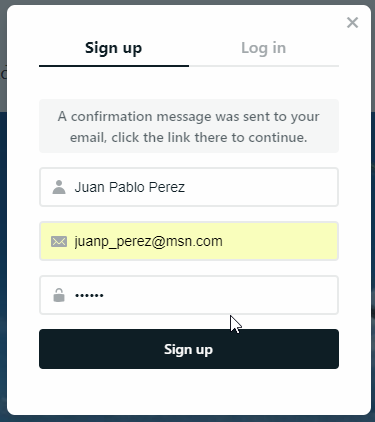
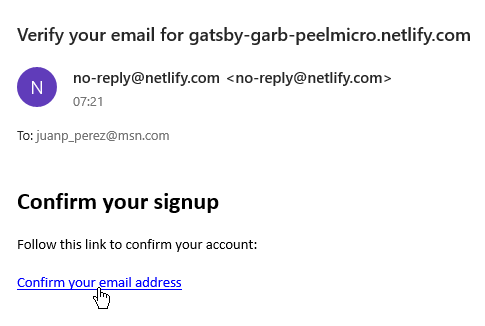
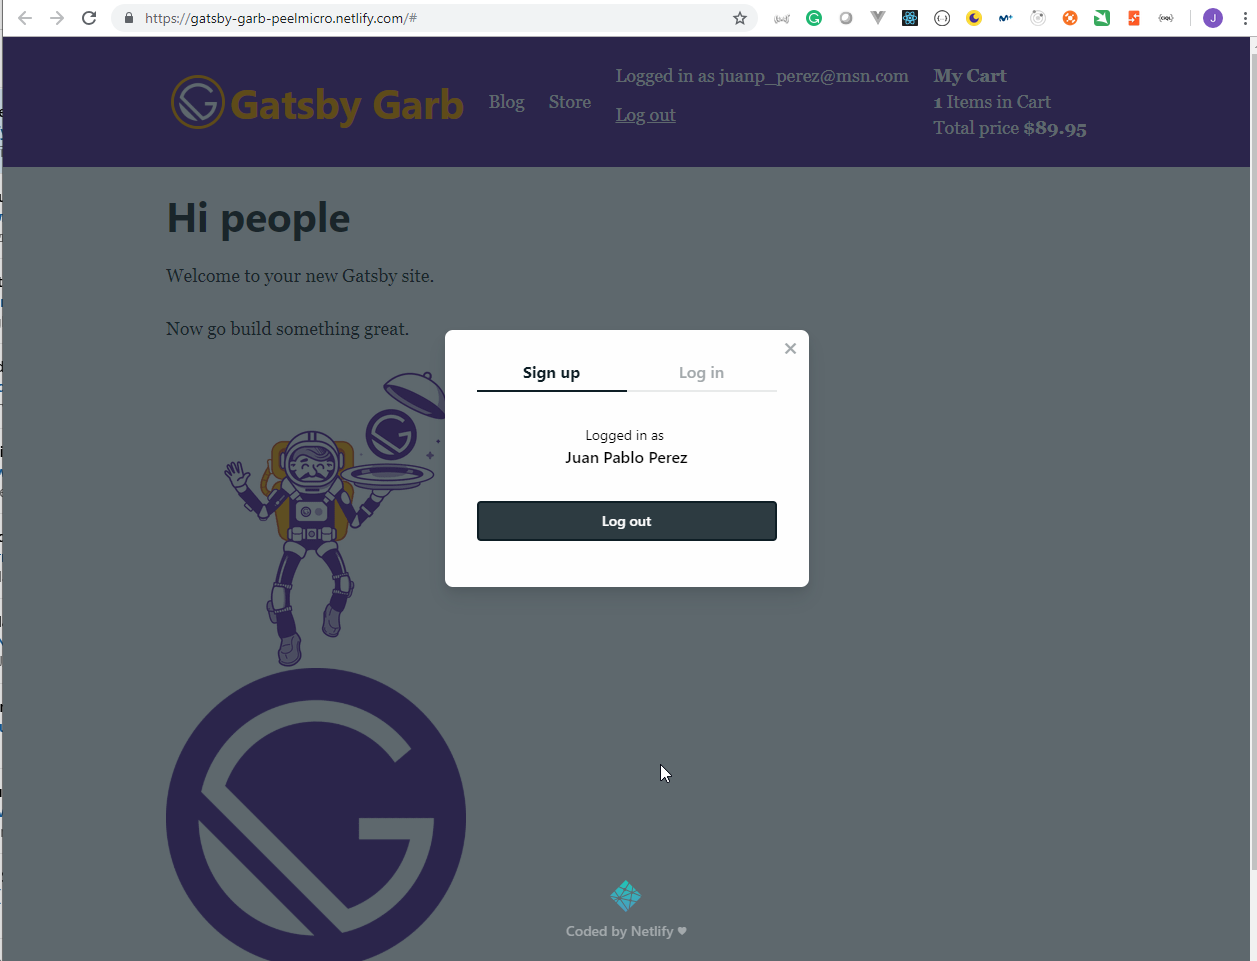
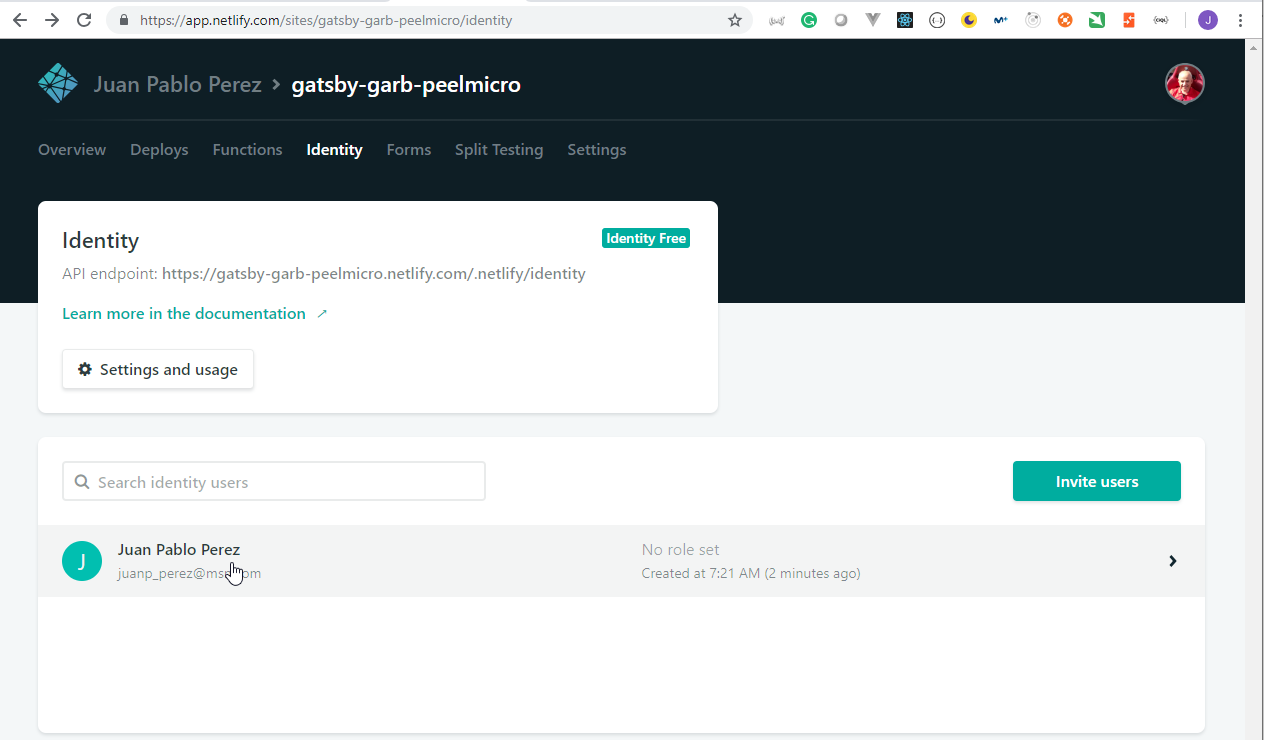
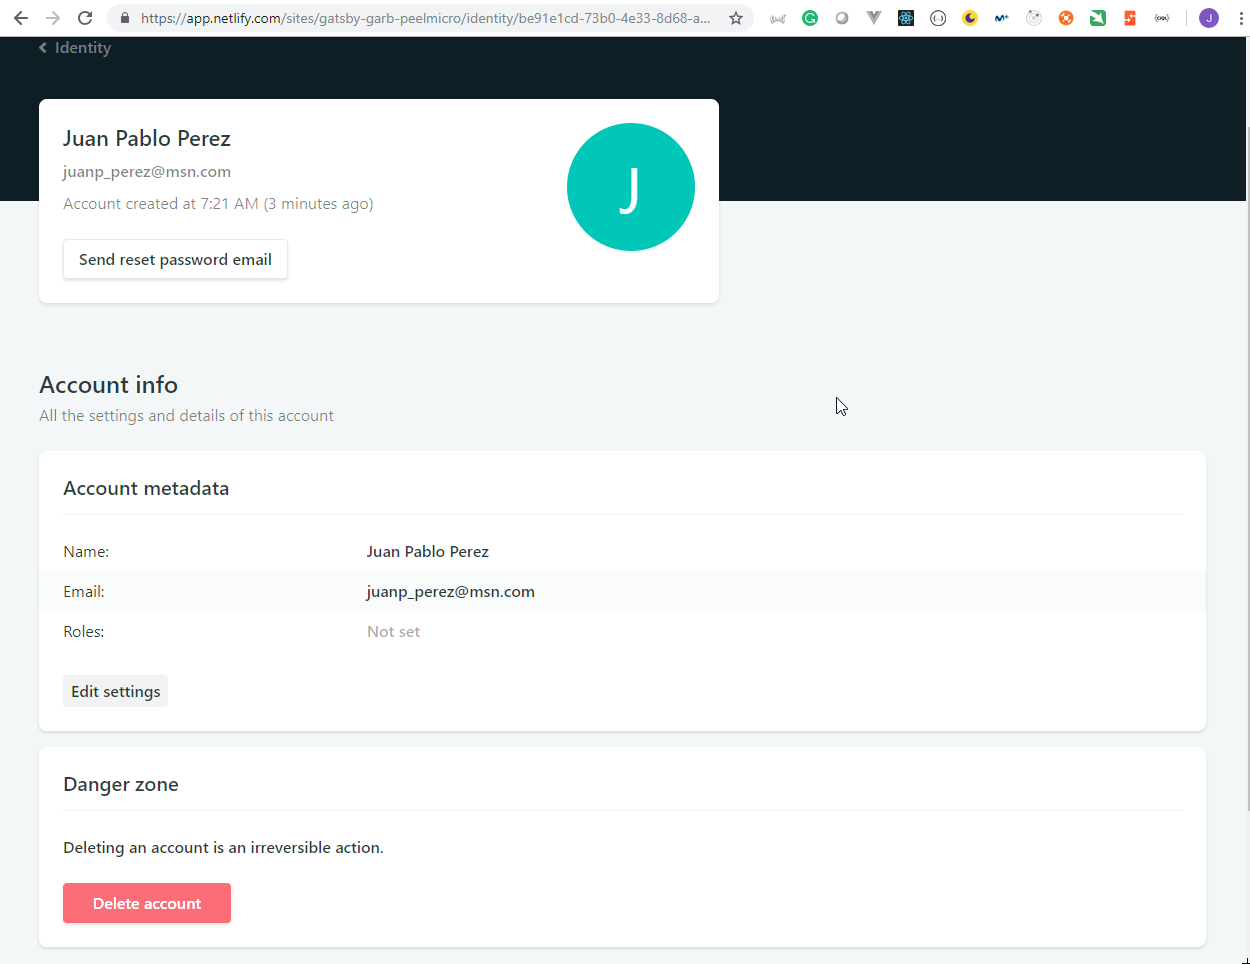
44. Displaying Private Products for Auth Users
- Add a new product on Contenful content and make it private.
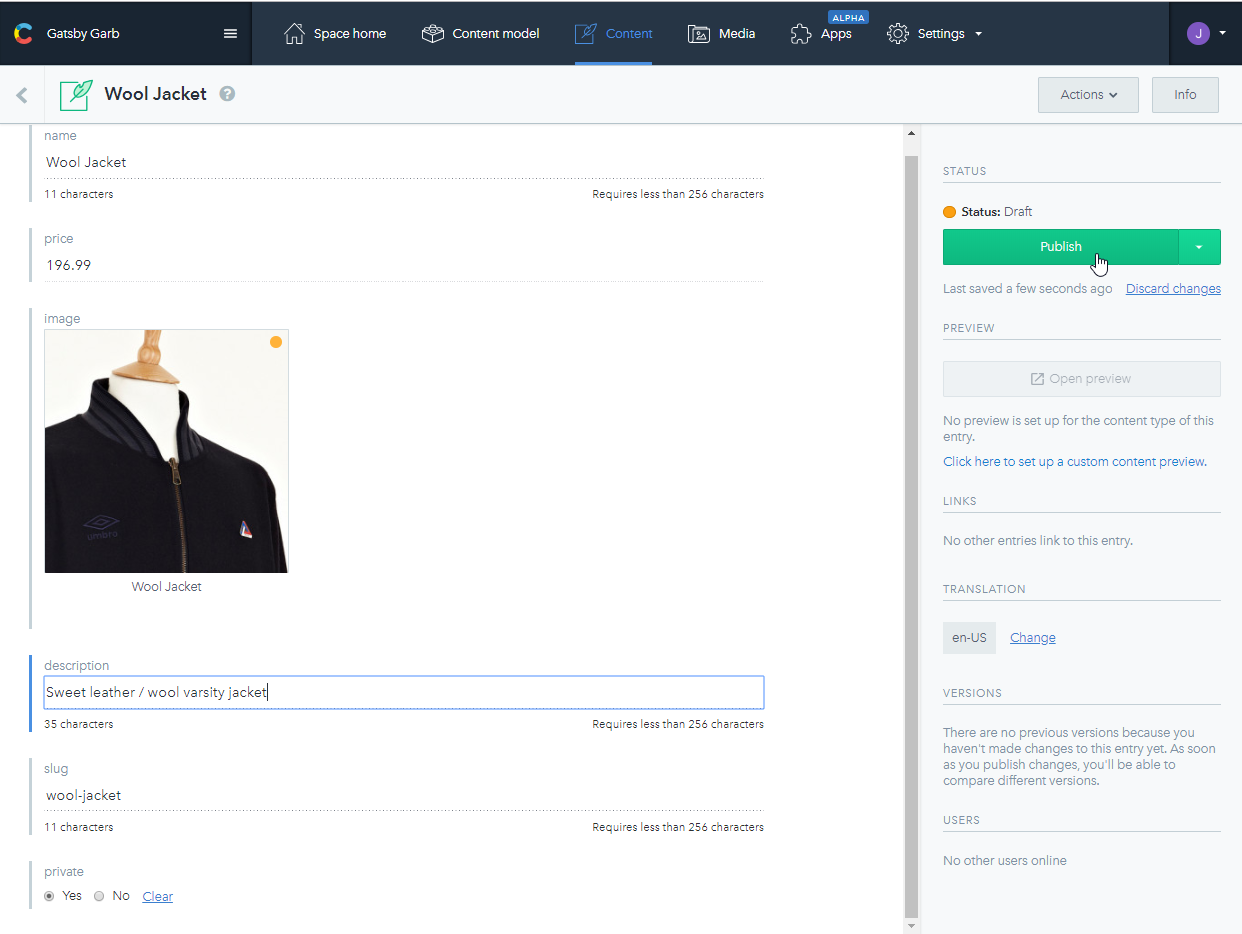
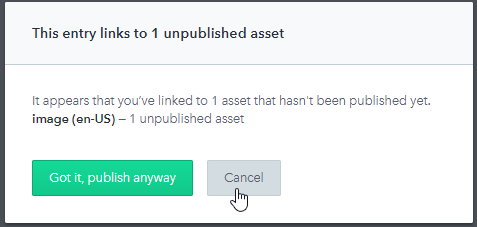

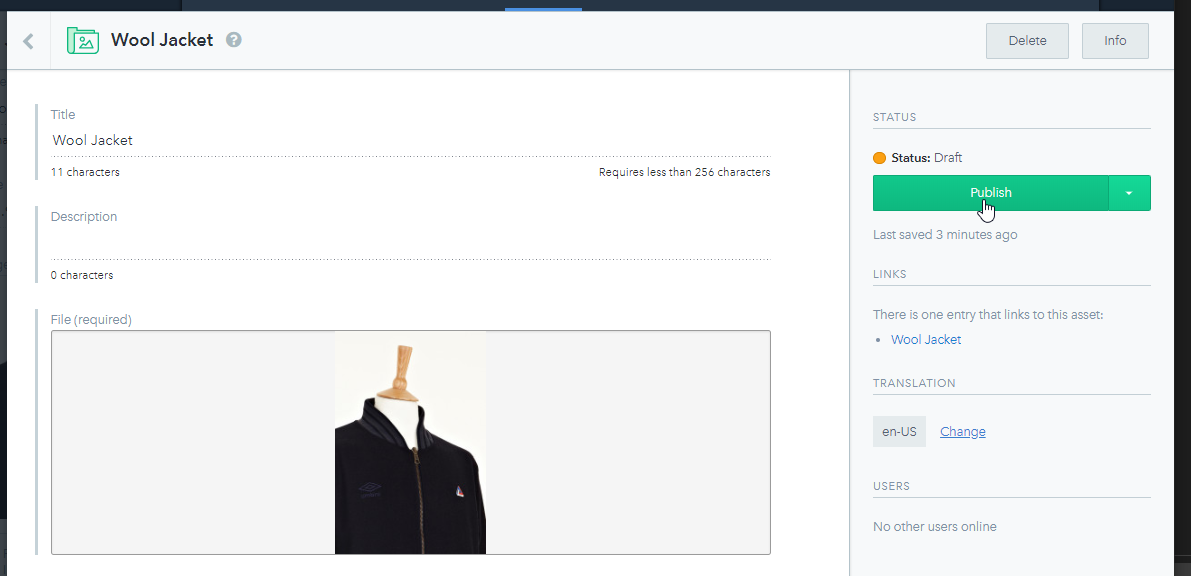

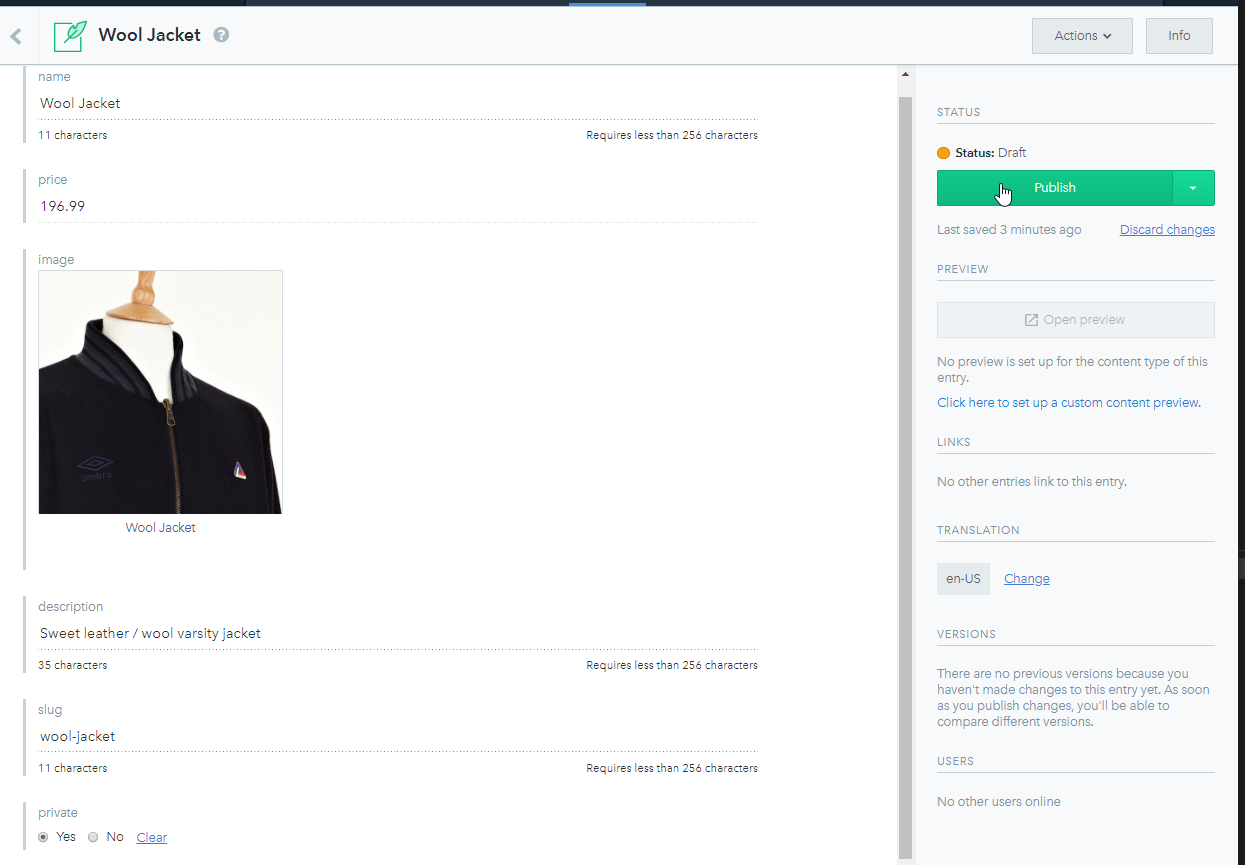

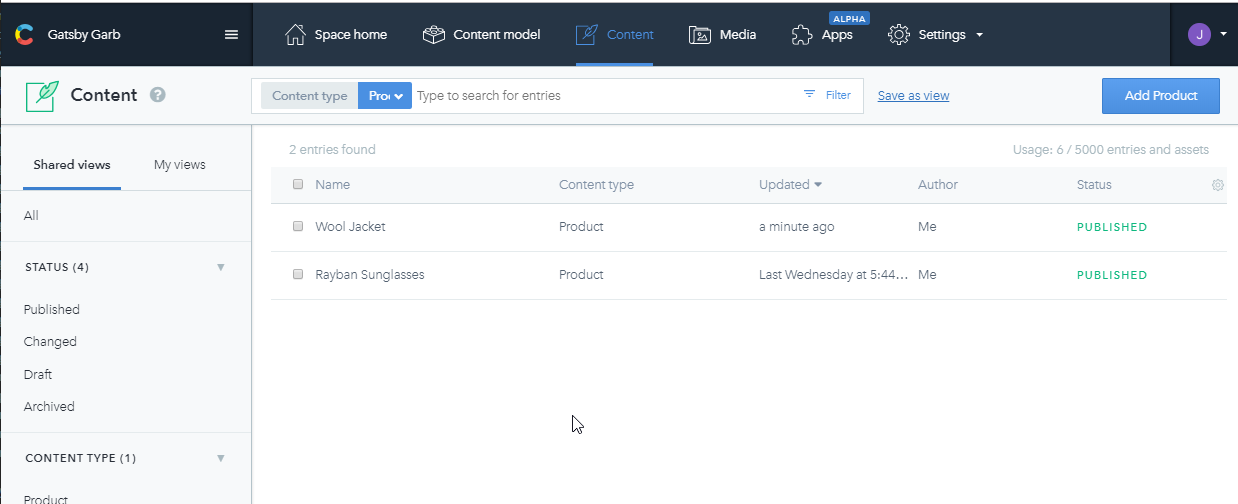

- Modify the
pages/product.jsdocument to show all the products only if the user is authenticated.
pages/product.js
import React from "react";
import { graphql, Link } from "gatsby";
import Img from "gatsby-image";
import netlifyIdentity from "netlify-identity-widget";

import Layout from "../components/layout";

class Products extends React.Component {
  state = {
    products: []
  };

  componentDidMount() {
    this.getProducts();
    netlifyIdentity.on("login", user => this.getProducts(user));
    netlifyIdentity.on("logout", () => this.getProducts());
  }

  getProducts = user => {
    console.log("Current User", user);
    const allProducts = this.props.data.allContentfulProduct.edges;
    const products =
      netlifyIdentity.currentUser() !== null
        ? allProducts
        : allProducts.filter(({ node: product }) => !product.private);
    this.setState({ products });
  };

  render() {
    const { products } = this.state;

    return (
      <Layout>
        <div>
          {/* Products List */}
          {products.map(({ node: product }) => (
            <div key={product.id}>
              <h2>Garb Products</h2>
              <Link
                to={`/products/${product.slug}`}
                style={{ textDecoration: "none", color: "#551a8b" }}
              >
                <h3>
                  {product.name} ·{" "}
                  <span
                    style={{
                      fontSize: "1.2rem",
                      fontWeight: 300,
                      color: "#f60"
                    }}
                  >
                    ${product.price}
                  </span>
                </h3>
              </Link>
              <Img style={{ maxWidth: 400 }} fluid={product.image.fluid} />
            </div>
          ))}
        </div>
      </Layout>
    );
  }
}

export const query = graphql`
  {
    allContentfulProduct {
      edges {
        node {
          id
          slug
          name
          price
          private
          image {
            fluid(maxWidth: 400) {
              ...GatsbyContentfulFluid
            }
          }
        }
      }
    }
  }
`;

export default Products;
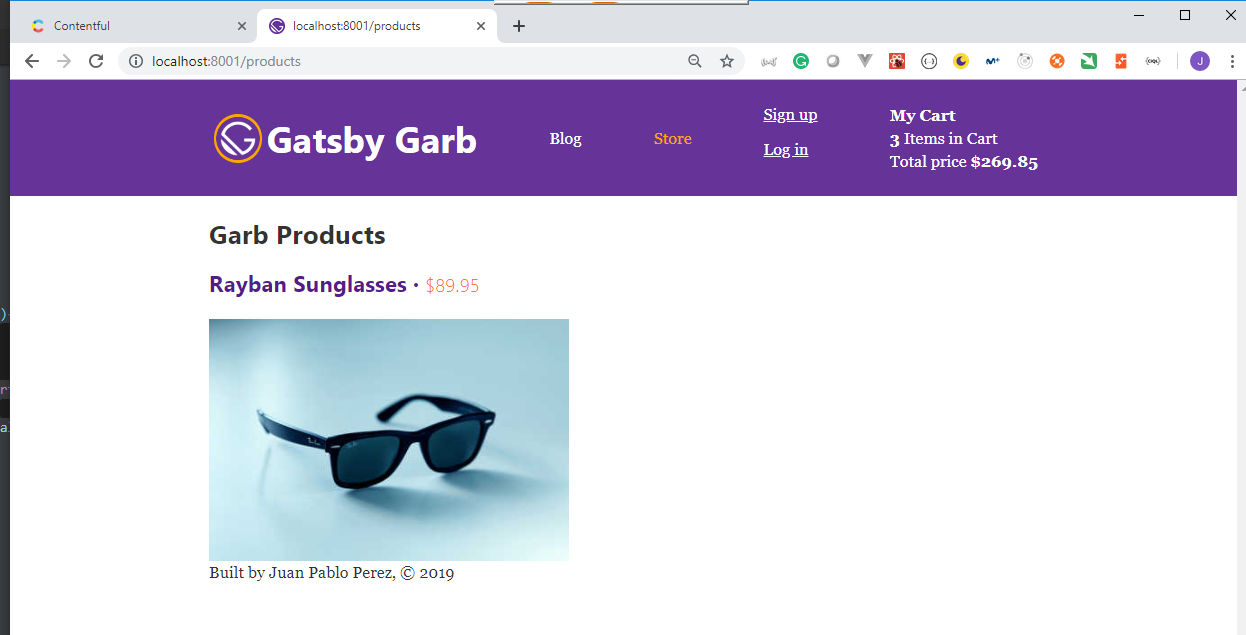

- Login doesn't work locally

- We need to commit the changes so that the web site is deployed by Netlify
Juan.Pablo.Perez@RIMDUB-0232 MINGW64 /c/Work/Training/Pre/Gatsby/gatsby-garb (master)
$ git add .
warning: LF will be replaced by CRLF in src/pages/products.js.
The file will have its original line endings in your working directory

Juan.Pablo.Perez@RIMDUB-0232 MINGW64 /c/Work/Training/Pre/Gatsby/gatsby-garb (master)
$ git commit -m "Added private product feature to auth users"
[master ed05371] Added private product feature to auth users
 2 files changed, 92 insertions(+), 64 deletions(-)
 rewrite src/pages/products.js (61%)

Juan.Pablo.Perez@RIMDUB-0232 MINGW64 /c/Work/Training/Pre/Gatsby/gatsby-garb (master)
$ git push origin HEAD
Enumerating objects: 13, done.
Counting objects: 100% (13/13), done.
Delta compression using up to 4 threads
Compressing objects: 100% (7/7), done.
Writing objects: 100% (7/7), 1.19 KiB | 203.00 KiB/s, done.
Total 7 (delta 5), reused 0 (delta 0)
remote: Resolving deltas: 100% (5/5), completed with 5 local objects.
To https://github.com/peelmicro/the-gatsby-masterclass.git
   3a1eefc..ed05371  HEAD -> master